The Ultimate Baked Garlic Bread Dip Recipe for Cozy Gatherings
Warm, crusty bread meets its perfect companion in this mouthwatering garlic bread dip that promises pure comfort.
Creamy cheese blends seamlessly with roasted garlic, creating an irresistible flavor explosion.
Weeknight dinners and game day spreads will never be the same with this simple yet addictive recipe.
Herbs and spices dance through each velvety bite, awakening taste buds with their robust charm.
This crowd-pleasing dip comes together in minutes, requiring just a handful of ingredients.
Serve it alongside toasted bread or crispy crackers for an instant crowd favorite that’ll have everyone asking for seconds.
Garlic Bread Dip: Why It’s So Good
Ingredients for Baked Garlic Bread Dip
Cheese Base:Creamy Binders:Flavor Enhancers:Garnish:Baked Garlic Bread Dip Preparation Steps
Step 1: Warm Up The Oven
Set your oven to 375°F to create the perfect toasty environment for your delicious dip.
Step 2: Create Creamy Cheese Blend
In a mixing bowl, combine your ingredients:Whisk everything together until the mixture becomes silky smooth and all ingredients are fully incorporated.
Step 3: Prepare Baking Dish
Transfer the creamy cheese mixture into a baking dish, using a spatula to spread it evenly across the surface.
Step 4: Bake To Perfection
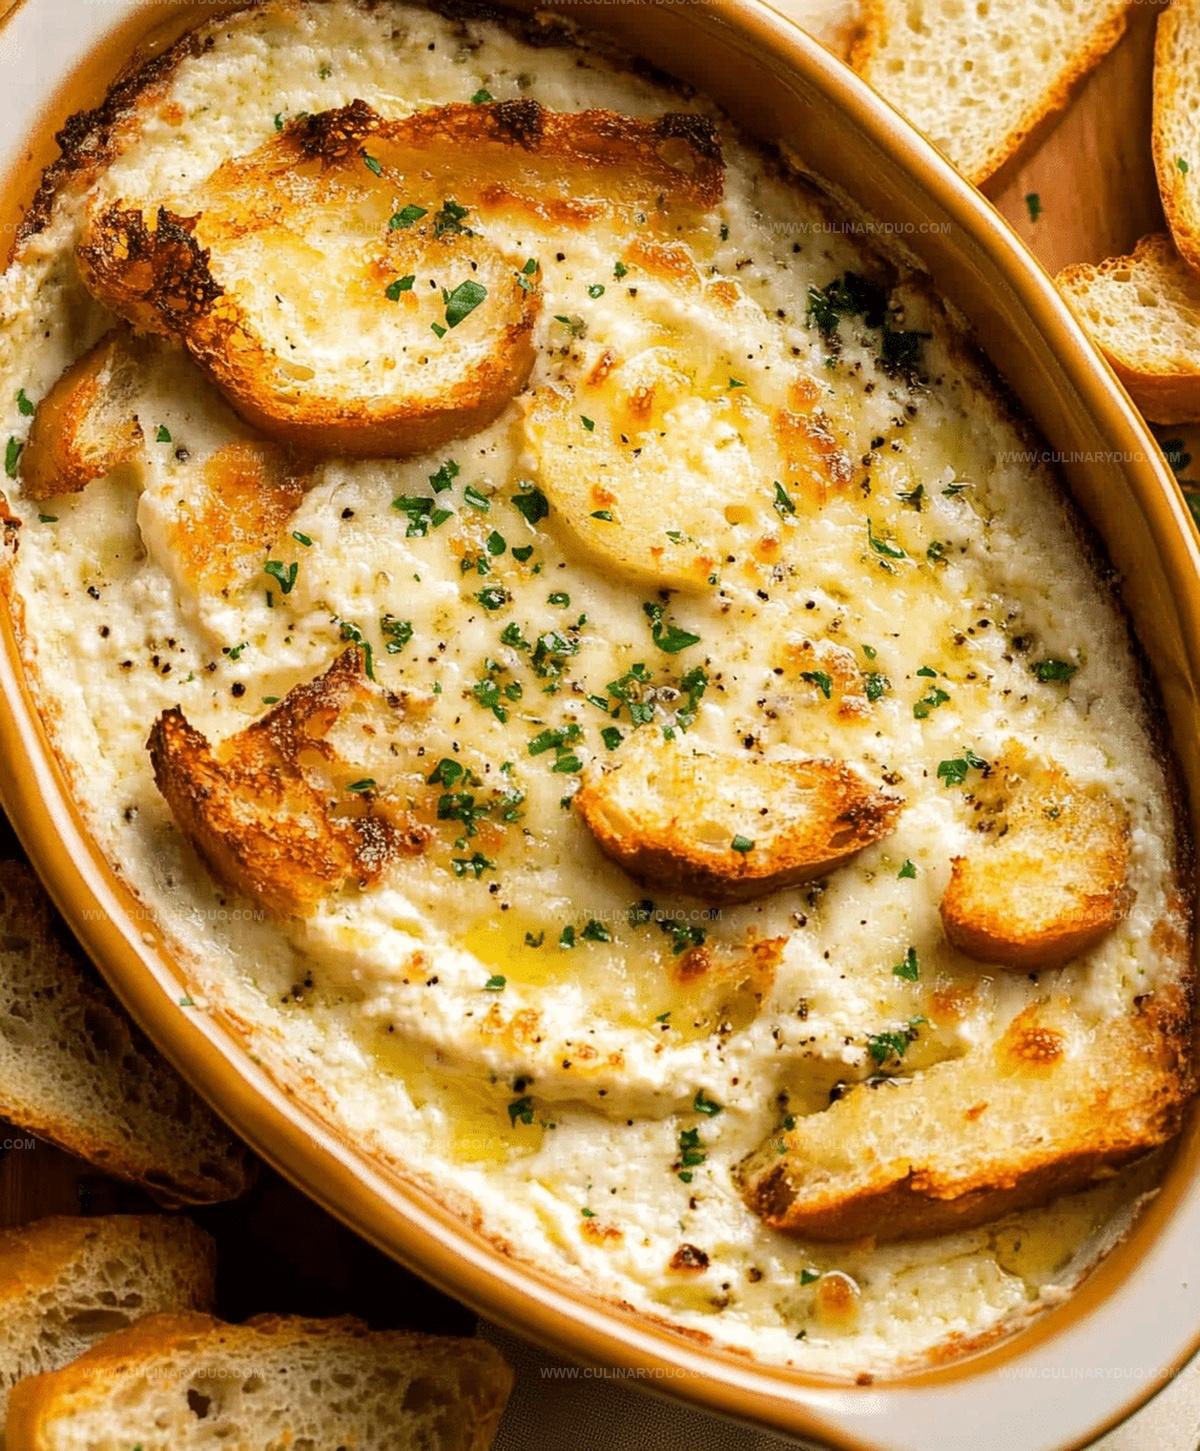
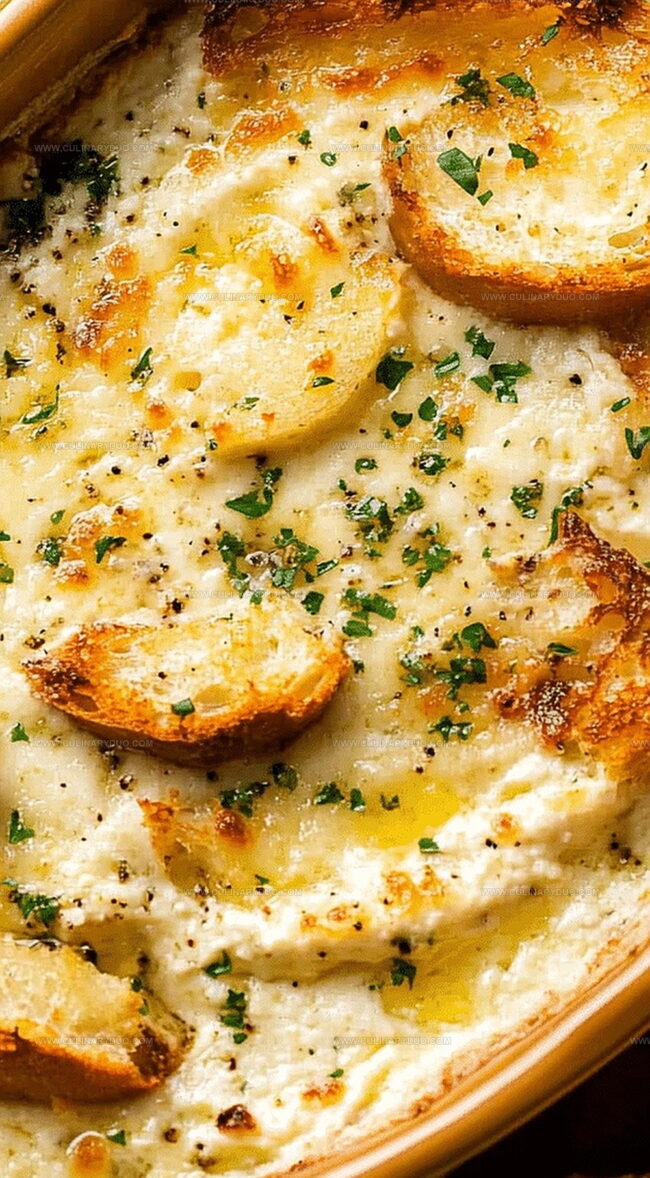
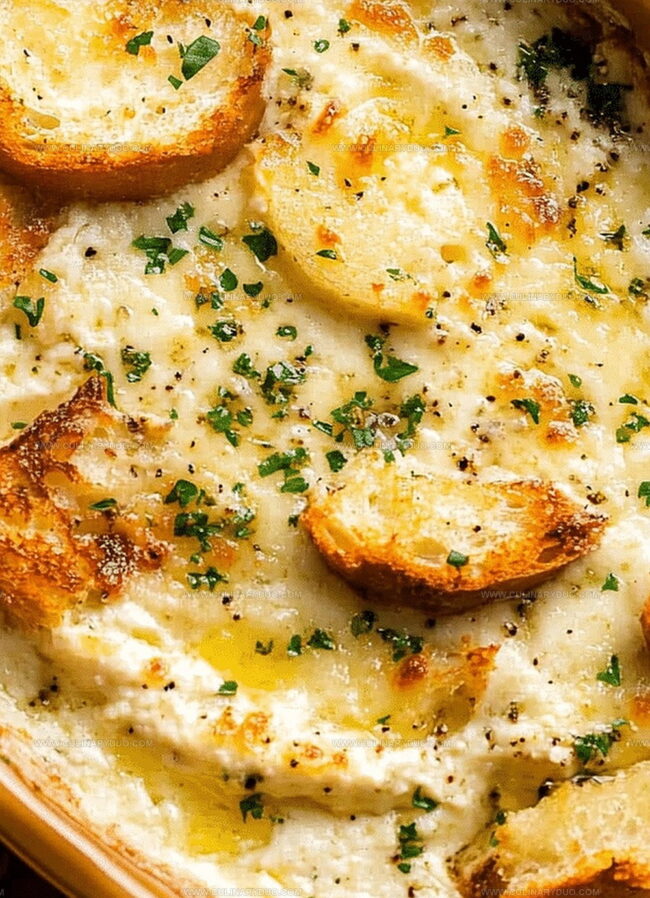
Slide the baking dish into the preheated oven and let it cook for 20-25 minutes.
Watch for the top to turn golden and the edges to become bubbly and irresistible.
Step 5: Finish And Serve
Carefully remove the hot dip from the oven.
Sprinkle freshly chopped parsley on top for a pop of color and fresh flavor.
Serve immediately with toasted bread slices or crispy crackers for dipping.
Garlic Bread Dip Tips to Try
Variations for Bread Dip Lovers
Serving Up Garlic Bread Dip
Keeping Garlic Bread Dip Fresh
FAQs
Yes, you can substitute regular cream cheese and sour cream with low-fat versions to make the dip lighter without significantly changing the overall flavor.
Absolutely! The recipe includes fresh garlic, which gives the dip an intense and rich garlic flavor that garlic enthusiasts will definitely enjoy.
Add red pepper flakes or a dash of hot sauce to the mixture before baking to give the dip a spicy kick. Start with a small amount and adjust according to your heat preference.
Print
Baked Garlic Bread Dip Recipe
- Total Time: 40 minutes
- Yield: 6 1x
Description
Warm, crusty garlic bread dip invites comfort right to your table, promising pure culinary bliss. Mediterranean flavors mingle with cheesy goodness, beckoning friends to gather and savor each creamy, herb-infused spoonful you’ll absolutely adore.
Ingredients
Main Cheese Ingredients:
- 8 ounces (226 grams) cream cheese, softened
- 1 cup (100 grams) mozzarella cheese, shredded
- 1/2 cup (50 grams) Parmesan cheese, grated
Flavor and Seasoning Ingredients:
- 3 cloves garlic, minced
- 1 teaspoon Italian seasoning
- 1/2 teaspoon salt
- 1/4 teaspoon black pepper
Additional Creamy Ingredients:
- 1/2 cup (120 milliliters) sour cream
- 1/4 cup (60 milliliters) mayonnaise
- 1 tablespoon fresh parsley, chopped (for garnish)
Serving Options:
- Bread
- Crackers
- Vegetables
Instructions
- Prepare the oven at 375°F for optimal baking temperature.
- Create a creamy base by thoroughly blending cream cheese, mozzarella, Parmesan, sour cream, and mayonnaise until achieving a smooth, uniform consistency.
- Incorporate minced garlic, Italian seasoning, salt, and pepper into the cheese mixture, ensuring even distribution of flavors.
- Carefully transfer the seasoned cheese blend into a suitable baking dish, spreading it uniformly to promote consistent heating.
- Place the dish in the preheated oven and bake for 20-25 minutes, watching for a golden-brown surface and bubbling edges that indicate perfect doneness.
- Once baked, immediately remove from the oven and enhance visual appeal by sprinkling fresh chopped parsley across the top.
- Serve the dip piping hot alongside crispy toasted bread slices or crunchy crackers for an irresistible appetizer experience.
Notes
- Ensure cream cheese is at room temperature for smooth, lump-free mixing and easy blending with other ingredients.
- Customize the dip’s heat level by adding red pepper flakes or diced jalapeños for spice lovers who want an extra kick.
- For a lighter version, substitute low-fat cream cheese and Greek yogurt instead of sour cream and mayonnaise, maintaining creamy texture while reducing calories.
- Try additional herbs like fresh basil or chives to enhance the flavor profile and create a unique, personalized dip that stands out from traditional recipes.
- Prep Time: 15 minutes
- Cook Time: 25 minutes
- Category: Appetizer, Snacks
- Method: Baking
- Cuisine: American
Nutrition
- Serving Size: 6
- Calories: 211 kcal
- Sugar: 1 g
- Sodium: 290 mg
- Fat: 19 g
- Saturated Fat: 9 g
- Unsaturated Fat: 8 g
- Trans Fat: 0.2 g
- Carbohydrates: 3 g
- Fiber: 0.2 g
- Protein: 7 g
- Cholesterol: 50 mg
Natalie Brooks
Co-Founder & Content Strategist
Expertise
Education
eCornell
Natalie brings the vibrant, plant-powered side to Culinary Duo. After earning her Plant-Based Nutrition Certificate from eCornell, she combined her love for fresh ingredients with a passion for storytelling, aiming to make healthy cooking simple and satisfying.
Her kitchen motto: good food doesn’t need a fancy label, it just needs fresh ideas and a little creativity. Outside of writing and recipe testing, Natalie’s happiest in her garden, exploring farmers’ markets, or mixing global flavors into new kitchen experiments.