
Dreamy Cannoli Ice Cream Recipe: A Sweet Italian Summer Treat
Crafting a delectable cannoli ice cream brings pure dessert magic right to your kitchen.
Sweet ricotta cheese transforms this classic treat into a frozen delight.
Sicilian traditions inspire this creamy adventure that dances between classic pastry and cool summer refreshment.
Rich mascarpone and chocolate chips create unexpected layers of flavor.
Crisp cannoli shells provide delightful crunch against smooth, velvety ice cream base.
Each spoonful promises a delicious journey through italian culinary creativity.
Whip up this incredible dessert and watch everyone’s eyes light with pure excitement.
Creamy Cannoli Ice Cream Treat
Ingredients For Creamy Cannoli Ice Cream
Dairy Base:Sweeteners:Flavor Enhancers:Mix-Ins:Step-By-Step Creamy Cannoli Ice Cream
Step 1: Whip Up the Creamy Base
Grab your blender and toss in heavy cream, milk, sugar, and corn syrup.
Blend everything on low speed until the sugar completely dissolves, which takes about a minute.
This creates the smooth foundation for your dreamy dessert.
Step 2: Blend Ricotta and Flavor Enhancers
Add ricotta cheese, cream cheese, and vanilla bean seeds to the mixture.
Blend until everything is perfectly pureed and silky smooth.
Pour the mixture into an airtight container and pop it in the freezer for an hour, giving it a quick stir halfway through.
Step 3: Churn in the Ice Cream Maker
Transfer the chilled mixture to your ice cream maker and process according to the manufacturer’s instructions.
This is where the magic happens and your mixture transforms into creamy goodness.
Step 4: Sprinkle in Crunchy Delights
During the last few minutes of churning, toss in:Let these mix throughout the ice cream for a delightful texture explosion.
Step 5: Freeze and Serve
Move the freshly churned ice cream to an airtight container and freeze until it reaches a semi-firm consistency.
For the best experience, serve when it’s slightly soft.
If you freeze it completely solid, let it sit at room temperature for a few minutes before scooping.
Pro Tip: Feel free to adjust the amount of mix-ins to suit your personal taste preferences.
Tips For Creamy Cannoli Ice Cream
Flavor Variations For Cannoli Ice Cream
Serving Suggestions For Cannoli Ice Cream
Storage Instructions For Cannoli Ice Cream
FAQs
You can use the no-churn method by whipping heavy cream until stiff peaks form, then folding in the remaining ingredients and freezing, stirring every hour to break up ice crystals.
Fresh ricotta should have a smooth, creamy texture and mild, slightly sweet taste. Check for a clean, milky smell and avoid any sour or off odors.
Unsalted, raw pistachios are ideal. They provide a nice crunch and nutty flavor without adding extra salt. Roasted pistachios can also work if you prefer a more intense nut taste.
Print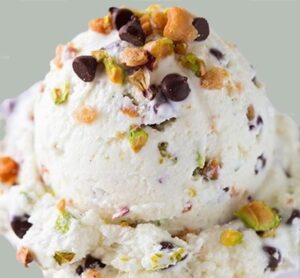
Cannoli Ice Cream Recipe
- Total Time: 3 hours 10 minutes
- Yield: 6 1x
Description
Indulgent cannoli ice cream brings Sicilian dessert magic to your frozen treat experience. Creamy ricotta, chocolate chips, and crisp pastry fragments create a delightful dessert you’ll savor with pure culinary joy.
Ingredients
Dairy and Cream:
- 1 cup heavy cream
- 3/4 cup whole milk
- 1 15 ounces (425 grams) whole milk ricotta
- 4 ounces (113 grams) cream cheese (diced into small cubes)
Sweeteners and Flavoring:
- 3/4 cup + 2 tablespoons granulated sugar
- 2 tablespoons light corn syrup
- Seeds of 1 small vanilla bean
Mix-ins and Garnishes:
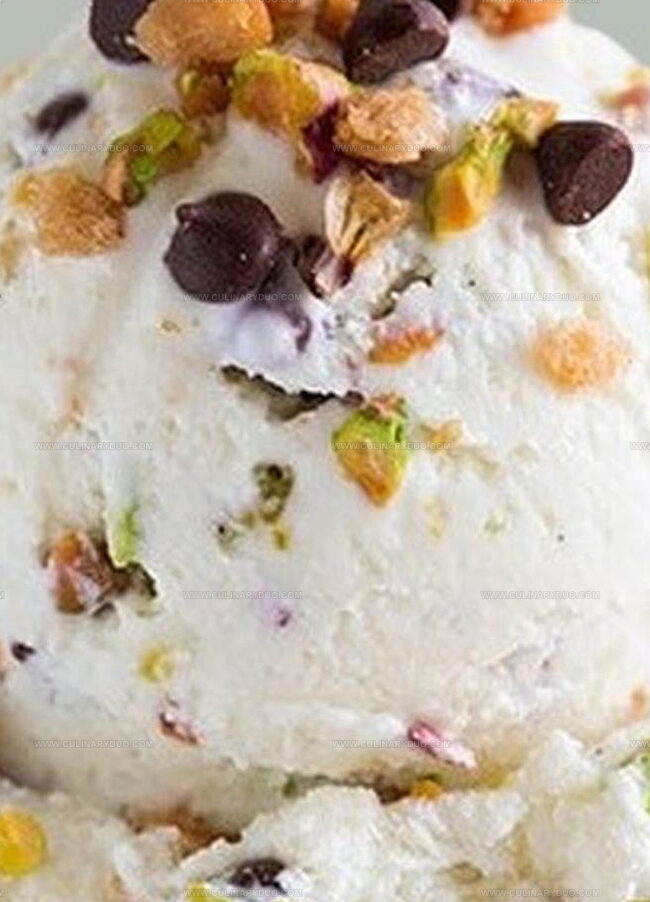
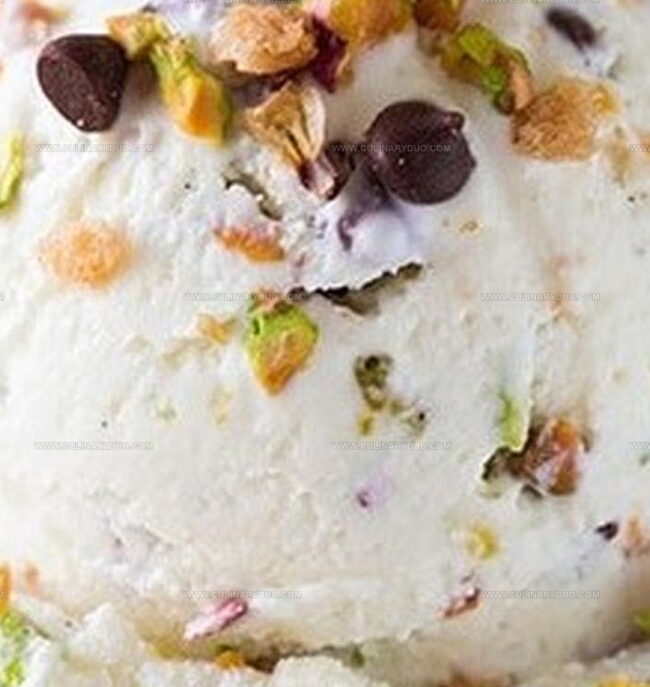
- 1/2 cup cannoli shell pieces
- 1/2 cup mini semi-sweet chocolate chips
- 1/2 cup unsalted roasted pistachios, chopped
Instructions
- Whisk heavy cream, milk, sugar, and corn syrup in a blender until sugar completely dissolves, approximately 60 seconds.
- Incorporate ricotta, cream cheese, and vanilla bean seeds, blending until smooth and homogeneous.
- Pour mixture into an airtight container and refrigerate for 1 hour, pausing midway to stir thoroughly.
- Transfer chilled mixture to an ice cream machine and churn according to manufacturer’s specifications.
- During the final moments of churning, gradually fold in crushed cannoli shell fragments, miniature chocolate chips, and finely chopped unsalted pistachios.
- Carefully transfer the freshly churned ice cream into a sealed container, ensuring even distribution of added ingredients.
- Freeze for 2-3 hours until reaching a semi-soft consistency, allowing slight melting for optimal texture before serving.
- For a less intense version, reduce the quantity of chocolate chips and pistachios during the final churning stage.
Notes
- Swap dairy for lactose-free alternatives like almond milk and dairy-free ricotta for a sensitive stomach friendly version.
- Reduce sugar content by using monk fruit sweetener or stevia for a lower-calorie dessert option.
- Crush cannoli shells finely to distribute flavor evenly throughout the ice cream and prevent large hard pieces.
- Toast pistachios beforehand to enhance their nutty flavor and add a deeper, more complex taste profile to the ice cream.
- Prep Time: 10 minutes
- Cook Time: 3 hours
- Category: Desserts
- Method: Blending
- Cuisine: Italian
Nutrition
- Serving Size: 6
- Calories: 368 kcal
- Sugar: 27 g
- Sodium: 106 mg
- Fat: 26 g
- Saturated Fat: 14 g
- Unsaturated Fat: 10 g
- Trans Fat: 0.5 g
- Carbohydrates: 29 g
- Fiber: 2 g
- Protein: 7 g
- Cholesterol: 86 mg
Natalie Brooks
Co-Founder & Content Strategist
Expertise
Education
eCornell
Natalie brings the vibrant, plant-powered side to Culinary Duo. After earning her Plant-Based Nutrition Certificate from eCornell, she combined her love for fresh ingredients with a passion for storytelling, aiming to make healthy cooking simple and satisfying.
Her kitchen motto: good food doesn’t need a fancy label, it just needs fresh ideas and a little creativity. Outside of writing and recipe testing, Natalie’s happiest in her garden, exploring farmers’ markets, or mixing global flavors into new kitchen experiments.