Savor the Sweet: Classic Cherry Delight Recipe for Dessert Lovers
Sweet summer memories often bloom around a classic cherry delight that combines nostalgic flavors with simple kitchen magic.
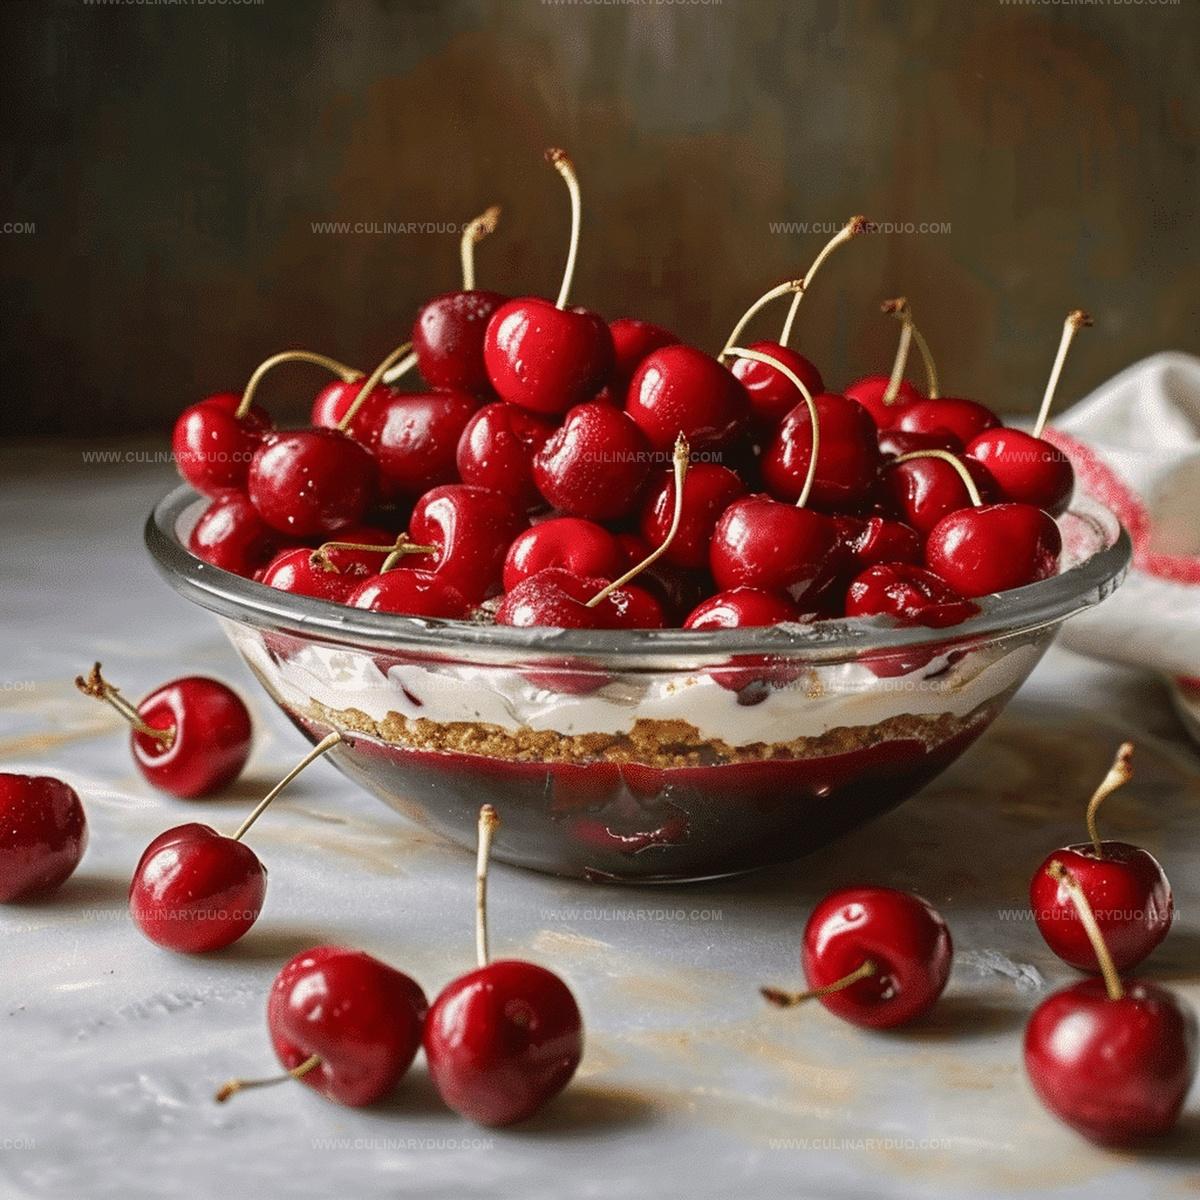
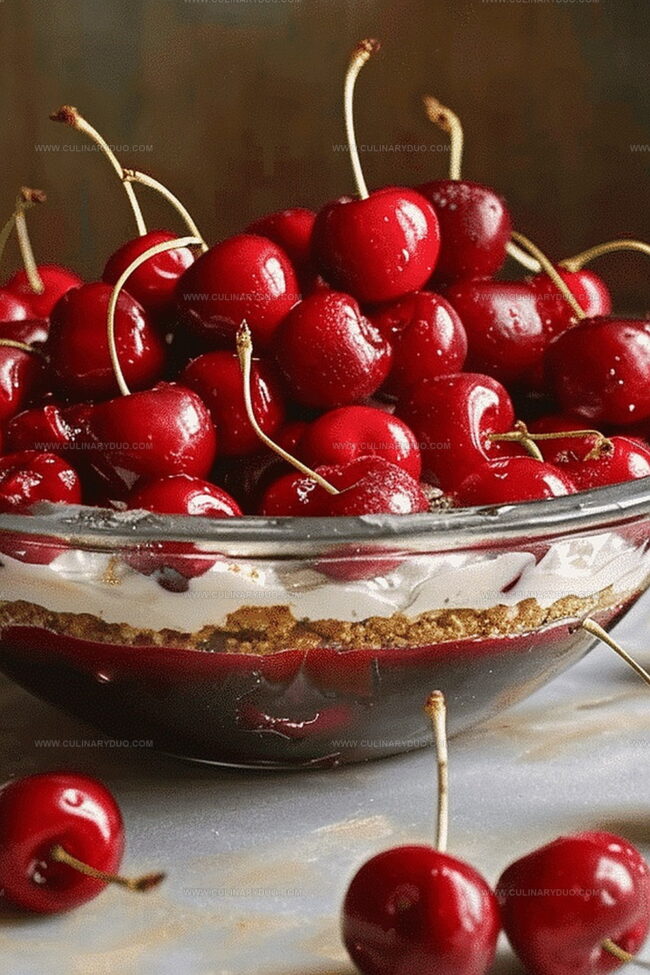
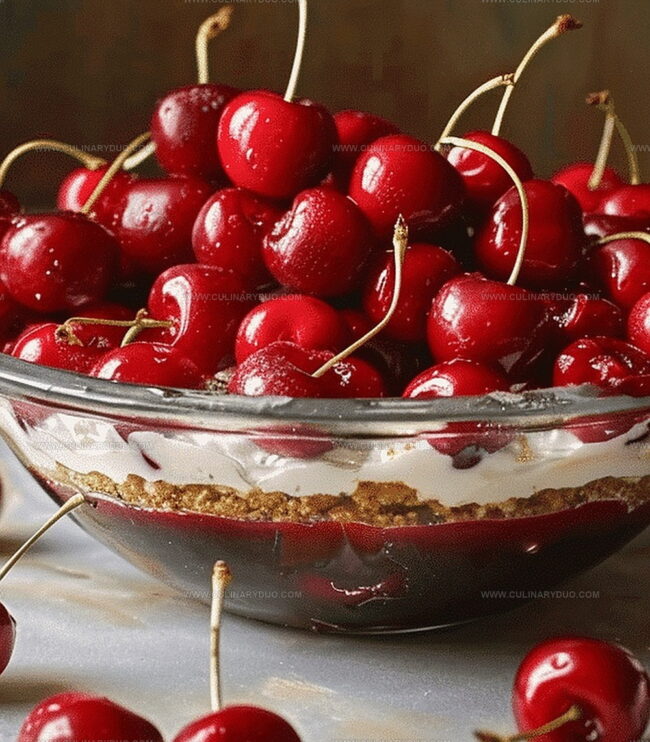
Cherries burst with vibrant crimson color, promising a dessert that captures pure comfort.
Grandmothers across America have perfected this delightful treat through generations of careful baking.
Creamy textures mingle with tart fruit, creating a harmonious balance that surprises your palate.
Delicate layers of smooth filling and fresh cherries promise an experience beyond ordinary desserts.
Your taste buds will dance with excitement when you discover this timeless sweet sensation.
What Makes Classic Cherry Delight Recipe Special
Ingredients Checklist For Cherry Delight Recipe Magic
Crust Base:Cream Cheese Filling:Topping:Steps To Create Classic Cherry Delight At Home
Step 1: Crafting the Buttery Graham Base
Melt the butter and mix it with graham cracker crumbs and sugar.
Press this delectable mixture firmly into the bottom of a 9×13 inch pan, creating a smooth, even foundation for your dessert.
Step 2: Whipping Up the Creamy Filling
Beat the cream cheese until it becomes wonderfully smooth.
Gradually blend in powdered sugar and vanilla extract, mixing until the combination is perfectly creamy.
Gently fold in the cool whip, ensuring a light and fluffy texture that will make taste buds dance.
Step 3: Layering the Creamy Goodness
Spread the cream cheese mixture evenly over the graham cracker crust, creating a luscious blanket of flavor that promises pure delight.
Step 4: Crowning with Cherry Brilliance
Top the creamy layer with a vibrant spread of cherry pie filling, creating a stunning red contrast that’s as beautiful as it is delicious.
Step 5: Chilling to Perfection
Tuck your creation into the refrigerator and let it chill for at least 2 hours.
This waiting period allows the flavors to meld and the dessert to set into a heavenly treat that will have everyone asking for seconds.
Helpful Tips For Classic Cherry Delight Success
Cherry Delight Variations Worth Trying This Week
Creative Ways To Serve Cherry Delight Dessert
Storing Classic Cherry Delight Recipe For Later
FAQs
Yes, you can substitute cool whip with homemade whipped cream. Just ensure it’s stabilized to maintain the dessert’s structure.
You can make it gluten-free by using gluten-free graham crackers for the crust. Always check ingredient labels carefully.
You can make this cherry delight up to 2 days ahead of time. Keep it refrigerated and covered until ready to serve.
Absolutely! You can replace cherry pie filling with other fruit toppings like blueberry, strawberry, or raspberry for variety.
Print
Classic Cherry Delight Recipe
- Total Time: 2 hours 20 minutes
- Yield: 8 1x
Description
Sweet summer memories bloom in this classic cherry delight recipe, blending nostalgic comfort with simple elegance. Rich cherry filling nestled in a buttery crust promises delightful moments you’ll savor with each delectable bite.
Ingredients
Main Ingredients:
- 1 21-ounce (595 grams) can cherry pie filling
- 1 8-ounce (226 grams) container cool whip
- 8 ounces (226 grams) cream cheese, softened
Crust Ingredients:
- 1 1/2 cups (180 grams) graham cracker crumbs
- 7 tablespoons (100 grams) unsalted butter
- 3 tablespoons (38 grams) granulated sugar
Additional Ingredients:
- 1 cup (120 grams) powdered sugar
- 1 teaspoon (5 milliliters) pure vanilla extract
Instructions
- Create a delectable base by blending melted butter with graham cracker crumbs and sugar until thoroughly combined.
- Firmly press the crumbly mixture into the bottom of a 9×13 inch pan, ensuring an even, compact layer that will serve as the foundation for the dessert.
- Using an electric mixer, whip the cream cheese until silky smooth and free of lumps.
- Gradually incorporate powdered sugar and vanilla extract, mixing until the texture becomes light and uniform.
- Gently fold in cool whip, creating a fluffy and creamy mixture that blends seamlessly.
- Carefully spread the cream cheese mixture across the graham cracker crust, maintaining an even thickness throughout.
- Delicately pour the cherry pie filling over the cream cheese layer, covering the surface with a vibrant ruby-red topping.
- Place the dessert in the refrigerator and chill for a minimum of 2 hours, allowing the layers to set and flavors to meld together.
- Before serving, remove from the refrigerator and slice into squares, revealing the beautiful layers of this classic dessert.
Notes
- Use room temperature cream cheese to ensure a smooth, lump-free filling that blends perfectly with other ingredients.
- Crush graham crackers finely for a more compact and sturdy crust that holds together well when slicing.
- Opt for low-fat cream cheese and cool whip to create a lighter version of this dessert without compromising taste.
- Swap cherry pie filling with fresh fruit like blueberries or strawberries for a seasonal twist and added nutritional value.
- Prep Time: 20 minutes
- Cook Time: 2 hours
- Category: Desserts
- Method: Chilling
- Cuisine: American
Nutrition
- Serving Size: 8
- Calories: 345 kcal
- Sugar: 36 g
- Sodium: 115 mg
- Fat: 20 g
- Saturated Fat: 12 g
- Unsaturated Fat: 7 g
- Trans Fat: 0.5 g
- Carbohydrates: 38 g
- Fiber: 1 g
- Protein: 4 g
- Cholesterol: 45 mg
Natalie Brooks
Co-Founder & Content Strategist
Expertise
Education
eCornell
Natalie brings the vibrant, plant-powered side to Culinary Duo. After earning her Plant-Based Nutrition Certificate from eCornell, she combined her love for fresh ingredients with a passion for storytelling, aiming to make healthy cooking simple and satisfying.
Her kitchen motto: good food doesn’t need a fancy label, it just needs fresh ideas and a little creativity. Outside of writing and recipe testing, Natalie’s happiest in her garden, exploring farmers’ markets, or mixing global flavors into new kitchen experiments.