Dreamy Cookie Dough Snickers & Reese’s Ice Cream Recipe
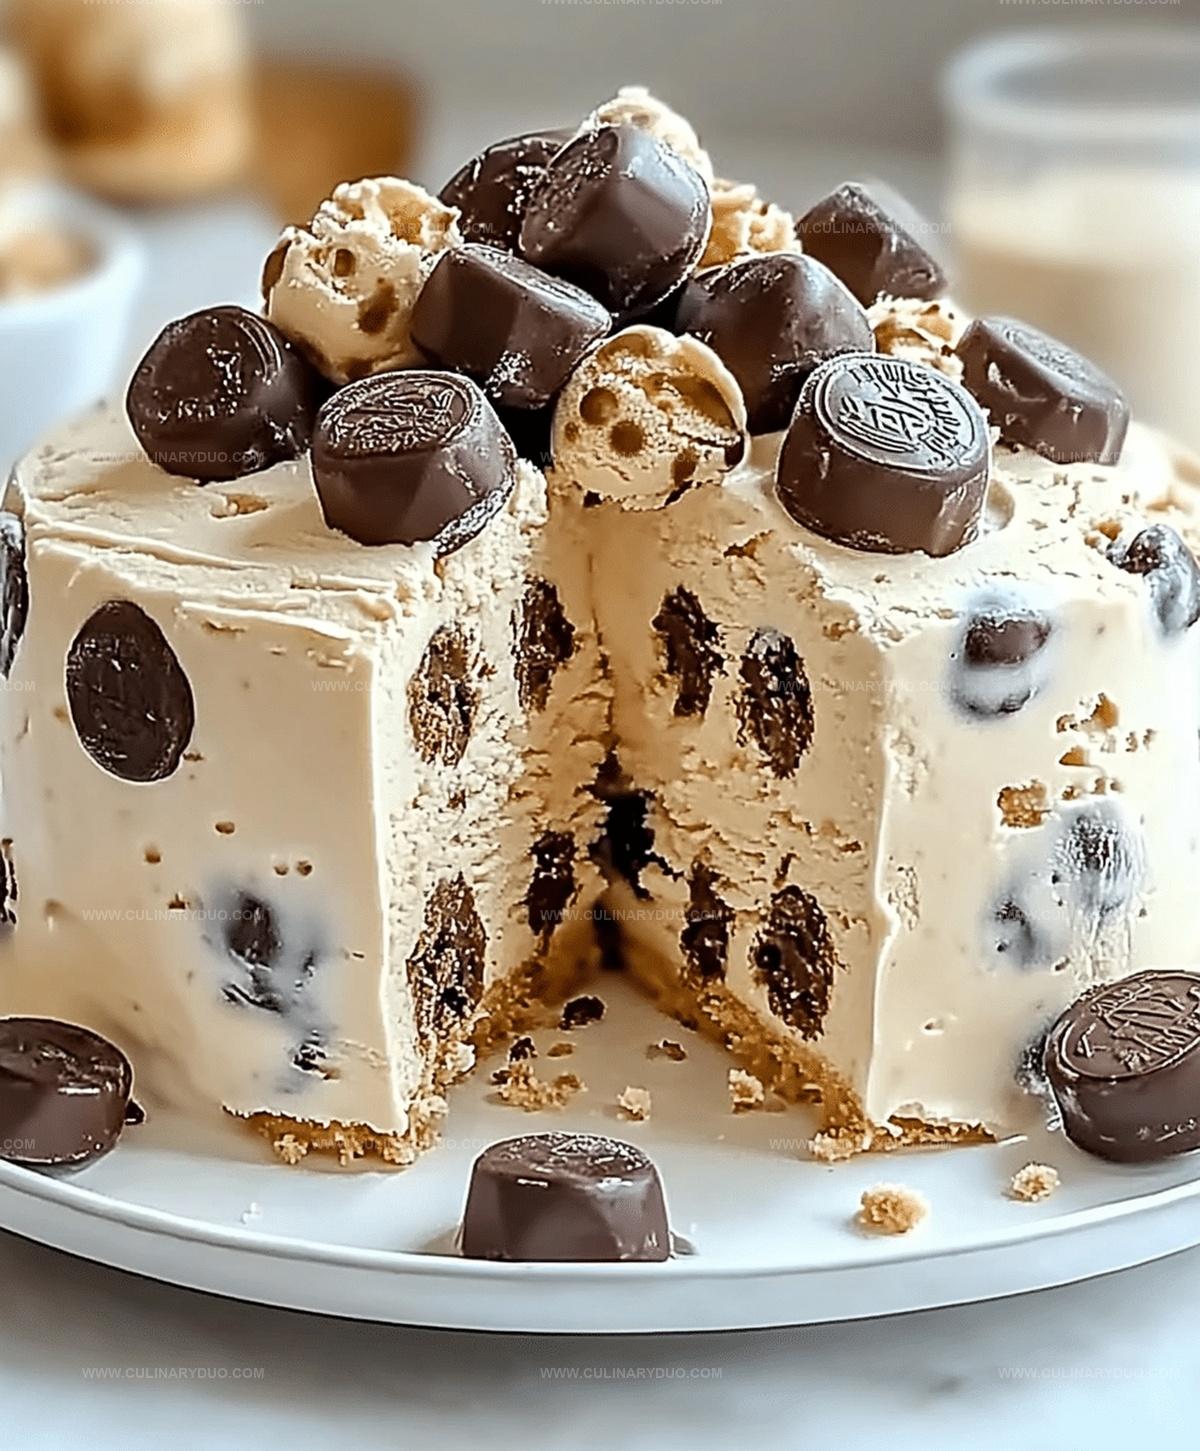
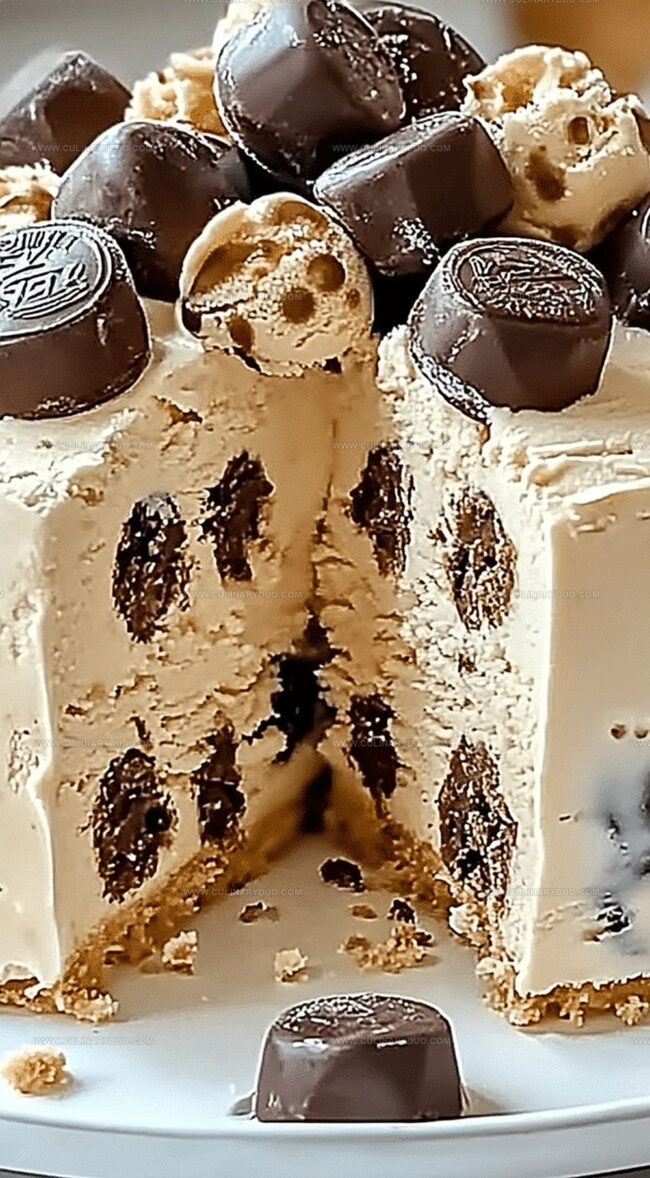
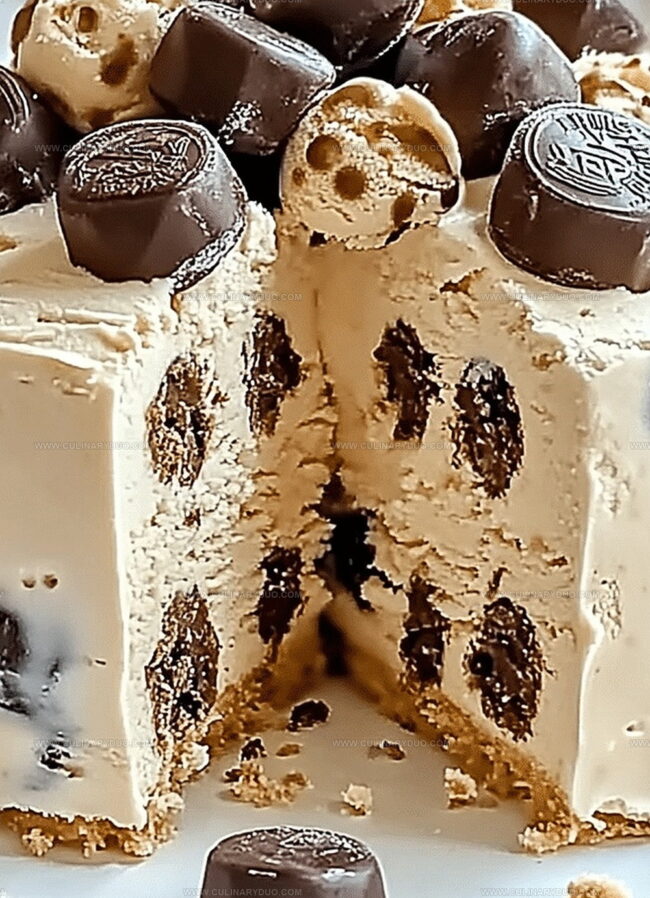
Chocolate lovers rejoice with this decadent cookie dough snikers & reese’s ice cream that blends nostalgic candy bar flavors into a creamy frozen delight.
Sweet tooths will melt over this indulgent dessert packed with chunks of classic candy bars.
Rich swirls of peanut butter and chocolate dance through smooth, velvety ice cream base.
Each spoonful promises a burst of intense flavor and delightful texture.
Homemade treats like these transform ordinary moments into extraordinary experiences.
Comfort and excitement merge in this simple yet spectacular frozen dessert that beckons you to grab a scoop and savor every delicious bite.
Why Cookie Dough Snickers & Reese’s Ice Cream Delivers
What’s Inside Cookie Dough Ice Cream Treats
Dairy Base:Flavor Enhancers:Mix-In Ingredients:How to Make Snickers & Reese’s Cookie Dough Ice Cream
Step 1: Whisk Creamy Base
Grab a large mixing bowl and whisk together the heavy cream, milk, sugar, and vanilla extract.
Keep whisking until the sugar completely melts and creates a smooth, silky mixture.
The goal is to blend all ingredients until they become a harmonious, sweet liquid.
Step 2: Blend Peanut Butter
Stir in the peanut butter, mixing thoroughly until it’s fully incorporated into the creamy base.
The peanut butter will add a rich, nutty flavor that complements the sweet cream.
Step 3: Churn The Ice Cream
Transfer the mixture into your ice cream maker and churn according to the machine’s specific instructions.
This process will help create that classic, smooth ice cream texture we all love.
Step 4: Add Delicious Mix-Ins
During the final moments of churning, gently fold in these delightful ingredients:Make sure the mix-ins are evenly distributed throughout the ice cream for a perfect bite every time.
Step 5: Freeze And Enjoy
Transfer the ice cream to a freezer-safe container and let it set for a few hours until it reaches your desired consistency.
Scoop and serve this decadent, loaded ice cream to eager dessert lovers.
Tips for a Rich, Creamy Ice Cream
Twists for Snickers & Reese’s Ice Cream Fans
Serving Cookie Dough Ice Cream Like a Pro
Storing Your Cookie Dough Ice Cream Desserts
FAQs
Yes, you can use the no-churn method by whipping heavy cream until stiff peaks form, then folding in the sweetened condensed milk and other ingredients before freezing for 6-8 hours.
While you can substitute lower-fat milk, using full-fat dairy will give a creamier, richer texture and better overall flavor for this ice cream.
Store the ice cream in an airtight container in the freezer for up to 2 weeks, but it’s best consumed within the first week for optimal taste and texture.
Print
Cookie Dough Snikers & Reese’s Ice Cream Recipe
- Total Time: 3 hours 35 minutes
- Yield: 4 1x
Description
Indulgent cookie dough snikers & reese’s ice cream blends rich chocolate, creamy peanut butter, and classic cookie dough into a luxurious frozen dessert. Cool summer nights become sweeter when you savor this irresistible homemade treat.
Ingredients
Main Ingredients:
- 2 cups (473 ml) heavy cream
- 1 cup (237 ml) whole milk
- 1/2 cup (120 ml) peanut butter
Candy Mix-Ins:
- 1/2 cup chopped Snickers
- 1/2 cup chopped Reese’s Cups
- 1/2 cup mini chocolate chips
Sweeteners and Flavoring:
- 3/4 cup (150 g) granulated sugar
- 1 teaspoon vanilla extract
Instructions
- Whisk heavy cream, milk, sugar, and vanilla extract in a mixing bowl until sugar completely dissolves, creating a smooth base liquid.
- Integrate peanut butter thoroughly into the cream mixture, ensuring a uniform, creamy consistency.
- Transfer the liquid to an ice cream maker and churn for approximately 20-25 minutes at the recommended manufacturer’s temperature setting.
- During the final 3-5 minutes of churning, gently incorporate mini chocolate chips, chopped Snickers bars, diced Reese’s pieces, and crumbled cookie dough chunks, distributing evenly throughout the ice cream.
- Once churning is complete, transfer the ice cream to a freezer-safe container, ensuring ingredients are well-mixed.
- Freeze for 2-3 hours to allow ice cream to set and flavors to meld together, creating a rich and decadent dessert.
- Before serving, let the ice cream sit at room temperature for 3-5 minutes to soften slightly, making it easier to scoop and enjoy.
Notes
- Customize the sweetness by adjusting sugar levels to match personal taste preferences.
- Freeze mixing bowl and utensils beforehand to help cream whip faster and maintain cooler temperature during preparation.
- For dairy-free option, swap heavy cream and milk with coconut cream and almond milk to create a similar creamy texture.
- Chop Snickers and Reese’s into smaller pieces to ensure more even distribution throughout the ice cream and prevent large frozen chunks.
- Prep Time: 10 minutes
- Cook Time: 3 hours 25 minutes
- Category: Desserts
- Method: Blending
- Cuisine: American
Nutrition
- Serving Size: 4
- Calories: 531
- Sugar: 35 g
- Sodium: 109 mg
- Fat: 38 g
- Saturated Fat: 15 g
- Unsaturated Fat: 20 g
- Trans Fat: 0.5 g
- Carbohydrates: 40 g
- Fiber: 2 g
- Protein: 10 g
- Cholesterol: 120 mg
Natalie Brooks
Co-Founder & Content Strategist
Expertise
Education
eCornell
Natalie brings the vibrant, plant-powered side to Culinary Duo. After earning her Plant-Based Nutrition Certificate from eCornell, she combined her love for fresh ingredients with a passion for storytelling, aiming to make healthy cooking simple and satisfying.
Her kitchen motto: good food doesn’t need a fancy label, it just needs fresh ideas and a little creativity. Outside of writing and recipe testing, Natalie’s happiest in her garden, exploring farmers’ markets, or mixing global flavors into new kitchen experiments.