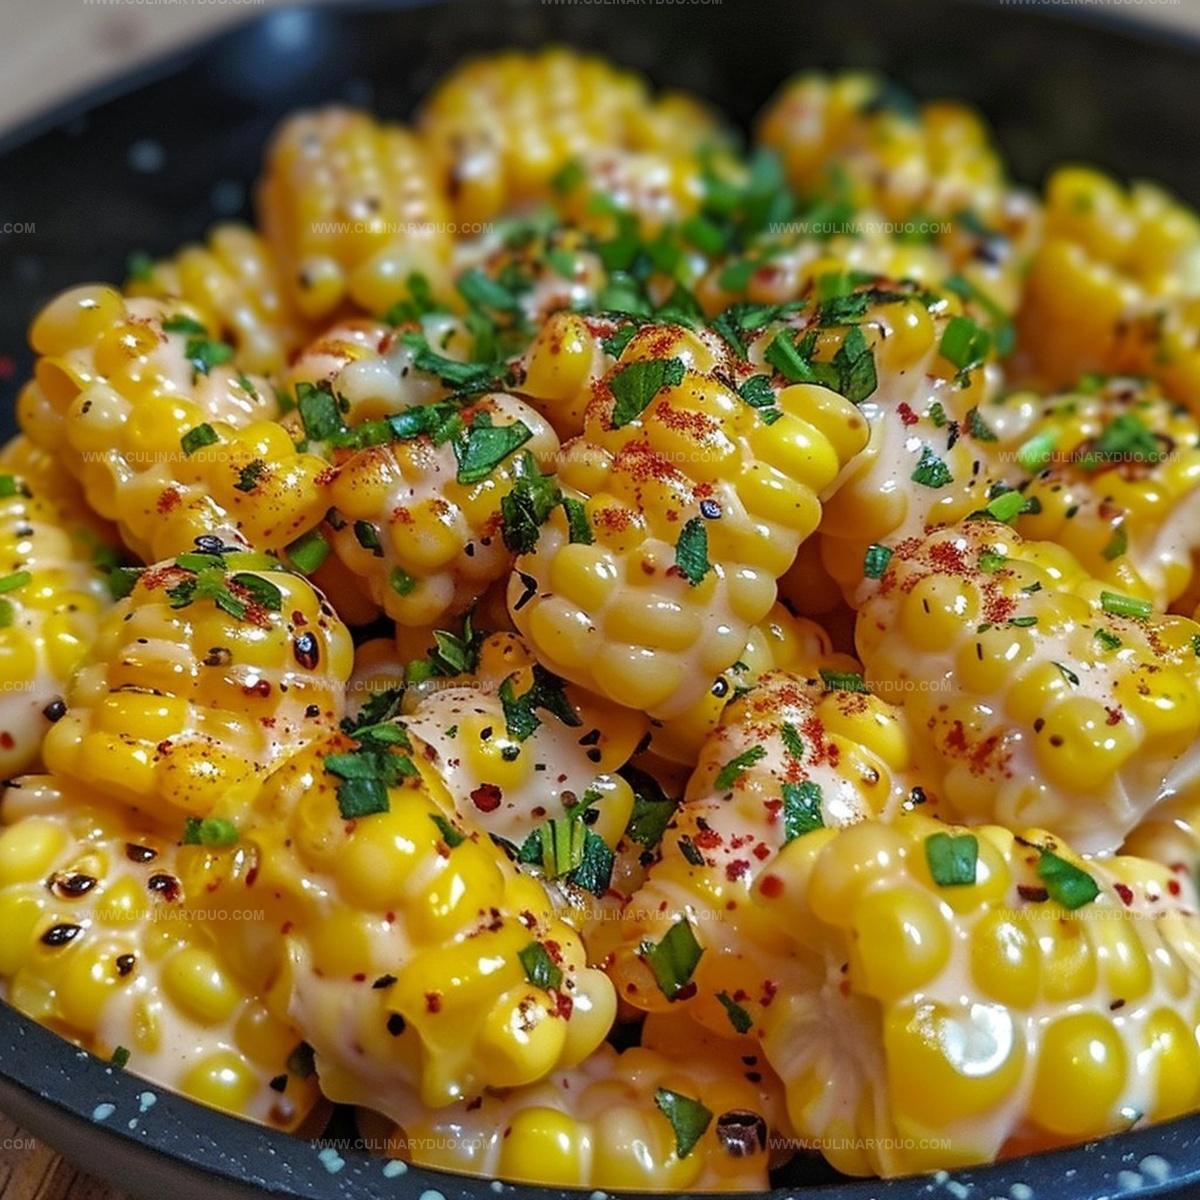
Sizzling Honey Butter Skillet Corn Recipe: Sweet Summer Bliss
Sweet kernels dancing with golden honey butter elevate this skillet corn to comfort food heaven.
Southern kitchens have long cherished this simple yet magical side dish.
Each spoonful bursts with rich, creamy goodness that melts effortlessly on your tongue.
The combination of fresh corn and velvety butter creates a harmony of flavors that sings with every bite.
Crisp edges and silky smooth centers make this dish irresistibly delectable.
Generations have passed down this recipe, celebrating its pure, homestyle deliciousness.
Honey Butter Skillet Corn: What Makes It Delicious
Ingredients for Honey Butter Skillet Corn
Main Ingredients:Dairy and Seasoning:Cooking Essentials:How to Cook Honey Butter Skillet Corn
Step 1: Warm Up The Skillet
Grab your favorite cast-iron skillet and place it on the stovetop.
Turn the heat to medium-high and let the pan get nice and hot.
Step 2: Create A Buttery Honey Base
Drop in the butter and honey, letting them melt together into a golden, glossy mixture.
Swirl the pan gently to help them combine smoothly.
Step 3: Introduce The Corn
Pour in the frozen corn kernels, spreading them evenly across the skillet.
Let the corn dance and sizzle in the sweet buttery liquid.
Stir occasionally to ensure each kernel gets some love from the heat.
Step 4: Bring In The Creamy Element
Add these ingredients to the skillet:Stir everything together, allowing the cream cheese to melt and create a luxurious, velvety sauce coating the corn.
Step 5: Final Touch And Serve
Continue cooking for a few more minutes, stirring periodically until the mixture looks creamy and well-blended.
Remove from heat and transfer to a serving dish immediately.
Step 6: Store Leftovers
If you have any remaining corn, pop it into a sealed container and refrigerate.
It’ll stay fresh and delicious for a few days.
Tips for Perfect Honey Butter Corn
Flavor Twists for Honey Butter Skillet Corn
Serving Suggestions for Honey Butter Corn
Storing Honey Butter Skillet Corn Easily
FAQs
Yes, you can use fresh corn kernels. Simply cut the kernels off the cob and follow the same cooking method in the skillet.
Absolutely! This Honey Butter Skillet Corn is vegetarian-friendly and contains no meat products.
Add a pinch of red pepper flakes or a dash of cayenne pepper when seasoning to give it a spicy kick.
Use full-fat cream cheese for the richest and most creamy texture in this recipe.
Print
Honey Butter Skillet Corn Recipe
- Total Time: 16 minutes
- Yield: 4 1x
Description
Sweet kernels of summer corn mingle with creamy honey butter in this irresistible Southern-style side dish. Melted butter and golden honey elevate simple corn into a crowd-pleasing companion that will make you crave seconds.
Ingredients
Main Ingredients:
- 1 bag (16 ounces/454 grams) frozen corn or corn ribs
- 2 ounces (56 grams) cream cheese (cut into chunks)
Seasoning Ingredients:
- 1/4 teaspoon salt
- 1/4 teaspoon black pepper
Finishing Ingredients:
- 2 tablespoons butter (salted preferred)
- 2 tablespoons honey
Instructions
- Heat cast-iron skillet over medium-high temperature, melting honey and butter together until they form a smooth, golden liquid.
- Add frozen corn kernels to the skillet, stirring periodically to ensure even cooking and prevent sticking. Continue cooking for 6-7 minutes until corn is heated through and slightly golden.
- Introduce cream cheese chunks into the skillet, gently folding them into the corn mixture. Season with salt and black pepper.
- Reduce heat to medium-low, allowing cream cheese to melt completely while stirring consistently. This process takes approximately 4 minutes, creating a creamy, glossy coating on the corn.
- Once cream cheese is fully incorporated and corn is tender, remove skillet from heat. The mixture should have a rich, velvety texture with a slight sheen.
- Transfer corn to a serving dish immediately, ensuring it remains warm. For storage, refrigerate in an airtight container, consuming within 2-3 days for optimal flavor and texture.
Notes
- Customize heat levels by adjusting the amount of black pepper for different spice preferences.
- Swap frozen corn with fresh corn kernels during summer for a more vibrant, crisp texture and enhanced natural sweetness.
- Transform this side dish into a creamy vegetarian main course by adding sautéed bell peppers, onions, or diced jalapeños for extra flavor complexity.
- Reduce butter and use a light cream cheese version to create a lighter, lower-calorie variation without compromising rich, comforting taste.
- Prep Time: 5 minutes
- Cook Time: 11 minutes
- Category: Breakfast, Lunch, Dinner, Snacks, Appetizer
- Method: Sautéing
- Cuisine: American
Nutrition
- Serving Size: 4
- Calories: 208 kcal
- Sugar: 8 g
- Sodium: 186 mg
- Fat: 12 g
- Saturated Fat: 7 g
- Unsaturated Fat: 4 g
- Trans Fat: 0.3 g
- Carbohydrates: 22 g
- Fiber: 2 g
- Protein: 4 g
- Cholesterol: 31 mg
Natalie Brooks
Co-Founder & Content Strategist
Expertise
Education
eCornell
Natalie brings the vibrant, plant-powered side to Culinary Duo. After earning her Plant-Based Nutrition Certificate from eCornell, she combined her love for fresh ingredients with a passion for storytelling, aiming to make healthy cooking simple and satisfying.
Her kitchen motto: good food doesn’t need a fancy label, it just needs fresh ideas and a little creativity. Outside of writing and recipe testing, Natalie’s happiest in her garden, exploring farmers’ markets, or mixing global flavors into new kitchen experiments.