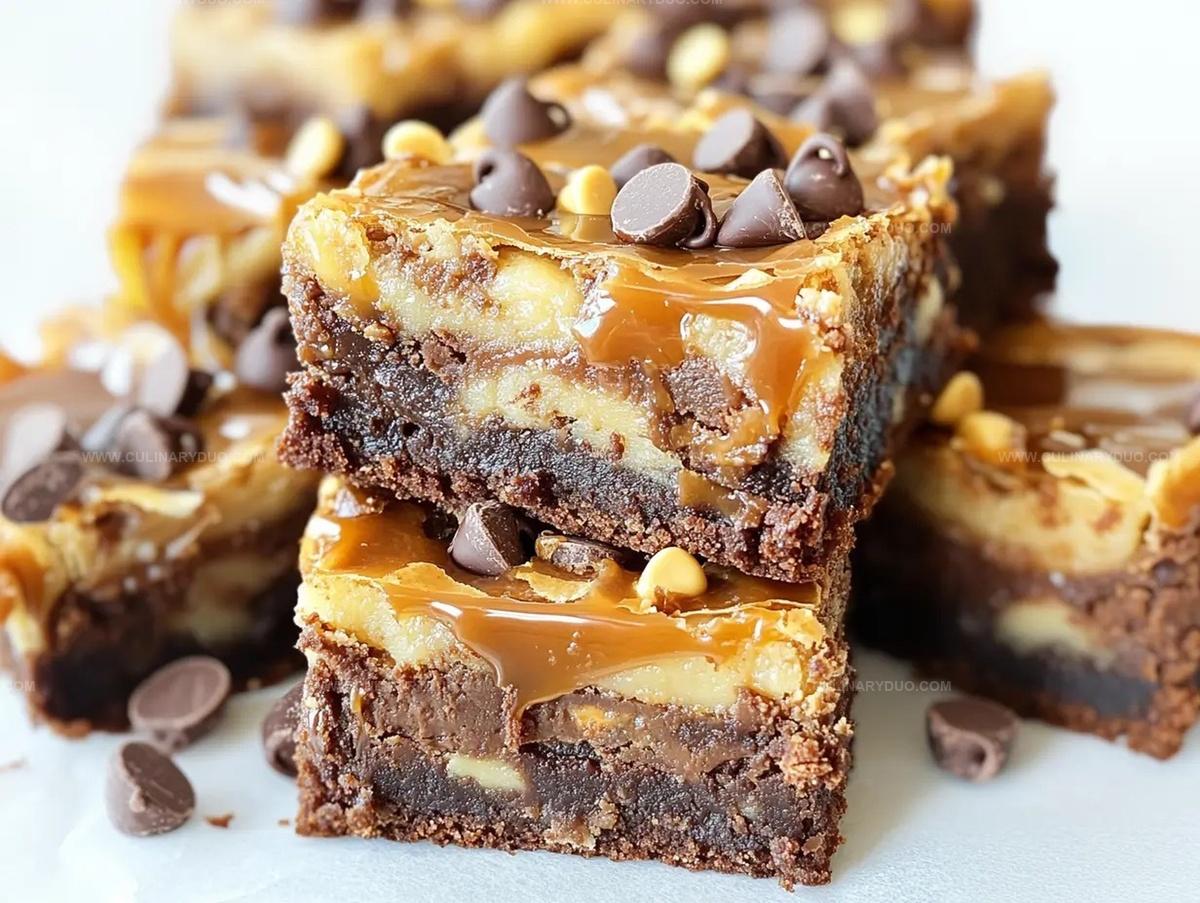
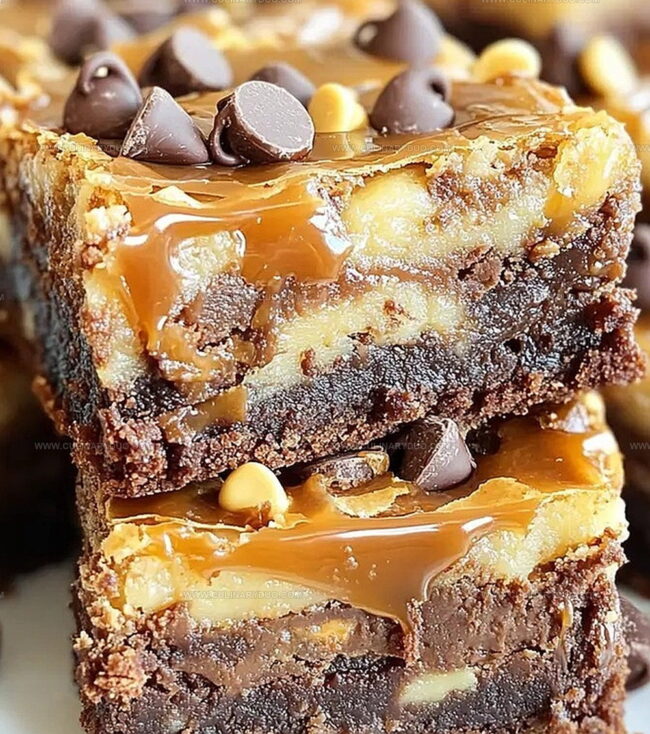
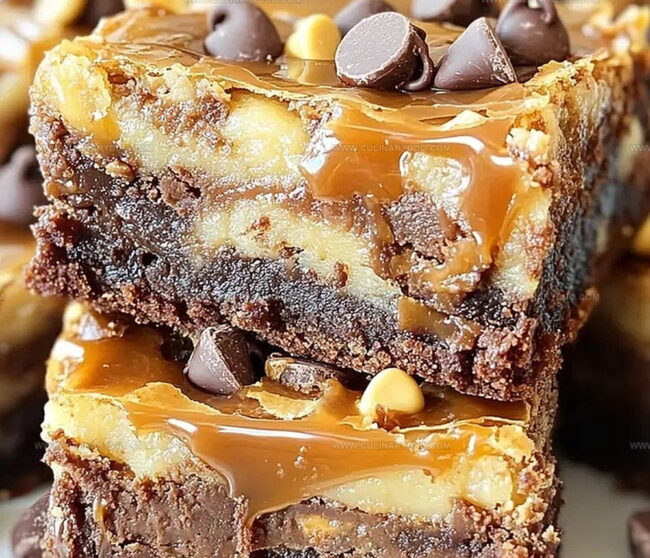
Irresistible Snickers Brownies Recipe: Gooey Chocolatey Bliss
Crafting the ultimate indulgent snickers brownies recipe promises a chocolate lover’s dream come true.
Layers of gooey decadence await you in this delightful dessert adventure.
Chocolate and caramel dance together with nutty undertones that make mouths water instantly.
Rich fudgy squares packed with candy bar chunks will become your new obsession.
Each bite delivers a perfect balance of sweet and salty textures that surprise and delight.
Creamy peanut notes weave through dense brownie foundations, creating an irresistible treat.
Why Snickers Brownies Are So Decadent
Essential Ingredients for Snickers Brownies
Base Ingredients:Dry Ingredients:Snickers Topping Ingredients:How to Bake Snickers Brownies Perfectly
Step 1: Prepare Baking Station
Heat oven to 350°F.
Line 8×8-inch pan with parchment paper, ensuring extra edges hang over sides for easy brownie removal.
Step 2: Create Chocolate Base
Melt chocolate and butter using one of two methods:Step 3: Whip Egg Mixture
Combine in mixing bowl:Beat until mixture becomes pale and thick, approximately 2-3 minutes.
Slowly incorporate warm melted chocolate while whisking.
Step 4: Incorporate Dry Ingredients
Mix separately:Gently fold dry ingredients into chocolate mixture until just combined.
Step 5: Bake Brownie Foundation
Spread batter evenly in prepared pan.
Bake 20-25 minutes until edges set.
Test doneness with toothpick – should have minimal moist crumbs.
Cool completely on wire rack.
Step 6: Craft Nougat Layer
Blend smoothly:Mixture should be thick and creamy.
Step 7: Apply Nougat Topping
Spread nougat layer evenly across cooled brownies.
Step 8: Create Chocolate Glaze
Melt chocolate with coconut oil using:Ensure smooth, glossy consistency.
Step 9: Cover with Chocolate
Pour melted chocolate over nougat layer.
Spread evenly using spatula.
Step 10: Set and Chill
Refrigerate brownies 30 minutes until chocolate firms completely.
Step 11: Slice and Serve
Warm knife under hot water, dry thoroughly.
Cut into clean, precise squares for serving.
Tips to Nail Snickers Brownies Every Time
Creative Twists for Snickers Brownies
Ideal Pairings for Snickers Brownies
Storing Snickers Brownies the Right Way
FAQs
Yes, they capture the classic Snickers flavor with layers of chocolate, caramel, peanut butter, and peanuts, creating a rich dessert that mirrors the candy bar’s taste profile.
Bittersweet chocolate provides depth, but you can substitute with semi-sweet chocolate. Milk chocolate might make the brownies too sweet and less complex in flavor.
Look for set edges and a toothpick with a few moist crumbs. Ovens vary, so start checking at 20 minutes to prevent overbaking, which can make brownies dry.
Print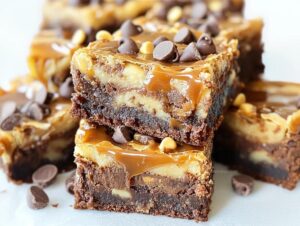
Indulgent Snickers Brownies Recipe
- Total Time: 50 minutes
- Yield: 9 1x
Description
Chocolate and caramel lovers discover pure bliss with homemade Snickers Brownies, a dessert that marries rich fudgy layers with classic candy bar flavors. Sweet indulgence meets nostalgic comfort, promising a delectable experience you won’t forget.
Ingredients
Main Ingredients:
- 4 ounces (113 grams) bittersweet chocolate (70% cocoa)
- 6 tablespoons (84 grams) unsalted butter
- 2 large eggs
- 3/4 cup (150 grams) granulated sugar
- 1/3 cup (50 grams) all-purpose flour
- 2 tablespoons (12 grams) cocoa powder
Flavor Enhancers:
- 1/2 teaspoon pure vanilla extract
- Heaped 1/4 teaspoon salt
- 1/3 cup (80 milliliters) salted caramel sauce
- 1/2 cup (120 milliliters) peanut butter
- 1/2 cup (60 grams) roasted peanuts
Coating and Garnish:
- 3 ounces (85 grams) dark chocolate
- 1 teaspoon (5 milliliters) coconut oil
Instructions
- Preheat the oven to 350°F and prepare an 8×8-inch baking pan with parchment paper, ensuring extra overhang for easy removal.
- Melt chocolate and butter together using low heat in a saucepan, stirring consistently until achieving a smooth, glossy consistency.
- Whip eggs, sugar, and salt in a large mixing bowl until the mixture transforms into a pale, thick texture, approximately 2-3 minutes.
- Gradually incorporate the warm melted chocolate into the egg mixture, whisking thoroughly to create a uniform blend.
- Sift flour and cocoa powder together, then gently fold into the chocolate mixture until just incorporated, avoiding overmixing.
- Distribute the batter evenly across the prepared pan, ensuring a smooth surface.
- Bake for 20-25 minutes, checking doneness with a toothpick that should emerge with minimal moist crumbs. Remove from oven and allow to cool completely on a wire rack.
- Create the nougat layer by combining salted caramel sauce, peanut butter, and roasted peanuts, mixing until achieving a thick, creamy consistency.
- Once brownies have cooled, spread the nougat mixture uniformly across the surface.
- Melt dark chocolate and coconut oil together using microwave or stovetop method, stirring until achieving a smooth, glossy texture.
- Pour and spread the melted chocolate over the nougat layer, ensuring complete coverage.
- Refrigerate for 30 minutes to allow the chocolate topping to set firmly.
- Remove from pan using parchment paper overhang and slice into squares using a knife heated under hot water for clean, precise cuts.
Notes
- Precise chocolate melting prevents burning, ensuring a smooth, glossy base for your brownies.
- Room temperature eggs blend more evenly, creating a more uniform and lighter brownie texture.
- Use high-quality cocoa powder and bittersweet chocolate for deeper, richer flavor complexity.
- Chill brownies completely before cutting to achieve clean, sharp edges and prevent crumbling.
- Prep Time: 25 minutes
- Cook Time: 25 minutes
- Category: Desserts
- Method: Baking
- Cuisine: American
Nutrition
- Serving Size: 9
- Calories: 319 kcal
- Sugar: 26 g
- Sodium: 121 mg
- Fat: 23 g
- Saturated Fat: 8 g
- Unsaturated Fat: 12 g
- Trans Fat: 0.1 g
- Carbohydrates: 28 g
- Fiber: 3 g
- Protein: 6 g
- Cholesterol: 49 mg
Natalie Brooks
Co-Founder & Content Strategist
Expertise
Education
eCornell
Natalie brings the vibrant, plant-powered side to Culinary Duo. After earning her Plant-Based Nutrition Certificate from eCornell, she combined her love for fresh ingredients with a passion for storytelling, aiming to make healthy cooking simple and satisfying.
Her kitchen motto: good food doesn’t need a fancy label, it just needs fresh ideas and a little creativity. Outside of writing and recipe testing, Natalie’s happiest in her garden, exploring farmers’ markets, or mixing global flavors into new kitchen experiments.