
The Best Long John Silvers Fish and Chicken Batter Recipe Ever
Crispy, golden-brown seafood dreams start with this long john silvers fish and chicken batter recipe that captures restaurant-quality magic right in your kitchen.
Home cooks have searched for years to replicate these legendary flavors.
The secret lies in creating a perfectly seasoned coating that locks in moisture and delivers irresistible crunch.
Each bite promises a delightful blend of crisp exterior and tender interior that will transport you to your favorite seafood restaurant.
Professional chefs know the importance of balanced seasoning and precise technique.
You can now master this beloved batter with simple ingredients and straightforward steps.
Unleash your inner culinary artist and prepare to impress everyone at your next meal.
Why Long John Silvers Fish and Chicken Batter Works

Ingredients for Fish and Chicken Batter
Dry Ingredients:Seasoning Ingredients:Liquid Ingredient:How to Make Crispy Fish and Chicken Batter
Step 1: Mix Dry Ingredients
Grab a spacious mixing bowl and toss in flour, cornstarch, baking powder, salt, sugar, baking soda, onion powder, and garlic powder.
Whisk these ingredients together until they’re perfectly blended and no lumps remain.
Step 2: Create Smooth Batter
Pour cold club soda into the dry mixture, whisking continuously to create a silky, lump-free batter.
Keep stirring until the mixture looks smooth and consistent.
Step 3: Let Batter Rest
Allow the batter to sit for a few minutes.
This brief pause helps the ingredients meld together and slightly thicken, creating a more substantial coating.
Step 4: Prepare Coating Station
Set up your dipping station with the batter ready for seafood or chicken.
Ensure each piece gets a complete, even coating by fully submerging the protein in the batter.
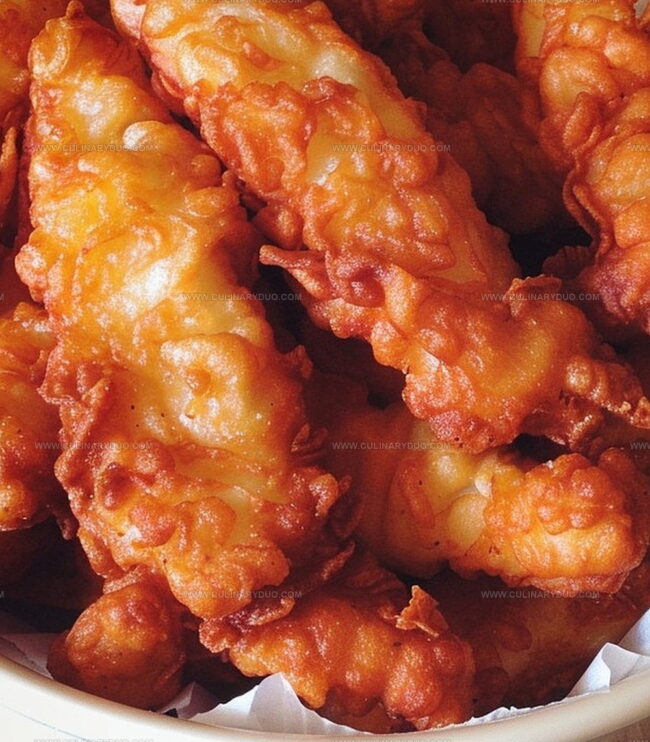
Step 5: Fry to Golden Perfection
Heat oil in a deep fryer or heavy-bottomed pan to 350°F.
Carefully lower battered proteins into the hot oil, cooking until they transform into a gorgeous golden-brown color.
For most items, this takes about 3-4 minutes per side.
Step 6: Drain and Serve
Transfer the crispy, golden pieces to a paper towel-lined plate to drain excess oil.
Serve immediately while the coating remains wonderfully crunchy and hot.
Pro Tips for Fish and Chicken Batter
Variations for Fish and Chicken Batter
Serving Suggestions for Fish and Chicken Batter
How to Store Fish and Chicken Batter
FAQs
No, club soda helps create a lighter, crispier texture. The carbonation creates air bubbles that make the batter extra crispy and delicate.
Absolutely! This versatile batter works great for coating vegetables like zucchini, onion rings, and cauliflower. The seasoning adds fantastic flavor to any ingredient.
Keep the club soda refrigerated and mix ingredients quickly. A cold batter helps create a crunchier exterior when frying.
Simply whisk in a little more cold club soda to thin it out to the right consistency. The batter should be smooth and coat ingredients evenly.
Print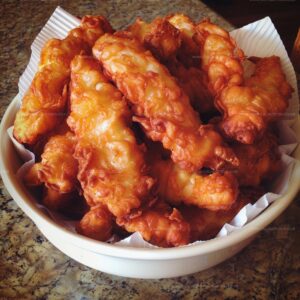
Long John Silvers Fish and Chicken Batter Recipe
- Total Time: 25 minutes
- Yield: 4 1x
Description
Crispy Long John Silver’s fish and chicken batter brings classic seafood flavors straight from American kitchens to your dining table. Perfectly seasoned and golden-brown, this recipe delivers restaurant-quality crunch that will delight you with its irresistible homemade charm.
Ingredients
Main Ingredients:
- 1 cup all-purpose flour
- 1 cup cornstarch
- 1 cup cold club soda
Leavening Agents:
- 2 teaspoons baking powder
- 1/4 teaspoon baking soda
Seasonings:
- 1 teaspoon salt
- 1 teaspoon sugar
- 1/4 teaspoon onion powder
- 1/4 teaspoon garlic powder
Instructions
- Thoroughly mix all dry ingredients in a spacious mixing bowl, ensuring even distribution of flour, cornstarch, baking powder, salt, sugar, baking soda, onion powder, and garlic powder.
- Gradually stream cold club soda into the dry mixture while whisking continuously to create a silky, lump-free batter.
- Let the batter rest for 2-3 minutes, allowing it to develop a slightly thicker consistency that will adhere well to proteins.
- Prepare a deep fryer or heavy-bottomed pot with oil heated precisely to 350°F, maintaining a consistent temperature for optimal frying.
- Completely submerge each piece of seafood or chicken into the prepared batter, ensuring a thorough, even coating that covers the entire surface.
- Carefully lower battered proteins into the hot oil, avoiding overcrowding to maintain oil temperature and promote crispy texture.
- Fry each piece for 3-4 minutes, turning once to achieve a uniform golden-brown color and crisp exterior.
- Remove fried items using a slotted spoon and place on paper towel-lined plate to drain excess oil and preserve crunchiness.
- Serve immediately while the batter remains crisp and hot, accompanied by preferred dipping sauces or sides.
Notes
- Keep club soda ice-cold to achieve the lightest, crispiest batter texture possible.
- Ensure oil temperature stays consistent at 350°F to prevent soggy or greasy coating.
- Pat protein completely dry before dipping to help batter adhere perfectly and create maximum crunchiness.
- For gluten-free version, swap wheat flour with rice flour or gluten-free all-purpose blend, maintaining same proportions.
- Prep Time: 10 minutes
- Cook Time: 15 minutes
- Category: Lunch, Dinner, Appetizer, Snacks
- Method: Frying
- Cuisine: American
Nutrition
- Serving Size: 4
- Calories: 170 kcal
- Sugar: 1 g
- Sodium: 560 mg
- Fat: 0 g
- Saturated Fat: 0 g
- Unsaturated Fat: 0 g
- Trans Fat: 0 g
- Carbohydrates: 42 g
- Fiber: 1 g
- Protein: 2 g
- Cholesterol: 0 mg
Natalie Brooks
Co-Founder & Content Strategist
Expertise
Education
eCornell
Natalie brings the vibrant, plant-powered side to Culinary Duo. After earning her Plant-Based Nutrition Certificate from eCornell, she combined her love for fresh ingredients with a passion for storytelling, aiming to make healthy cooking simple and satisfying.
Her kitchen motto: good food doesn’t need a fancy label, it just needs fresh ideas and a little creativity. Outside of writing and recipe testing, Natalie’s happiest in her garden, exploring farmers’ markets, or mixing global flavors into new kitchen experiments.