Dreamy Magnolia Bakery Banana Pudding Recipe for Sweet Bliss
Creamy, dreamy magnolia bakery banana pudding has captured dessert lovers’ hearts everywhere.
Sweet layers of nostalgia blend perfectly in this iconic treat.
New york’s famous bakery inspired countless home cooks to recreate this delightful dessert.
Soft bananas and velvety custard create a magical combination that melts in your mouth.
Comfort and indulgence dance together in each spoonful of this classic recipe.
Simple ingredients transform into an extraordinary experience that feels like a warm hug.
You won’t be able to resist diving into this irresistible pudding that promises pure happiness.
Reasons To Love Magnolia Banana Pudding
Key Ingredients For Magnolia Banana Pudding
Main Ingredients:
Pudding Base:Whipped Component:Layering and Crust Ingredients:Garnish:Step-By-Step Magnolia Banana Pudding Recipe
Step 1: Create Pudding Base
Whisk together instant vanilla pudding mix and cold milk in a bowl.
Allow the mixture to rest for 10 minutes until it thickens nicely.
Step 2: Enhance Pudding Mixture
Incorporate sweetened condensed milk and softened cream cheese into the pudding.
Use an electric hand mixer to blend until completely smooth and creamy.
Step 3: Whip Up Cream
In a separate bowl, combine heavy cream and vanilla extract.
Beat with an electric hand mixer until stiff peaks form, being careful not to over-mix.
Step 4: Blend Cream and Pudding
Gently fold the whipped cream into the pudding mixture using a rubber spatula.
Refrigerate the combined mixture while preparing other components.
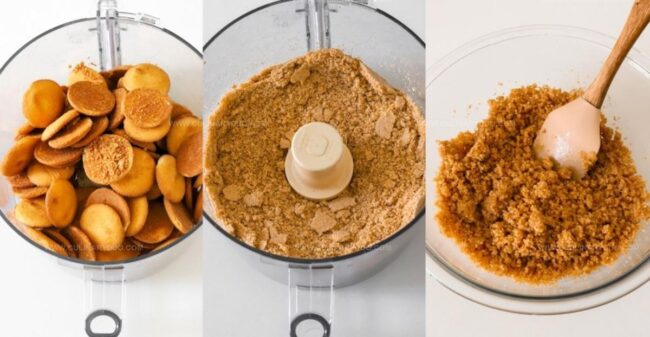
Step 5: Prepare Wafer Crust
Pulse Nilla wafers in a food processor until they resemble fine sand.
Mix with melted butter to create a crumbly base.
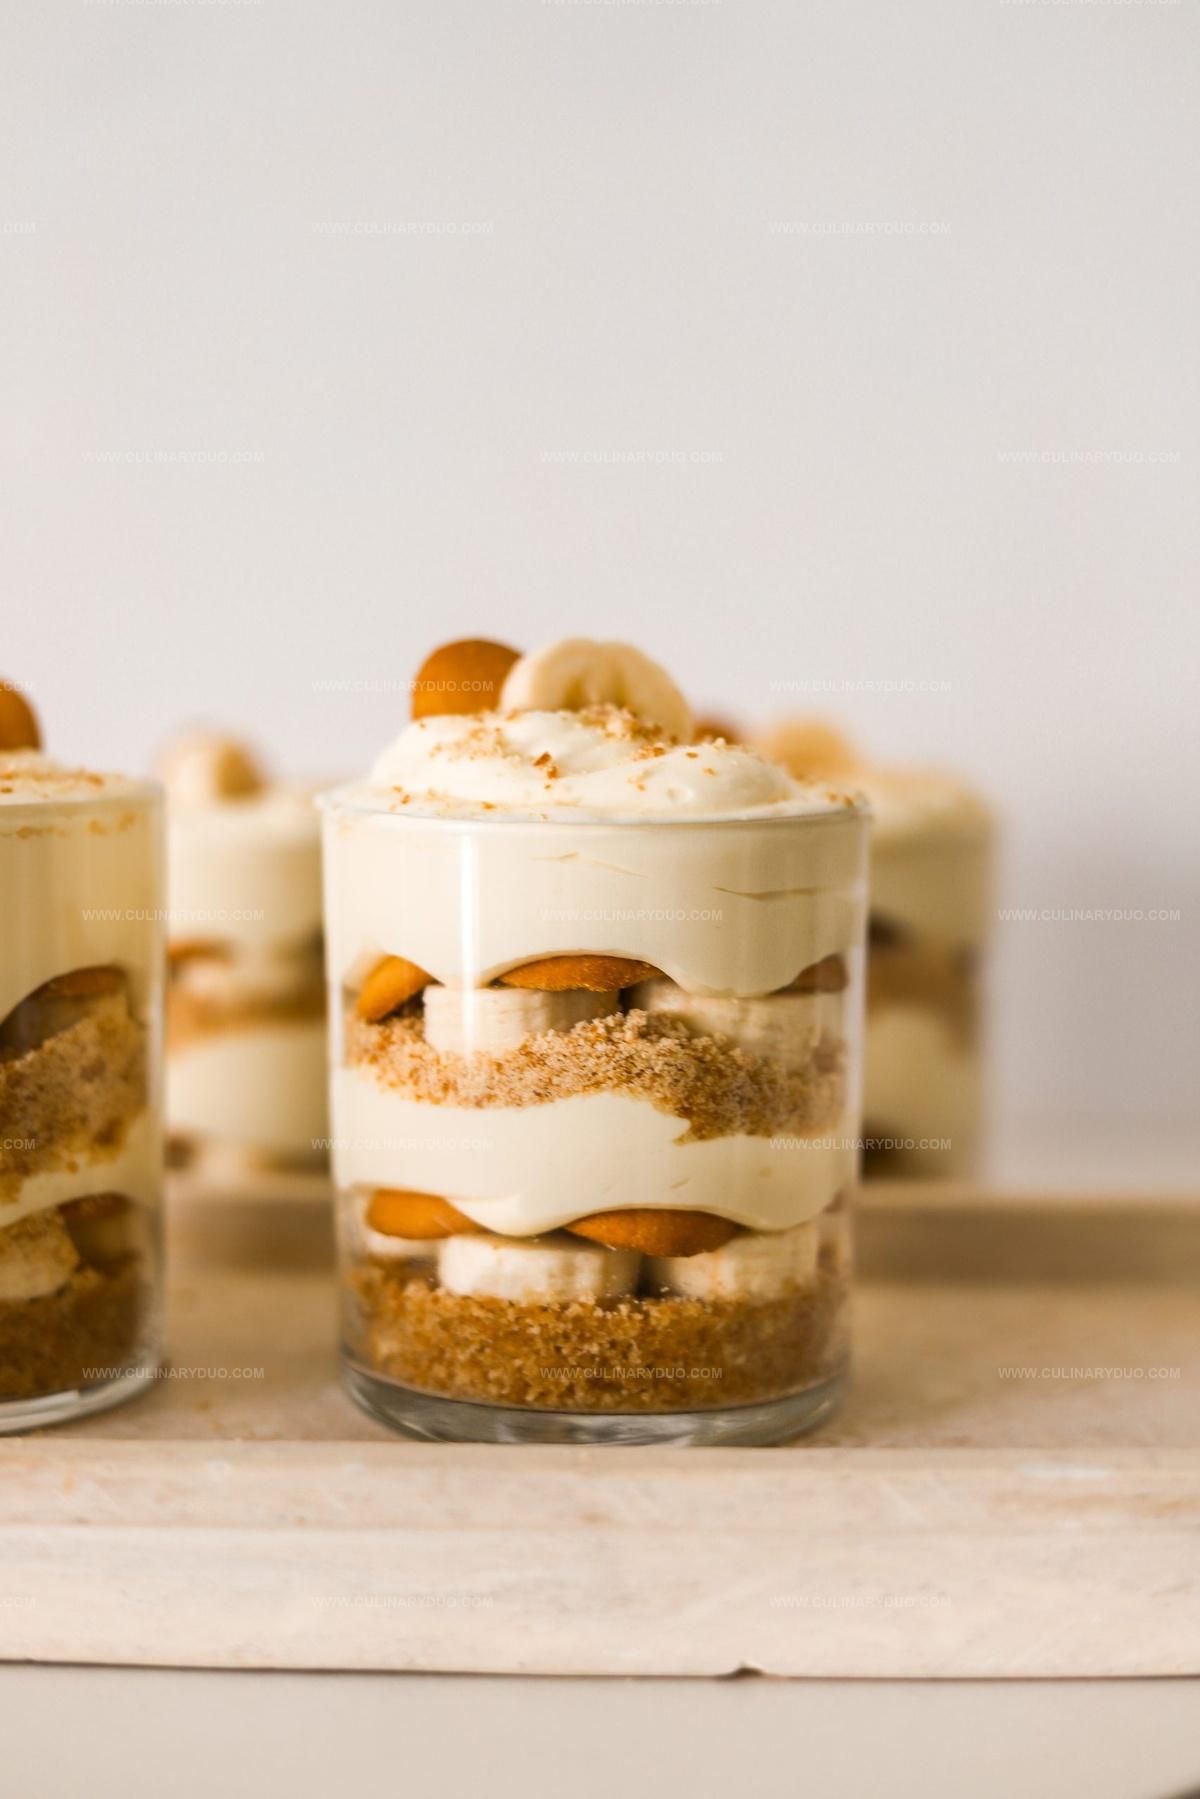
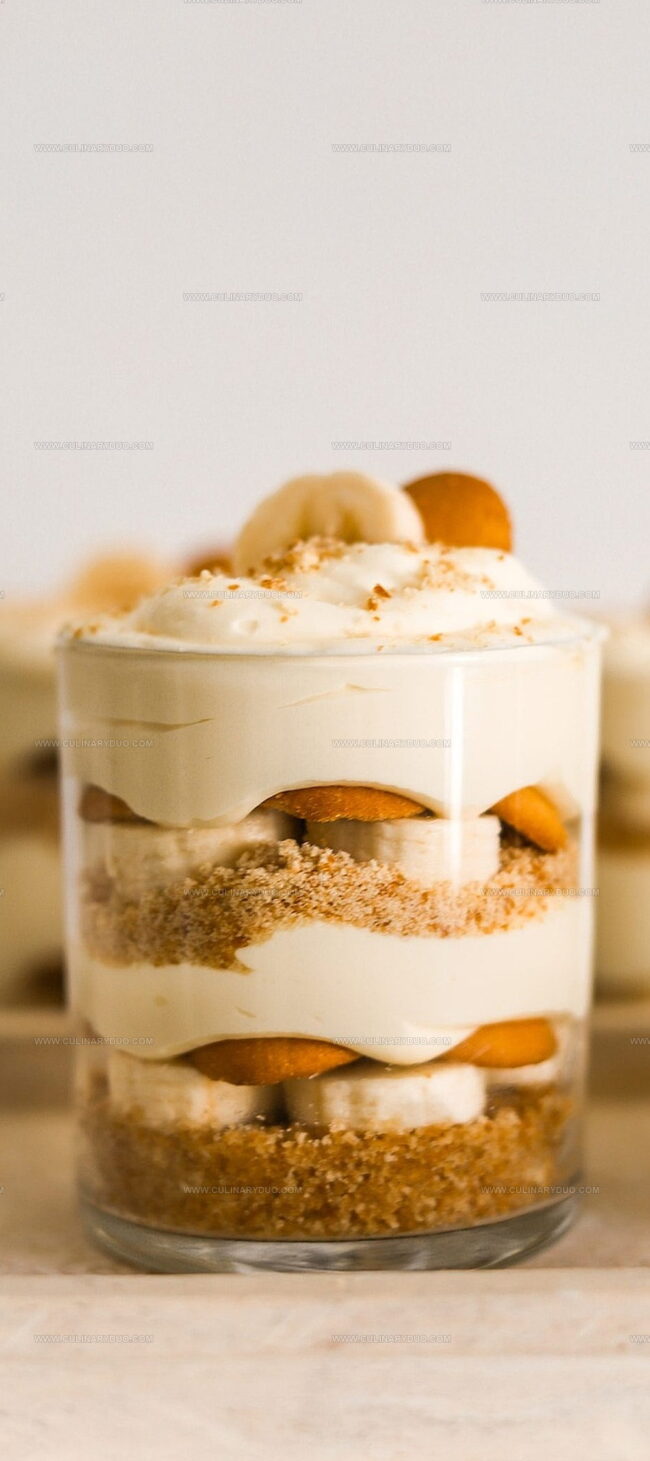
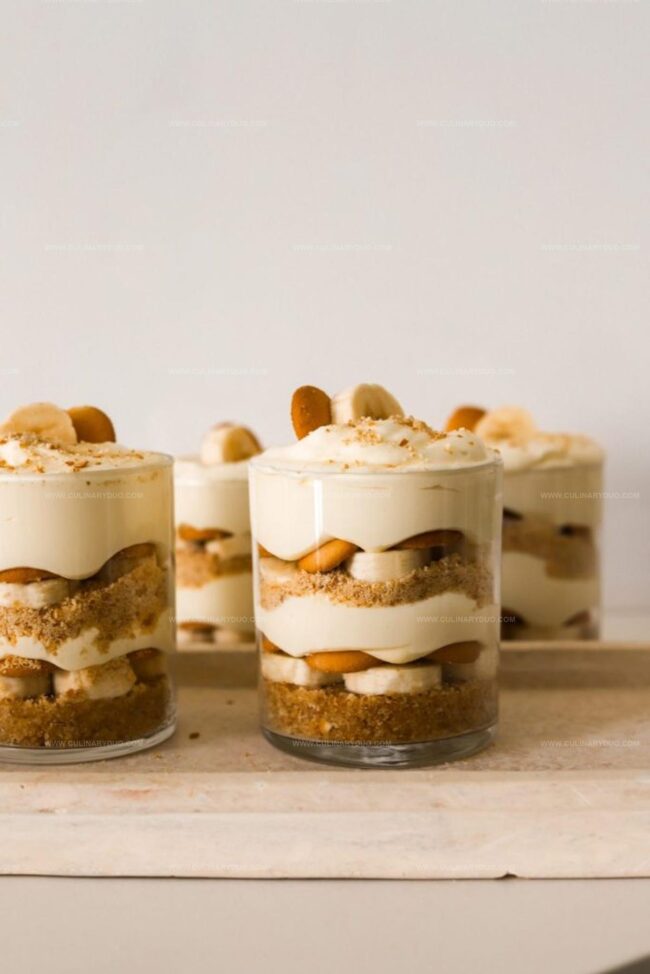
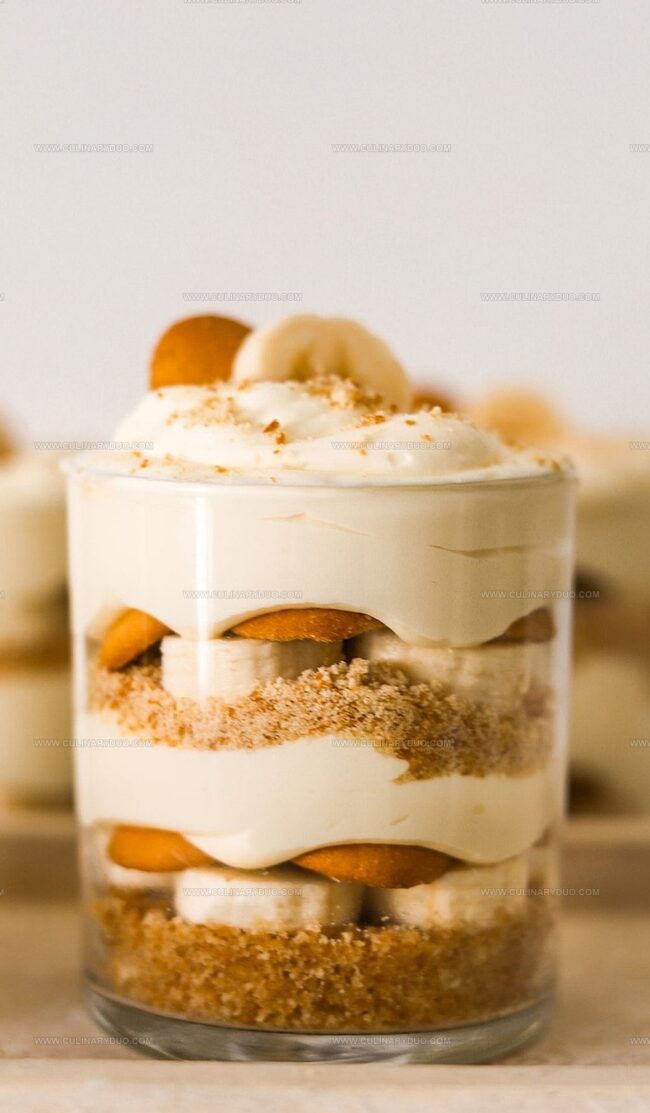
Step 6: Layer the Dessert
Prepare your serving vessel (individual cups or large dish) by following this layering sequence:Repeat these layers two times, typically filling the chosen container.
Step 7: Chill and Set
Refrigerate the dessert for a minimum of 6 hours, allowing flavors to meld and texture to soften.
Step 8: Final Garnish
Before serving, top with:Enjoy this delightful creamy treat!
Helpful Tips For Magnolia Banana Pudding
Creative Twists For Magnolia Banana Pudding
Delicious Pairings With Magnolia Banana Pudding
Best Ways To Store Banana Pudding
FAQs
This recipe uses a unique combination of instant vanilla pudding, sweetened condensed milk, and cream cheese, creating a richer, creamier texture that sets it apart from traditional banana pudding recipes.
Absolutely! This dessert actually tastes better when prepared in advance. It needs at least 6 hours of refrigeration to allow the flavors to meld and the Nilla wafers to soften, making it perfect for preparing a day before serving.
While you can mix by hand, an electric mixer is recommended for achieving the right consistency, especially when whipping the cream and combining the pudding mixture. It helps create a smoother, lighter texture that’s key to this dessert’s signature feel.
Print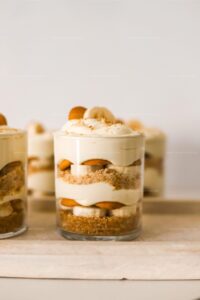
Magnolia Bakery Banana Pudding Recipe
- Total Time: 6 hours 30 minutes
- Yield: 8 1x
Description
Magnolia Bakery’s famous banana pudding delights dessert enthusiasts with creamy layers of vanilla pudding, ripe bananas, and fluffy whipped cream. Smooth vanilla wafers add delightful crunch, making this New York classic an irresistible treat you’ll crave time and again.
Ingredients
Main Ingredients:
- 6 to 10 bananas (sliced)
- 1 bag Nilla wafers
- 5-ounce package instant vanilla pudding mix
- 1 can sweetened condensed milk
Dairy and Cream Ingredients:
- 3 cups (720 milliliters) heavy cream
- 2 cups (480 milliliters) cold milk
- 1/4 cup (60 grams) cream cheese (softened)
- 1 teaspoon vanilla extract
Crust Ingredients:
- 2 cups crumbs of Nilla Wafers
- 1/2 cup (113 grams) unsalted butter (melted)
Instructions
- Prepare the instant vanilla pudding mix by whisking with cold milk. Allow the mixture to set and thicken for 10 minutes at room temperature.
- Incorporate sweetened condensed milk and softened cream cheese into the pudding. Blend thoroughly using an electric mixer until smooth and creamy.
- Create whipped cream by beating heavy cream and vanilla extract until stiff peaks form. Be cautious not to over-whip the mixture.
- Gently fold the whipped cream into the pudding mixture using a rubber spatula, creating a light and airy texture.
- Transform Nilla wafers into fine crumbs using a food processor. Mix the crushed wafers with melted butter to create a crumbly base.
- Select your serving vessel – either individual cups or a large trifle dish for presentation.
- Layer the dessert by first adding the wafer-butter crumb mixture as the base. Arrange sliced bananas over the crumbs, then add a layer of Nilla wafers and cover with the prepared pudding mixture.
- Repeat the layering process, typically creating two complete layers of bananas, wafers, and pudding.
- Refrigerate the dessert for a minimum of 6 hours to allow flavors to meld and textures to soften.
- Before serving, garnish with a whole Nilla wafer, fresh banana slice, and sprinkle of crushed wafer crumbs for an elegant finish.
Notes
- Chill thoroughly for the best texture, allowing wafers to soften and flavors to meld perfectly.
- Use ripe, spotty bananas for deeper, sweeter flavor and natural caramel-like undertones.
- Avoid over-mixing whipped cream to maintain its light, airy consistency and prevent deflation.
- Prepare this dessert a day ahead for maximum flavor development and easier serving.
- Prep Time: 30 minutes
- Cook Time: 6 hours
- Category: Desserts
- Method: Blending
- Cuisine: American
Nutrition
- Serving Size: 8
- Calories: 470 kcal
- Sugar: 38 g
- Sodium: 180 mg
- Fat: 28 g
- Saturated Fat: 17 g
- Unsaturated Fat: 10 g
- Trans Fat: 0.5 g
- Carbohydrates: 47 g
- Fiber: 1.5 g
- Protein: 5 g
- Cholesterol: 85 mg
Natalie Brooks
Co-Founder & Content Strategist
Expertise
Education
eCornell
Natalie brings the vibrant, plant-powered side to Culinary Duo. After earning her Plant-Based Nutrition Certificate from eCornell, she combined her love for fresh ingredients with a passion for storytelling, aiming to make healthy cooking simple and satisfying.
Her kitchen motto: good food doesn’t need a fancy label, it just needs fresh ideas and a little creativity. Outside of writing and recipe testing, Natalie’s happiest in her garden, exploring farmers’ markets, or mixing global flavors into new kitchen experiments.