
The Dreamiest No Bake Chocolate Peanut Butter Pinwheels Recipe
Sweet and decadent no bake chocolate peanut butter pinwheels dance with rich, creamy flavors that promise pure indulgence.
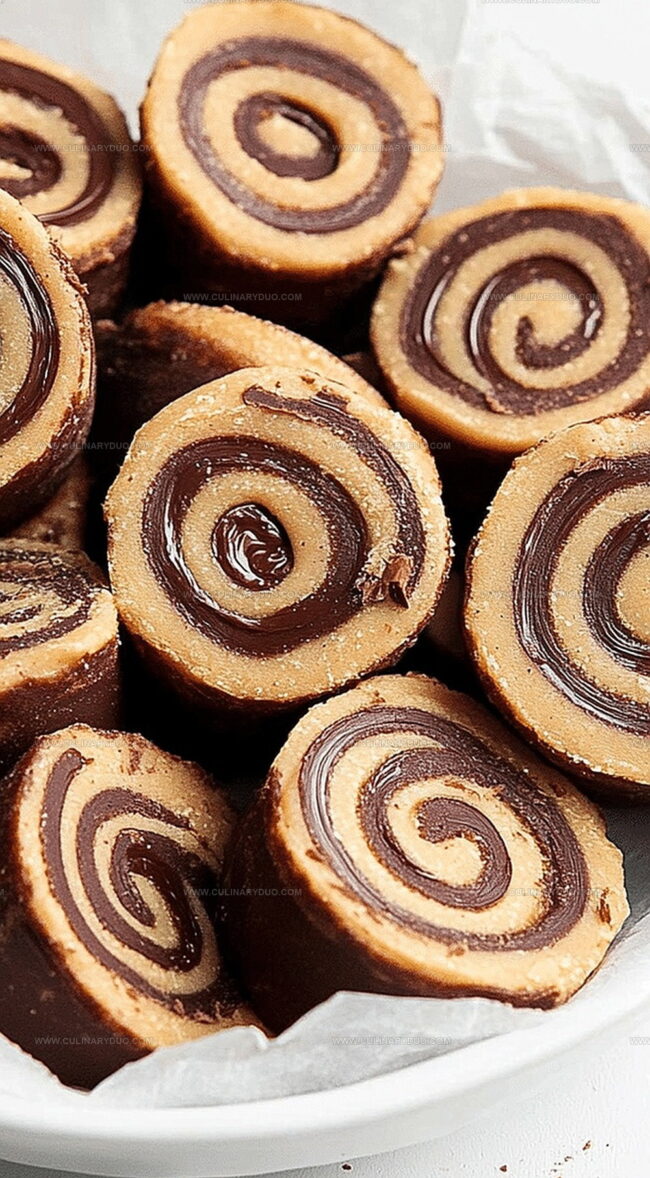
These delightful treats blend smooth chocolate and nutty peanut butter in a simple, no-cook method.
Minimal ingredients create maximum satisfaction for dessert enthusiasts.
Each pinwheel swirls together classic flavors that melt in your mouth with delicate texture.
Chilled and sliced, these pinwheels offer a quick and elegant dessert option perfect for any occasion.
Chocolate and peanut butter lovers will absolutely adore this effortless recipe that delivers serious taste without turning on the oven.
Why You’ll Like Chocolate Peanut Butter Pinwheels
What’s in No Bake Pinwheels
Base Ingredients:Chocolate Coating:Additional Ingredient:How to Make Pinwheel Cookies Easily
Step 1: Blend Creamy Base
In a mixing bowl, whip together powdered sugar, peanut butter, and softened butter until the mixture becomes completely smooth and well-combined.
Use a hand mixer or wooden spoon to ensure no lumps remain.
Step 2: Create Flat Rectangle
Place a large piece of parchment paper on your work surface and put the peanut butter mixture on top.
Cover with another parchment paper sheet and gently roll out the mixture into a thin, even rectangular shape using a rolling pin.
Step 3: Prepare Chocolate Coating
Use a microwave-safe bowl to melt chocolate chips and coconut oil.
Heat in 30-second intervals, stirring between each interval until the chocolate becomes completely smooth and glossy.
Step 4: Layer Chocolate Topping
Remove the top parchment paper from the peanut butter rectangle.
Carefully pour and spread the melted chocolate evenly across the entire surface, ensuring full coverage from edge to edge.
Step 5: Roll Into Log
Using the bottom parchment paper as a guide, slowly and tightly roll the sheet into a compact log.
Press gently to seal the edges and maintain a consistent shape.
Step 6: Chill and Set
Transfer the rolled log to the refrigerator and let it rest for 1-2 hours.
The pinwheel log needs to become completely firm before slicing.
Step 7: Slice and Serve
Remove the log from the refrigerator and use a sharp knife to cut into beautiful pinwheel slices.
Arrange on a serving plate and enjoy your delightful no-bake treat.
Pinwheel Cookie Tips for Neat Swirls
Pinwheel Cookie Flavor Ideas

Pinwheel Cookies – Ways to Serve Them
Storing Pinwheel Cookies the Smart Way
FAQs
Yes, you can substitute peanut butter with almond butter or cashew butter for a different flavor profile.
Roll it to about 1/4 inch thickness for the best pinwheel texture and easy rolling.
No, just basic kitchen tools like a mixing bowl, parchment paper, and a knife are needed.
Absolutely! You can prepare them up to 3 days in advance and store them in the refrigerator until ready to serve.
Print
No Bake Chocolate Peanut Butter Pinwheels Recipe
- Total Time: 15 minutes
- Yield: 12 1x
Description
Sweet chocolate and creamy peanut butter dance together in these No Bake Chocolate Peanut Butter Pinwheels, creating a delightful treat perfect for quick dessert cravings. Minimal ingredients and simple steps guarantee you can enjoy these irresistible swirls of indulgence in minutes.
Ingredients
Chocolate Base:
- 2 cups chocolate chips
- 1 tablespoon (1 tbsp) coconut oil
Peanut Butter Filling:
- 1/2 cup creamy peanut butter
- 1/4 cup (4 tablespoons) unsalted butter, softened
- 1 1/2 cups powdered sugar
Coating/Garnish:
(none)
Instructions
- Combine powdered sugar, peanut butter, and softened butter in a mixing bowl, blending until a cohesive and silky texture forms.
- Place the mixture between two parchment paper sheets and carefully roll into a uniform thin rectangle, ensuring even thickness.
- Microwave chocolate chips with coconut oil in 30-second intervals, stirring between each interval until completely smooth and glossy.
- Gently spread the melted chocolate across the entire surface of the peanut butter layer, creating an even, consistent coating.
- Using the parchment paper as a guide, carefully roll the sheet into a compact, tight log, pressing gently to ensure a secure seal.
- Transfer the rolled log to the refrigerator and chill for approximately 90 minutes, or until the pinwheel becomes firm and maintains its shape.
- Remove from refrigerator and slice into uniform rounds, revealing the beautiful chocolate and peanut butter swirl pattern.
- Arrange pinwheels on a serving plate and enjoy the cool, creamy treat immediately or store in an airtight container in the refrigerator.
Notes
- Ensure butter and peanut butter are at room temperature for smooth, easy mixing without lumps.
- Use high-quality chocolate chips for richer, more decadent flavor and smoother melting.
- Chill the log longer for cleaner, more precise pinwheel slices that hold their shape perfectly.
- Substitute almond butter or sunflower seed butter for a nut-free version suitable for allergies.
- Prep Time: 15 minutes
- Cook Time: 0 minutes
- Category: Snacks, Desserts
- Method: Rolling
- Cuisine: American
Nutrition
- Serving Size: 12
- Calories: 263
- Sugar: 18 g
- Sodium: 30 mg
- Fat: 19 g
- Saturated Fat: 6 g
- Unsaturated Fat: 12 g
- Trans Fat: 0 g
- Carbohydrates: 22 g
- Fiber: 1 g
- Protein: 5 g
- Cholesterol: 10 mg
Natalie Brooks
Co-Founder & Content Strategist
Expertise
Education
eCornell
Natalie brings the vibrant, plant-powered side to Culinary Duo. After earning her Plant-Based Nutrition Certificate from eCornell, she combined her love for fresh ingredients with a passion for storytelling, aiming to make healthy cooking simple and satisfying.
Her kitchen motto: good food doesn’t need a fancy label, it just needs fresh ideas and a little creativity. Outside of writing and recipe testing, Natalie’s happiest in her garden, exploring farmers’ markets, or mixing global flavors into new kitchen experiments.