
The Ultimate No Bake Nanaimo Bar Cheesecake Recipe for Sweet Lovers
Sweet layers of creamy decadence meet a classic Canadian nanaimo bar cheesecake that melts in your mouth.
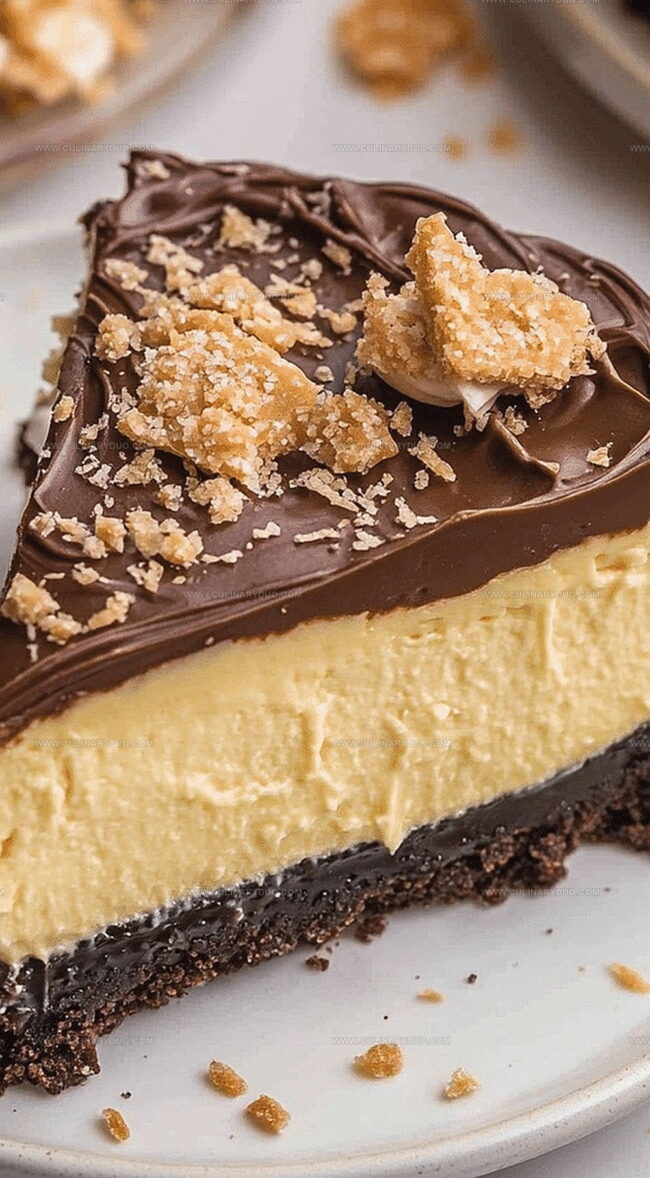
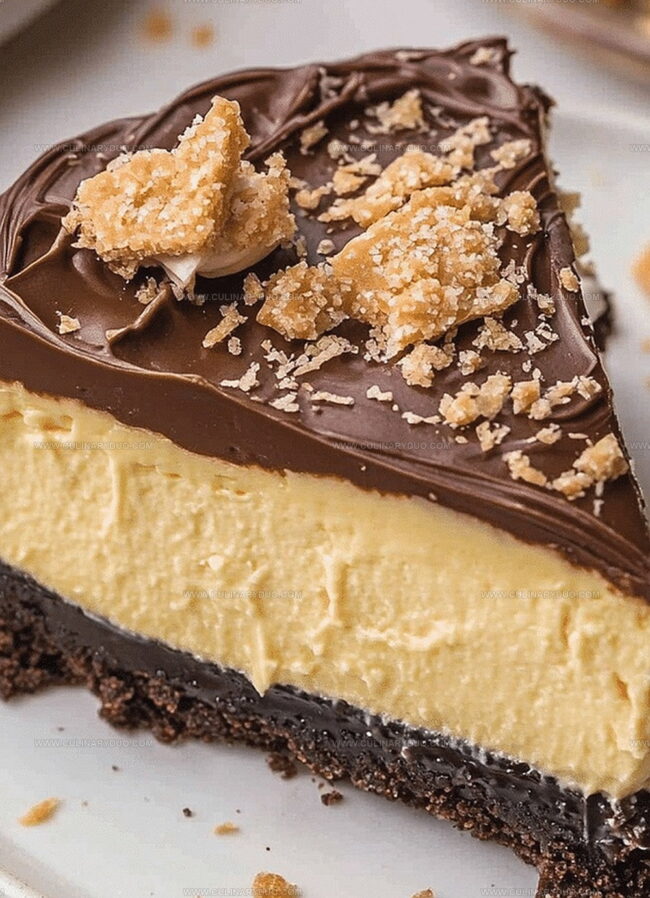
This no-bake dessert combines rich chocolate, custard-like filling, and a nutty graham cracker base into an irresistible treat.
Each spoonful promises pure indulgence without turning on the oven.
The smooth, velvety texture blends perfectly with crumbly chocolate and buttery graham crust.
Chilled to perfection, this cheesecake brings together the best elements of a traditional nanaimo bar and a classic creamy cheesecake.
Summer gatherings or intimate dinner parties will never be the same with this showstopping dessert.
Nanaimo Bar Cheesecake – No-Bake Goodness
Nanaimo Bar Cheesecake Ingredient List
Crust Ingredients:Cheesecake Layer Ingredients:Chocolate Ganache Ingredients:Easy Steps for Nanaimo Cheesecake Bars
Step 1: Create the Crumbly Base
Grab a mixing bowl and toss in graham cracker crumbs, shredded coconut, cocoa powder, melted butter, and sugar.
Mix everything until the ingredients are well combined and look like wet sand.
Press this delightful mixture firmly into the bottom of a greased 9-inch springform pan, creating an even, compact layer.
Pop the pan into the refrigerator and let it chill for 15 minutes to set the base.
Step 2: Whip Up the Creamy Cheesecake Layer
Using an electric mixer, blend cream cheese, powdered sugar, butter, and vanilla extract until the mixture becomes silky smooth and luxuriously creamy.
Once the base has chilled, carefully spread this dreamy filling evenly across the crust.
Return the pan to the refrigerator and let it cool for 1 hour to firm up.
Step 3: Craft the Decadent Chocolate Topping
Warm the heavy cream until it’s just heated (avoid boiling).
Pour the warm cream over chocolate chips and let it sit for 5 minutes.
Gently stir until the mixture transforms into a glossy, smooth ganache.
Carefully pour this rich chocolate layer over the chilled cheesecake, making sure to spread it evenly.
Place the pan back in the refrigerator and let it set for at least 4 hours or ideally overnight.
Step 4: Slice and Savor
When ready to serve, release the cheesecake from the springform pan.
Slice into beautiful wedges and enjoy the cool, creamy, chocolatey goodness of this no-bake dessert.
Pro Tips for Nanaimo Bar Success
Nanaimo Cheesecake Variations to Try
Ways to Serve Nanaimo Cheesecake Bars
Storage for No-Bake Cheesecake Bars
FAQs
A traditional Canadian dessert originating from Nanaimo, British Columbia, typically featuring a chocolate, custard, and coconut crumb base.
Yes, substitute graham cracker crumbs with gluten-free cookie crumbs or almond flour to create a similar texture and taste.
Ensure the ganache is at room temperature when pouring and spread it gently using an offset spatula to create a smooth, even layer.
While a springform pan makes removing the cheesecake easier, you can use a regular pan lined with parchment paper for similar results.
Print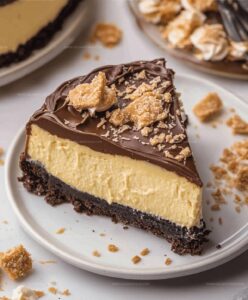
No Bake Nanaimo Bar Cheesecake Recipe
- Total Time: 20 minutes
- Yield: 9 1x
Description
Rich Canadian Nanaimo bar cheesecake blends creamy indulgence with classic dessert nostalgia. Layers of chocolate, custard, and smooth cheesecake create a no-bake masterpiece you’ll savor with pure delight.
Ingredients
Main Ingredients:
- 1 16 ounces (454 grams) cream cheese, softened
- 1 1/2 cups graham cracker crumbs
- 1 cup semi-sweet chocolate chips
- 1/2 cup heavy cream
Base and Binding Ingredients:
- 1/2 cup unsalted butter, melted
- 1/2 cup unsalted butter, softened
- 1/2 cup shredded coconut
- 1/4 cup cocoa powder
- 1/4 cup granulated sugar
- 1 cup powdered sugar
Flavor Enhancers:
- 2 teaspoons vanilla extract
Instructions
- Craft a robust base by mixing graham cracker crumbs, shredded coconut, cocoa powder, melted butter, and sugar into a cohesive texture. Firmly press the crumbly mixture across the bottom of a greased 9-inch springform pan, ensuring an even, compact layer. Refrigerate for 15 minutes to set the foundation.
- Whip cream cheese, powdered sugar, butter, and vanilla extract until achieving a silky, uniform consistency. Gently spread the creamy mixture over the chilled crust, creating a smooth, even layer. Return to refrigerator and allow to set for 1 hour.
- Warm heavy cream until steaming but not boiling. Pour the heated cream over chocolate chips and allow to rest for 5 minutes. Stir methodically until the mixture transforms into a glossy, uniform ganache. Carefully drizzle and spread the ganache across the cheesecake surface, ensuring complete and even coverage.
- Refrigerate the assembled dessert for a minimum of 4 hours, preferably overnight, to allow flavors to meld and texture to firm. When ready to serve, carefully release from springform pan, slice into elegant portions, and present chilled.
Notes
- Swap graham crackers with gluten-free alternatives like almond flour or gluten-free cookie crumbs for a celiac-friendly version.
- Adjust sweetness by reducing powdered sugar or using natural sweeteners like stevia for a lower-calorie dessert.
- Enhance coconut flavor by toasting shredded coconut before mixing into the crust for a deeper, nuttier taste.
- Create elegant garnish by sprinkling extra toasted coconut or chocolate shavings on top before serving.
- Prep Time: 20 minutes
- Cook Time: 0 minutes
- Category: Desserts
- Method: Chilling
- Cuisine: Canadian
Nutrition
- Serving Size: 9
- Calories: 381 kcal
- Sugar: 26 g
- Sodium: 98 mg
- Fat: 29 g
- Saturated Fat: 18 g
- Unsaturated Fat: 9 g
- Trans Fat: 0.3 g
- Carbohydrates: 31 g
- Fiber: 2 g
- Protein: 4 g
- Cholesterol: 70 mg
Natalie Brooks
Co-Founder & Content Strategist
Expertise
Education
eCornell
Natalie brings the vibrant, plant-powered side to Culinary Duo. After earning her Plant-Based Nutrition Certificate from eCornell, she combined her love for fresh ingredients with a passion for storytelling, aiming to make healthy cooking simple and satisfying.
Her kitchen motto: good food doesn’t need a fancy label, it just needs fresh ideas and a little creativity. Outside of writing and recipe testing, Natalie’s happiest in her garden, exploring farmers’ markets, or mixing global flavors into new kitchen experiments.