The Perfect No-Bake Turtle Mini Cheesecakes Recipe for Dessert Lovers
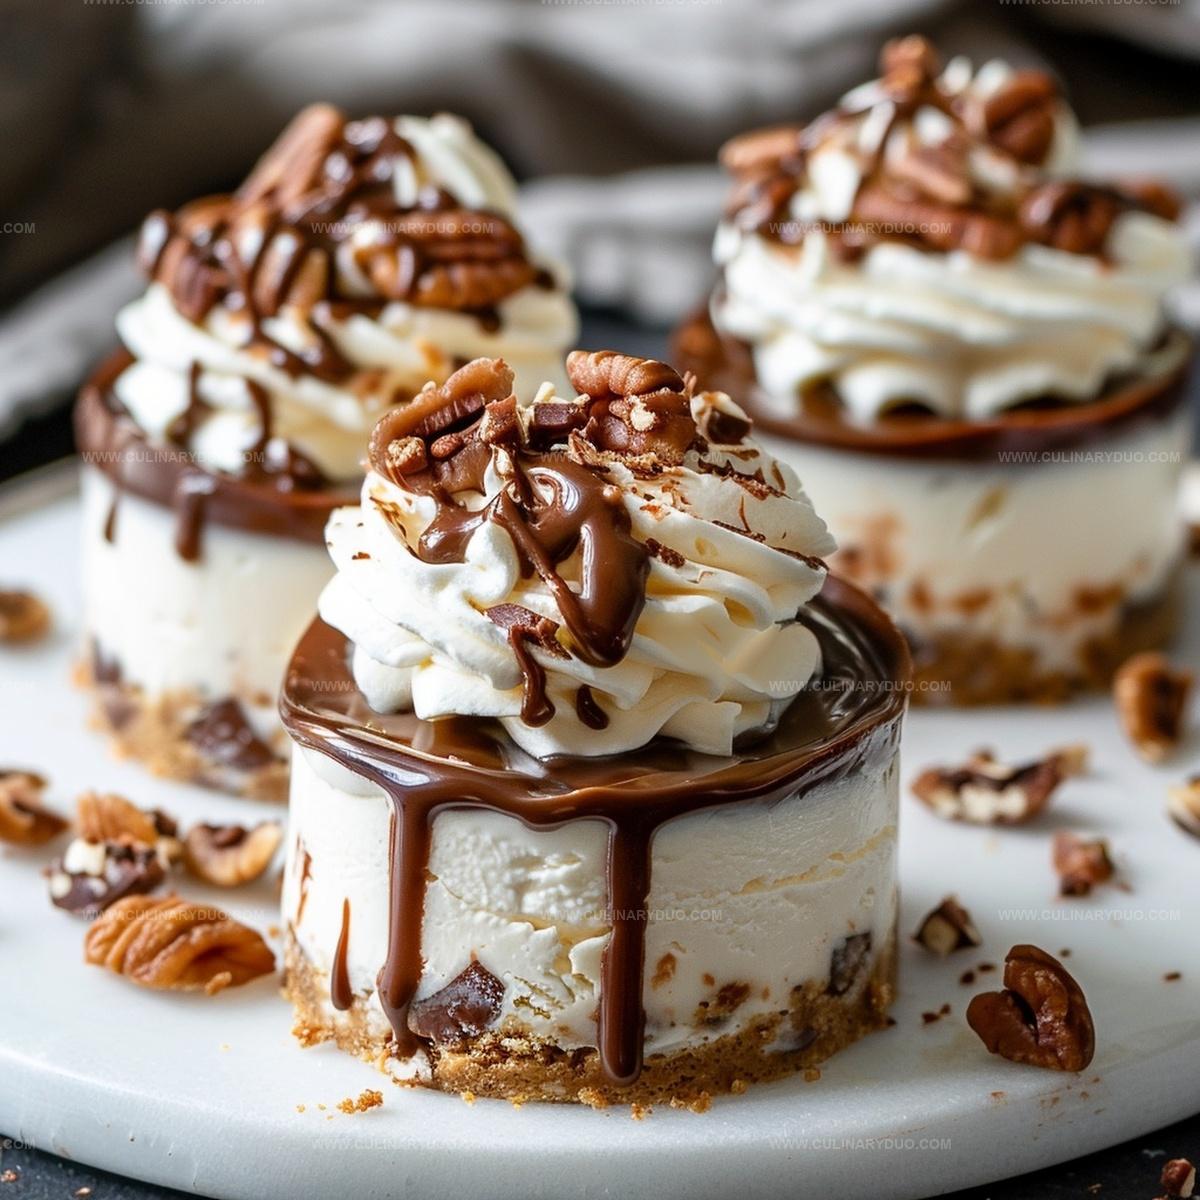
Creamy no-bake turtle mini cheesecakes deliver pure dessert magic right to your plate.
Caramel, chocolate, and pecans create an irresistible flavor combination that melts in your mouth.
Delicate graham cracker crusts provide the perfect foundation for these miniature treats.
Decadent layers showcase rich textures that promise indulgence with every single bite.
Smooth cream cheese filling blends seamlessly with sweet drizzles of silky caramel.
Nutty pecan accents add delightful crunch and depth to each petite cheesecake.
You won’t believe how simple these elegant desserts are to assemble.
Grab a fork and let the deliciousness begin!
No-Bake Turtle Mini Cheesecakes Overview
Ingredients for No-Bake Turtle Mini Cheesecakes
Crust Ingredients:Cheesecake Filling:Toppings and Garnishes:Preparation Steps for Turtle Mini Cheesecakes
Step 1: Prepare Crumbly Crust
Mix graham cracker crumbs, sugar, and melted butter in a bowl until the texture feels like damp beach sand.
The mixture should hold together when pressed.
Step 2: Shape Crust Bases
Press the crumb mixture firmly into paper-lined muffin tin cavities, creating an even layer at the bottom of each cup.
Ensure the crust is compact and smooth.
Step 3: Chill Crust Foundation
Place the muffin tin with crust into the refrigerator to set while preparing the filling.
This helps create a sturdy base for the cheesecake.
Step 4: Whip Creamy Cheesecake Filling
Beat cream cheese, sugar, and vanilla extract in a large bowl until the mixture becomes silky and completely smooth.
Use an electric mixer for best results.
Step 5: Fold in Fluffy Cream
Gently incorporate whipped heavy cream into the cream cheese mixture, being careful to maintain the light, airy texture without deflating the mixture.
Step 6: Fill Cheesecake Cups
Carefully spoon the creamy filling into each muffin cup, distributing evenly and leaving a small space at the top.
Step 7: Add Nutty Crunch
Sprinkle chopped pecans generously over the top of each filled cheesecake cup.
Step 8: Drizzle Caramel Goodness
Pour caramel sauce over the pecan-topped cheesecakes, creating a beautiful golden swirl.
Step 9: Create Chocolate Drizzle
Melt chocolate chips in short microwave intervals, stirring between each heating, until perfectly smooth and glossy.
Step 10: Chocolate Finish
Drizzle melted chocolate over the caramel sauce, creating an elegant crisscross pattern.
Step 11: Chill and Set
Refrigerate the cheesecakes for at least two hours, allowing them to firm up completely.
Step 12: Remove and Garnish
Carefully remove cheesecakes from the muffin tin, peeling off paper liners.
Step 13: Final Touch
Top with whipped cream, additional caramel sauce, and a sprinkle of chopped pecans just before serving.
Step 14: Serve and Celebrate
Present these decadent mini cheesecakes and watch everyone’s eyes light up with delight!
Pro Tips for No-Bake Turtle Mini Cheesecakes
Variations for Turtle Mini Cheesecakes
Serving Suggestions for No-Bake Turtle Mini Cheesecakes
Storage Advice for Turtle Mini Cheesecakes
FAQs
Yes, you can substitute pecans with walnuts or almonds for a similar crunchy texture and nutty flavor.
You’ll need a muffin tin, paper liners, and a mixing bowl. A hand mixer or stand mixer helps, but you can also mix by hand with a bit more effort.
They’ll stay delicious for 3-4 days when stored in an airtight container in the refrigerator. Just keep them chilled to maintain their creamy texture.
Not at all. Using paper liners makes it easy to lift them out without damaging the delicate cheesecake surface.
Print
No-Bake Turtle Mini Cheesecakes Recipe
- Total Time: 2 hours 30 minutes
- Yield: 12 1x
Description
Indulgent No-Bake Turtle Mini Cheesecakes blend creamy richness with caramel and chocolate decadence. Chocolate graham cracker crusts cradle silky cheesecake layers, promising a delightful dessert that melts in your mouth and satisfies sweet cravings.
Ingredients
Cheesecake Base:
- 1 cup graham cracker crumbs
- 2 tablespoons granulated sugar
- 4 tablespoons (1/4 cup or 56 grams) unsalted butter, melted
Cheesecake Filling:
- 8 ounces (226 grams) cream cheese, softened
- 1/4 cup (50 grams) granulated sugar
- 1 teaspoon vanilla extract
- 1 cup (240 milliliters) heavy cream, whipped to stiff peaks
Toppings and Garnish:
- 1/2 cup (60 grams) chopped pecans
- 1/4 cup (60 milliliters) caramel sauce, plus extra for drizzling
- 1/4 cup (45 grams) chocolate chips, melted
- 1 can of whipped cream or 2 cups (480 milliliters) heavy cream, whipped to stiff peaks
Instructions
- Craft a delectable base by blending graham cracker crumbs, sugar, and melted butter until the texture mimics damp sandy consistency.
- Distribute the crumbly mixture into paper-lined muffin tin compartments, ensuring an even, compact layer covering the bottom of each cup.
- Refrigerate the crust while preparing the creamy filling to help it set firmly.
- Whip cream cheese, sugar, and vanilla extract together until achieving a silky, lump-free texture with a luxurious sheen.
- Gently incorporate whipped heavy cream into the cream cheese mixture, maintaining its airy volume through delicate folding techniques.
- Extract chilled crust from refrigerator and meticulously fill each cavity with the velvety cheesecake mixture, reaching near the top rim.
- Smoothen the surface of each mini cheesecake using a flat utensil for a polished appearance.
- Generously scatter chopped pecans across the cream-filled surfaces, creating a delightful nutty layer.
- Drizzle rich caramel sauce over the pecan-covered cheesecakes, allowing it to cascade elegantly.
- Melt chocolate chips in microwave at 30-second intervals, stirring between each session until achieving a glossy, liquid consistency.
- Artfully stream melted chocolate over the caramel-coated mini cheesecakes.
- Chill in refrigerator for minimum 2 hours until completely set and firm.
- Carefully extract mini cheesecakes from tin, peeling away paper liners.
- Crown each cheesecake with fluffy whipped cream for an extra indulgent touch.
- Optional: Embellish with additional caramel drizzle and pecan sprinkles before serving.
- Savor the decadent, multi-layered dessert experience.
Notes
- Chill the muffin tin with the crust for at least 15 minutes to ensure a firm, crisp base that won’t crumble when removing the cheesecakes.
- Use room temperature cream cheese to prevent lumps and achieve a smooth, creamy filling that blends seamlessly.
- Gently fold the whipped cream into the cream cheese mixture to maintain its light, airy texture and prevent deflation.
- For a gluten-free version, swap graham cracker crumbs with almond flour or gluten-free cookie crumbs, ensuring everyone can enjoy this decadent dessert.
- Prep Time: 30 minutes
- Cook Time: 2 hours
- Category: Desserts
- Method: Chilling
- Cuisine: American
Nutrition
- Serving Size: 12
- Calories: 210 kcal
- Sugar: 15 g
- Sodium: 90 mg
- Fat: 17 g
- Saturated Fat: 7 g
- Unsaturated Fat: 8 g
- Trans Fat: 0.2 g
- Carbohydrates: 14 g
- Fiber: 1 g
- Protein: 3 g
- Cholesterol: 45 mg
Natalie Brooks
Co-Founder & Content Strategist
Expertise
Education
eCornell
Natalie brings the vibrant, plant-powered side to Culinary Duo. After earning her Plant-Based Nutrition Certificate from eCornell, she combined her love for fresh ingredients with a passion for storytelling, aiming to make healthy cooking simple and satisfying.
Her kitchen motto: good food doesn’t need a fancy label, it just needs fresh ideas and a little creativity. Outside of writing and recipe testing, Natalie’s happiest in her garden, exploring farmers’ markets, or mixing global flavors into new kitchen experiments.