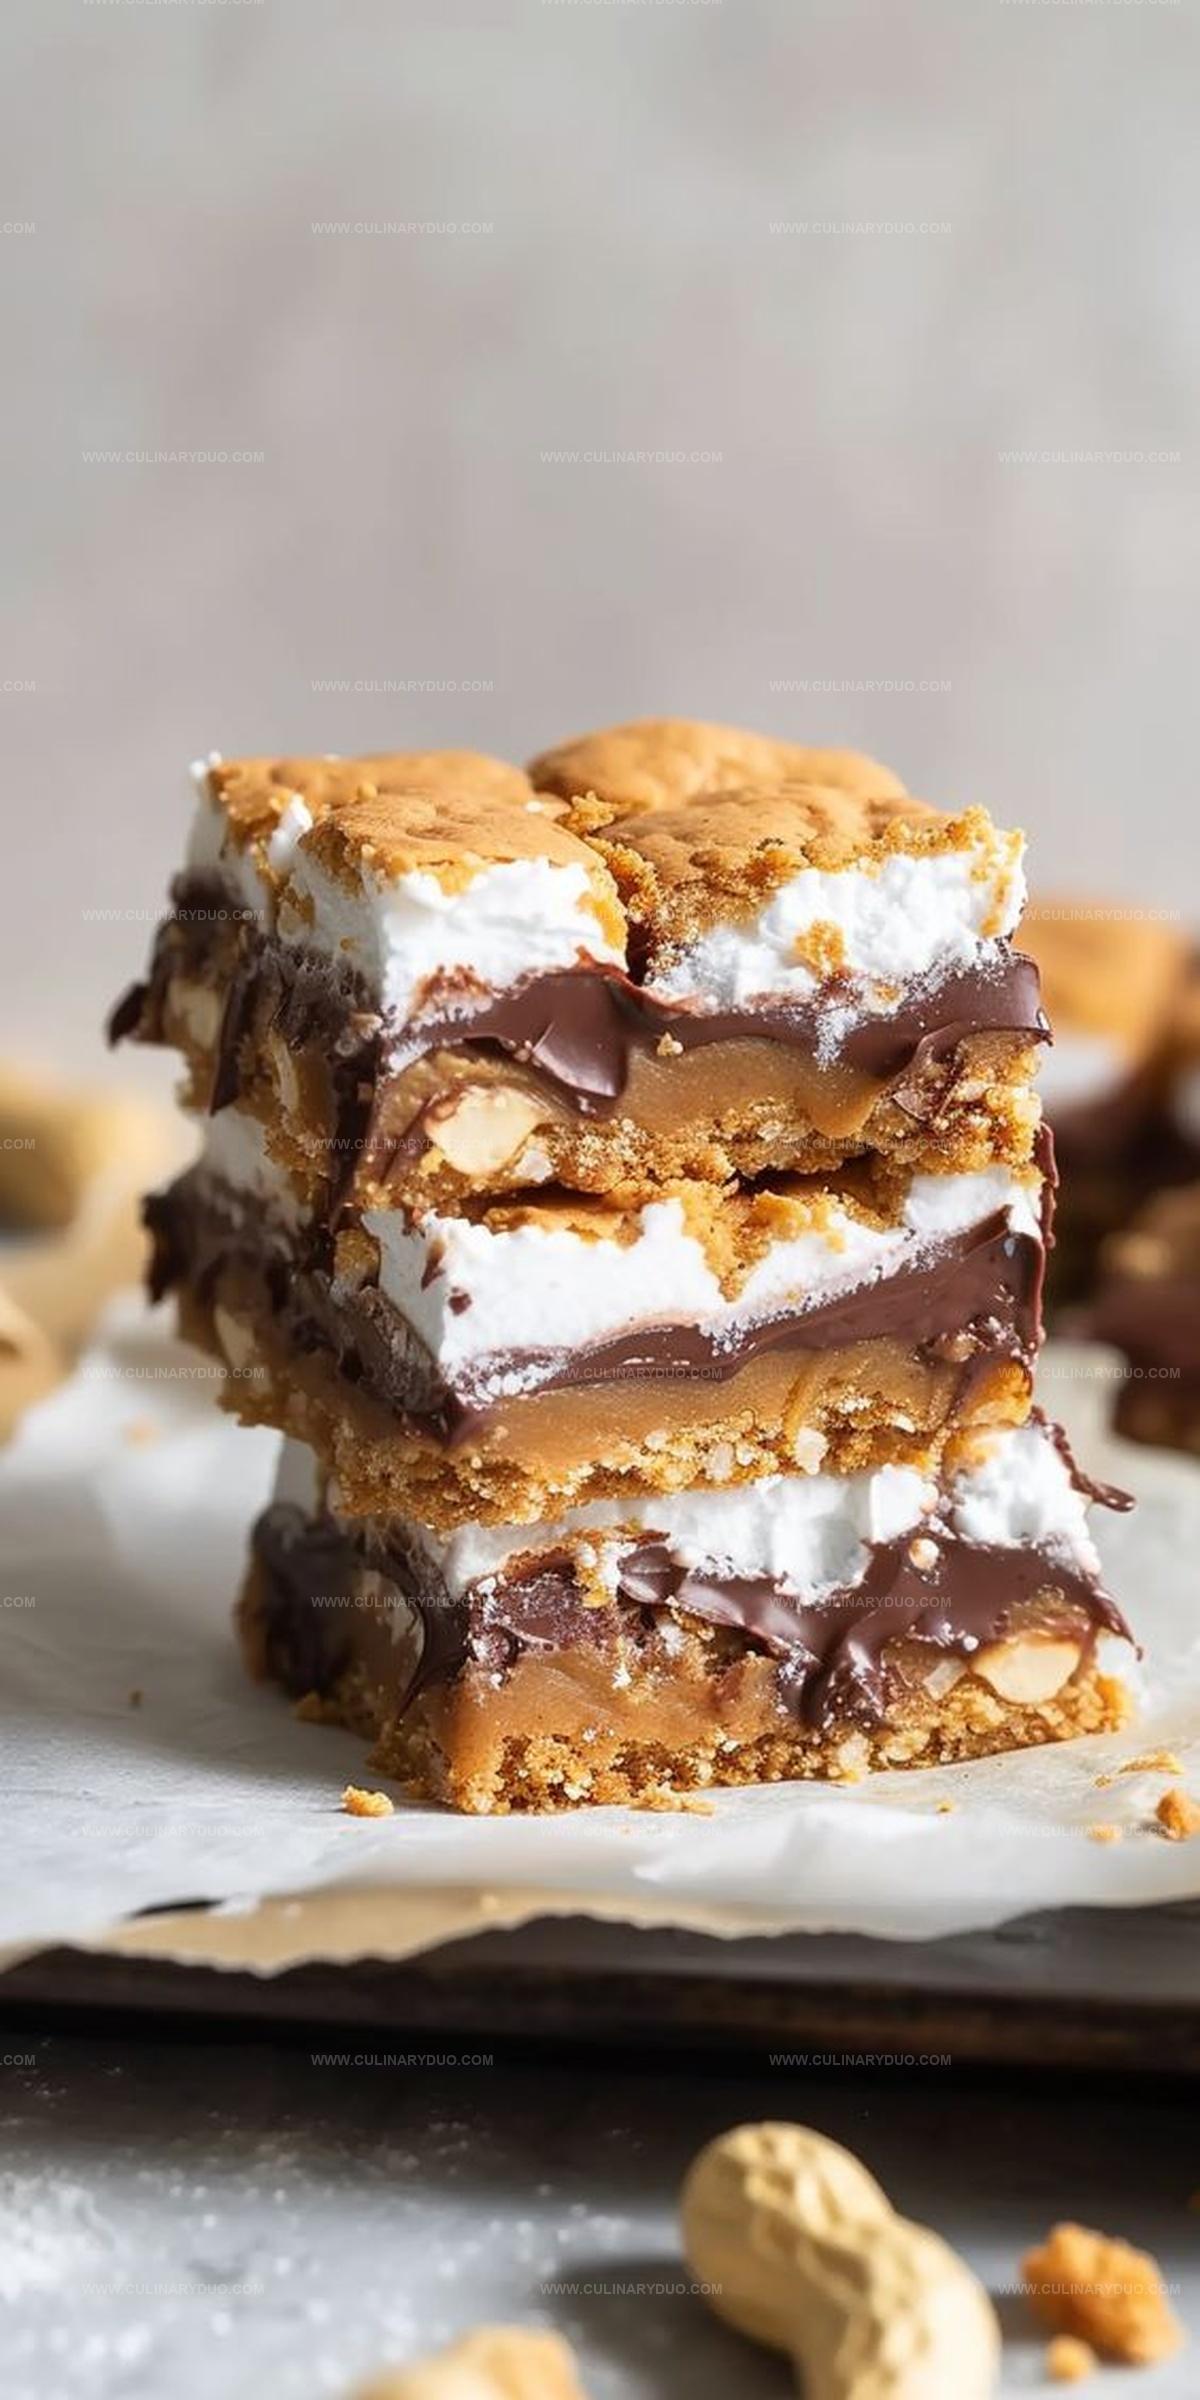
The Gooey Peanut Butter Smores Bars Recipe You Can’t Resist
Sweet memories of campfire nights collide with a delightful peanut butter s’mores bars twist that will make you smile.
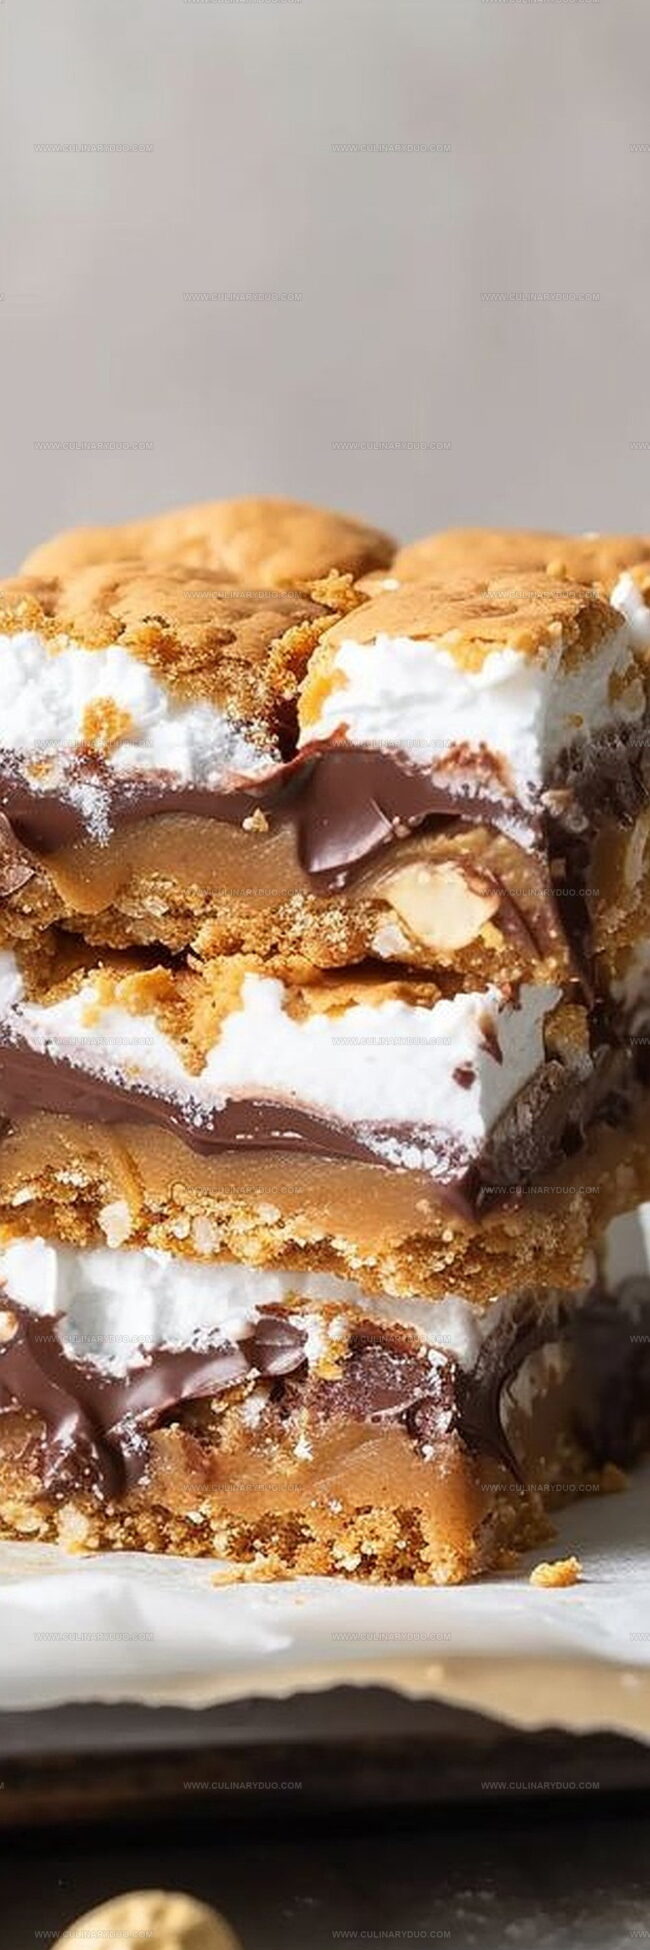
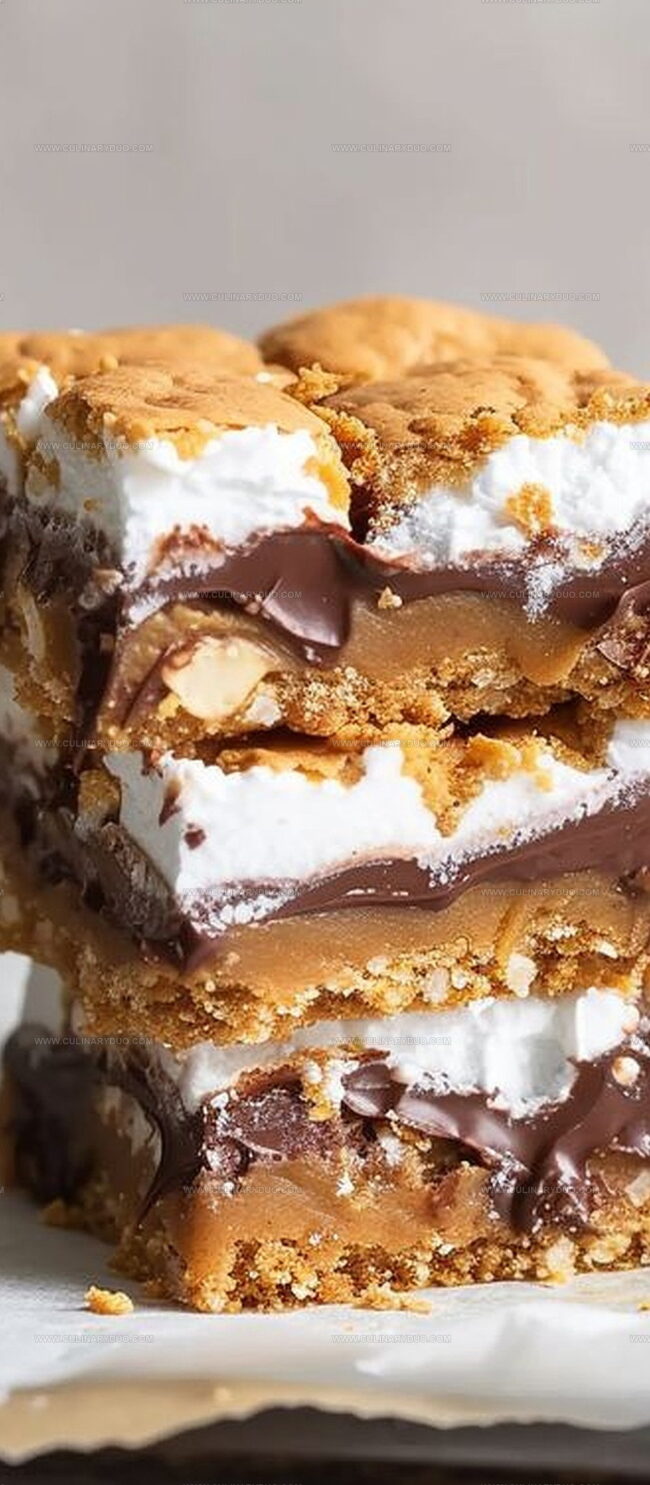
Graham cracker layers cradle rich chocolate and creamy peanut butter in a no-bake dessert.
Marshmallow fluff adds dreamy texture to this simple treat.
Summer nostalgia meets kitchen creativity with minimal effort and maximum flavor.
Kids and adults alike will adore these decadent squares that require zero baking skills.
Melted chocolate and gooey marshmallow create an irresistible combination you cannot resist.
Whip up these bars and watch everyone’s eyes light with pure dessert excitement.
Peanut Butter S’mores Bars Highlights
Ingredients for Peanut Butter S’mores Bars
Base Layer:Filling Ingredients:Topping Ingredients:Quick Prep for S’mores Bars
Step 1: Prepare Baking Setup
Warm your oven to 350°F.
Grab a 9×13-inch pan and line it completely with parchment paper, ensuring edges are covered for easy removal later.
Step 2: Create Crumbly Graham Crust
Mix graham cracker crumbs with melted butter until they stick together.
Press the mixture firmly and evenly across the entire pan bottom, creating a solid foundation for your delicious bars.
Step 3: Spread Creamy Peanut Butter Layer
Generously spread a smooth, even layer of peanut butter across the graham cracker base, covering every inch with rich, nutty goodness.
Step 4: Add Fluffy Marshmallow Cream
Dollop marshmallow cream over the peanut butter layer.
Gently spread it around, creating a soft, pillowy surface that will make these bars irresistible.
Step 5: Craft Silky Chocolate Ganache
Heat heavy cream in a saucepan until tiny bubbles form around the edges.
Remove from heat and pour over chocolate chips.
Let sit for one minute, then stir until:Step 6: Pour Chocolate Ganache
Drizzle the velvety chocolate ganache over the marshmallow layer.
Use a spatula to spread it evenly, ensuring complete coverage.
Step 7: Add Toasty Marshmallow Topping
Sprinkle mini marshmallows across the top.
For extra indulgence, use a kitchen torch to lightly golden the marshmallows, creating a campfire-like finish.
Step 8: Chill and Set
Place the pan in the refrigerator for at least 2 hours.
The bars need time to firm up and develop their incredible layered texture.
Once set, slice into perfect squares and enjoy!
Pro Tips for Perfect S’mores Bars
Variations to Spice Up S’mores Bars
Serving Suggestions for Peanut Butter S’mores Bars
How to Store Peanut Butter S’mores Bars
FAQs
Yes, you can substitute peanut butter with almond butter, cashew butter, or sunflower seed butter for a different flavor profile.
No, you can achieve a golden color by placing the pan under the broiler for 1-2 minutes, watching carefully to prevent burning.
Use a sharp knife and wipe it clean with a warm, damp cloth between each cut to ensure smooth, precise edges.
Absolutely! These bars can be prepared a day in advance and stored in the refrigerator, making them perfect for parties and gatherings.
Print
Peanut Butter Smores Bars Recipe
- Total Time: 30 minutes
- Yield: 12 1x
Description
Indulgent peanut butter s’mores bars blend campfire nostalgia with gooey graham cracker goodness. Rich chocolate and marshmallow layers create a mouthwatering dessert that brings sweet memories closer with each delectable bite you’ll savor.
Ingredients
Chocolate and Peanut Butter Layer:
- 2 cups chocolate chips
- 1 cup peanut butter
- 1/2 cup heavy cream
Crust Base:
- 2 cups graham cracker crumbs
- 1/2 cup unsalted butter (melted)
Marshmallow Topping:
- 1 cup marshmallow cream
- Additional mini marshmallows for topping
Instructions
- Preheat the oven to 350°F and prepare a 9×13-inch pan with parchment paper, ensuring complete coverage for easy removal.
- Create the graham cracker crust by mixing crumbs with melted butter, then press firmly and evenly across the entire pan bottom to form a compact base.
- Carefully spread a uniform layer of peanut butter over the graham cracker foundation, covering every inch of the surface.
- Drop spoonfuls of marshmallow cream strategically across the peanut butter layer, then gently smooth into a consistent covering.
- Heat heavy cream in a saucepan until small bubbles form around the edges, then immediately pour over chocolate chips, allowing them to melt naturally before whisking into a silky ganache.
- Cascade the glossy chocolate ganache over the marshmallow layer, tilting the pan to ensure complete and even distribution.
- Scatter mini marshmallows across the top, optionally using a kitchen torch to caramelize them to a golden-brown finish.
- Chill the assembled bars in the refrigerator for a minimum of 2 hours, allowing all layers to set completely before slicing into neat squares.
Notes
- Swap graham crackers for gluten-free alternatives to make the recipe celiac-friendly and accommodate dietary restrictions.
- Try different nut butters like almond or cashew for unique flavor variations and personalized taste profiles.
- Use a kitchen torch carefully when browning marshmallows to achieve perfect caramelization without burning the topping.
- Ensure ganache is smooth by stirring chocolate and cream gently and consistently, preventing potential graininess in the final texture.
- Prep Time: 20 minutes
- Cook Time: 10 minutes
- Category: Snacks, Desserts
- Method: Baking
- Cuisine: American
Nutrition
- Serving Size: 12
- Calories: 293 kcal
- Sugar: 22 g
- Sodium: 102 mg
- Fat: 21 g
- Saturated Fat: 8 g
- Unsaturated Fat: 12 g
- Trans Fat: 0.2 g
- Carbohydrates: 25 g
- Fiber: 2 g
- Protein: 6 g
- Cholesterol: 18 mg
Natalie Brooks
Co-Founder & Content Strategist
Expertise
Education
eCornell
Natalie brings the vibrant, plant-powered side to Culinary Duo. After earning her Plant-Based Nutrition Certificate from eCornell, she combined her love for fresh ingredients with a passion for storytelling, aiming to make healthy cooking simple and satisfying.
Her kitchen motto: good food doesn’t need a fancy label, it just needs fresh ideas and a little creativity. Outside of writing and recipe testing, Natalie’s happiest in her garden, exploring farmers’ markets, or mixing global flavors into new kitchen experiments.