
Dreamy Strawberry Cheesecake Dump Cake Recipe For Sweet Cravings
Decadent desserts can surprise us with their simplicity, especially when a strawberry cheesecake dump cake recipe lands on our kitchen counter.
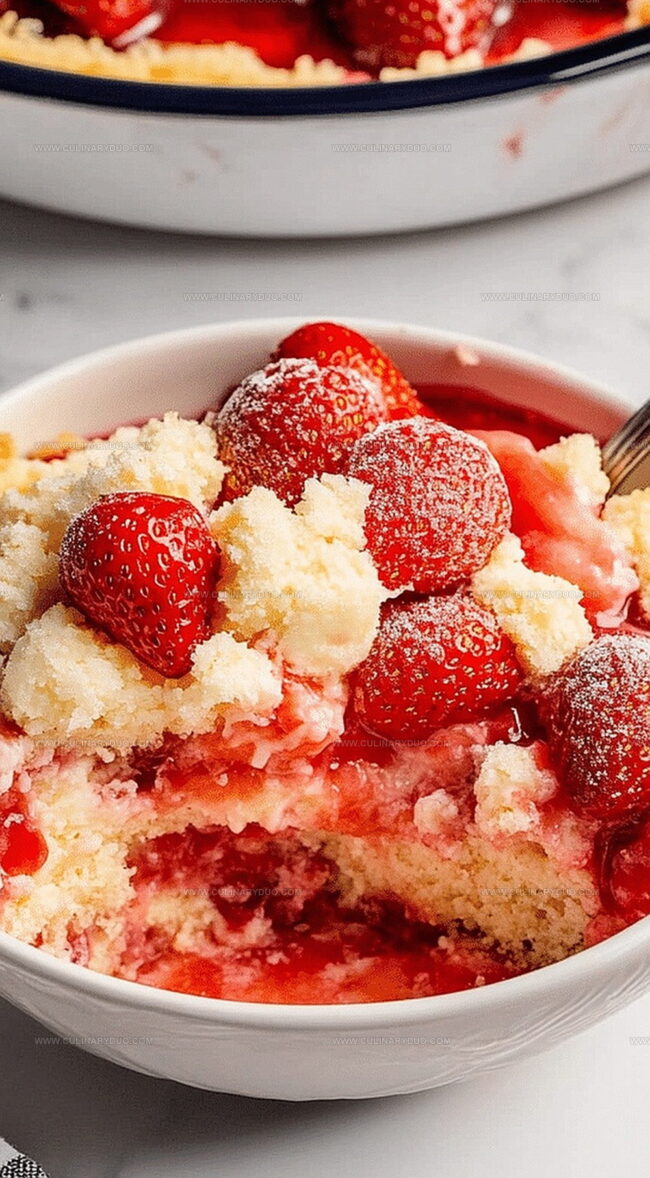
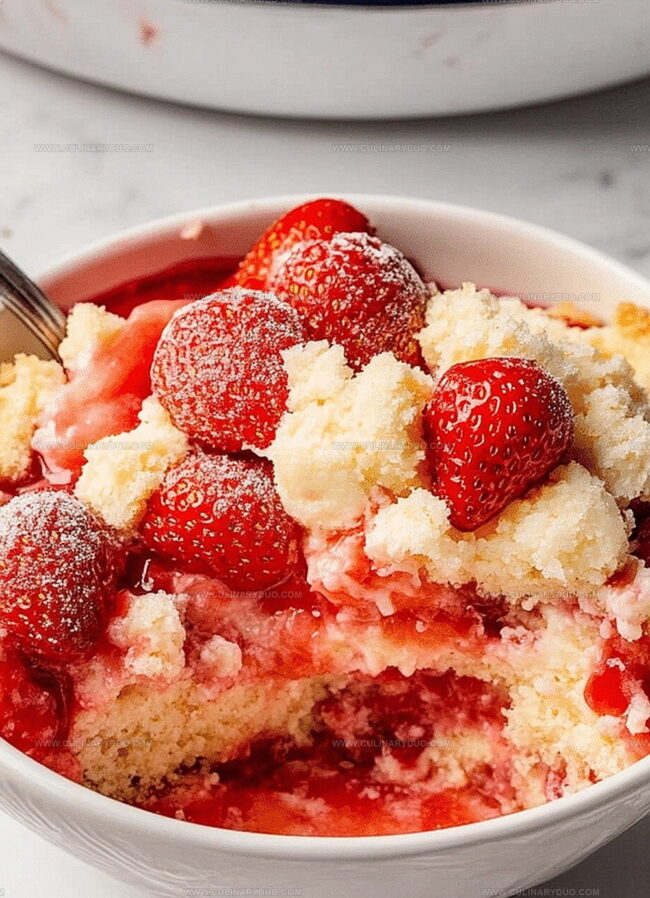
This delightful treat combines the creamy richness of cheesecake with the rustic charm of a classic dump cake.
Layers of sweet strawberries mingle with soft cream cheese and tender cake crumbs, creating a mouthwatering symphony of flavors.
Each spoonful promises a delectable journey through textures and tastes that dance on your palate.
The magic happens with minimal effort, making this dessert a go-to for busy home bakers seeking something extraordinary.
Chocolate lovers and fruit dessert enthusiasts will both fall in love with this effortless creation that feels like a bakery-worthy indulgence.
What Makes Cheesecake Dump Cake Irresistible
Ingredients for Strawberry Dump Cake
Base Layer:Creamy Layer:Topping Layer:Easy Steps to Cheesecake Dump Cake
Step 1: Warm Up the Oven
Fire up your oven to a toasty 350°F and lovingly coat a 9×13-inch baking dish with a light butter or cooking spray layer.
Step 2: Create the Fruity Foundation
Generously spread the vibrant strawberry pie filling across the bottom of the baking dish, creating a luscious crimson base.
Step 3: Whip Up the Creamy Dream
In a mixing bowl, blend together:Whisk these ingredients until they transform into a silky, smooth mixture with no lumps.
Step 4: Layer the Creamy Clouds
Gently spoon dollops of the cream cheese mixture over the strawberry filling, creating a dreamy landscape of white peaks.
Step 5: Dust with Cake Magic
Evenly cascade the dry cake mix over the cream cheese layer, covering it completely like a soft blanket of sweetness.
Step 6: Drench in Liquid Gold
Drizzle melted butter and milk across the cake mix, allowing it to seep into every delicious crevice.
Do not mix or stir the layers.
Step 7: Bake to Perfection
Slide the dish into the preheated oven and bake for 40-45 minutes.
Watch for a golden-brown top that bubbles with tempting promise.
Step 8: Cool and Celebrate
Allow the cake to rest and cool slightly.
Serve warm for a gooey treat or chill for a refreshing dessert that will make taste buds dance.
Tips for a Creamy Dump Cake
Strawberry Dump Cake Recipe Twists
How to Serve Dump Cake Right
Dump Cake Storage for Later
FAQs
Unlike traditional cheesecake, this recipe requires minimal preparation and uses cake mix for a quick, easy dessert that combines cheesecake and cake textures in one pan.
Fresh or frozen strawberries won’t work as well. Strawberry pie filling provides the right consistency and sweetness needed for this recipe to set properly and maintain the right moisture level.
No, the beauty of a dump cake is layering ingredients without stirring. Each layer stays distinct, creating a unique texture and flavor combination when baked.
Print
Strawberry Cheesecake Dump Cake Recipe
- Total Time: 1 hour
- Yield: 8 1x
Description
Sweet strawberry cheesecake dump cake blends creamy indulgence with rustic charm. Layers of tangy cream cheese, ripe strawberries, and buttery cake crumble create a dessert that instantly transports you to dessert paradise.
Ingredients
Main Ingredients:
- 1 box (15.25 ounces) vanilla or yellow cake mix
- 1 can (21 ounces) strawberry pie filling
- 1 package (8 ounces) cream cheese, softened
Dairy and Binding Ingredients:
- 1/2 cup unsalted butter, melted
- 1/2 cup milk
- 1/2 cup granulated sugar
Seasoning and Flavoring:
- 1 teaspoon vanilla extract
- 1/2 teaspoon salt
Instructions
- Warm the oven to 350°F and coat a rectangular baking pan with a light layer of cooking spray.
- Create an even base layer of vibrant strawberry pie filling across the entire dish bottom.
- Blend cream cheese with granulated sweetener and aromatic vanilla until achieving a velvety, lump-free consistency.
- Gently distribute soft cream cheese mixture in random dollops across the strawberry foundation.
- Liberally dust the entire surface with powdery dry cake mix, ensuring complete coverage.
- Cascade melted butter and smooth milk across the powdered layer without disturbing the existing layers.
- Transfer to heated oven and bake approximately 40-45 minutes until surface transforms into a golden, effervescent crust.
- Remove from oven and allow dessert to rest and slightly cool for 10-15 minutes, permitting flavors to meld and settle.
- Serve immediately while warm or refrigerate for a chilled version of this delectable treat.
Notes
- Cream cheese layer works best when ingredients are at room temperature, ensuring smooth and lump-free mixing.
- Create dairy-free version by substituting cream cheese with coconut cream or vegan cream cheese alternatives.
- Elevate presentation by garnishing with fresh strawberry slices or whipped cream before serving for extra visual appeal.
- Reduce sweetness by using sugar-free pie filling and cutting down on added sugar in cream cheese mixture.
- Prep Time: 15 minutes
- Cook Time: 45 minutes
- Category: Desserts
- Method: Baking
- Cuisine: American
Nutrition
- Serving Size: 8
- Calories: 428 kcal
- Sugar: 44 g
- Sodium: 345 mg
- Fat: 22 g
- Saturated Fat: 13 g
- Unsaturated Fat: 8 g
- Trans Fat: 0.5 g
- Carbohydrates: 52 g
- Fiber: 1 g
- Protein: 4 g
- Cholesterol: 45 mg
Natalie Brooks
Co-Founder & Content Strategist
Expertise
Education
eCornell
Natalie brings the vibrant, plant-powered side to Culinary Duo. After earning her Plant-Based Nutrition Certificate from eCornell, she combined her love for fresh ingredients with a passion for storytelling, aiming to make healthy cooking simple and satisfying.
Her kitchen motto: good food doesn’t need a fancy label, it just needs fresh ideas and a little creativity. Outside of writing and recipe testing, Natalie’s happiest in her garden, exploring farmers’ markets, or mixing global flavors into new kitchen experiments.