
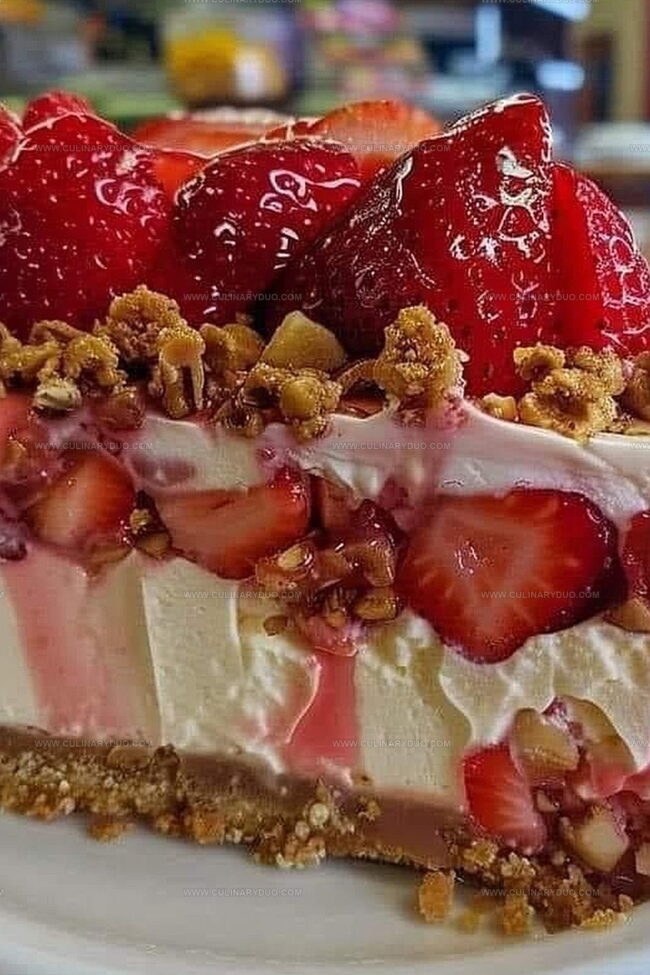
Tangy No-Bake Strawberry Crunch Cheesecake Recipe for Summer
Summer’s sweetest sensation, this no-bake strawberry crunch cheesecake promises pure delight.
Cool layers of creamy goodness meld perfectly with a crisp graham cracker base.
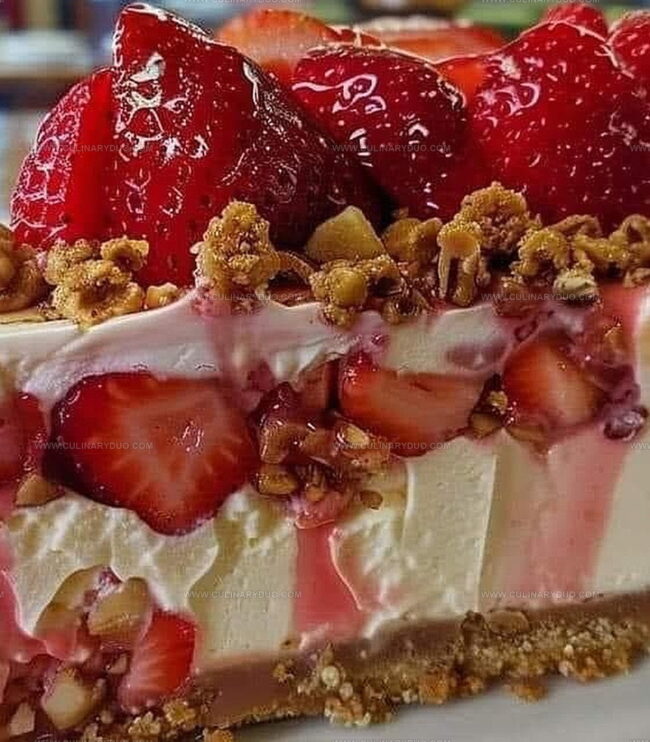
Ripe strawberries dance through each luscious bite, creating a dessert that screams warm-weather indulgence.
The recipe combines simple ingredients with minimal effort, making it a breeze to whip up for any occasion.
Crunchy and smooth textures intertwine in a dessert that feels like a celebration of sunshine.
Each slice offers a refreshing escape from traditional heavy desserts.
No-Bake Strawberry Crunch Cheesecake: Here’s Why
Stock Up For No-Bake Strawberry Crunch
Crust Base:Filling Ingredients:Topping and Garnish:Assemble Your Strawberry Crunch Cheesecake Fast
Step 1: Craft the Crunchy Base
Grab your food processor and pulse vanilla cream cookies until they transform into fine, sandy crumbs.
Drizzle melted butter over the crumbs and mix until they stick together perfectly.
Press this buttery mixture firmly into the bottom of a greased springform pan, creating an even, compact layer.
Pop the pan into the freezer for a quick 15-minute chill.
Step 2: Prepare the Strawberry Jello
Dissolve strawberry Jello in boiling water, stirring until completely smooth.
Let the mixture cool down to room temperature, but don’t refrigerate – you want it just right for mixing.
Step 3: Whip Up the Cream Cheese Filling
In a large mixing bowl, beat cream cheese and granulated sugar until the mixture becomes silky and free of lumps.
In a separate bowl, whip heavy cream with powdered sugar until it forms stiff, billowy peaks.
Step 4: Combine the Creamy Layers
Gently fold the whipped cream into the cream cheese mixture in two careful stages.
Then softly incorporate the cooled strawberry Jello, creating a dreamy, light-pink filling.
Step 5: Layer the Cheesecake
Pour half of the whipped cream mixture over the chilled crust.
Follow with half of the strawberry Jello mixture, creating beautiful swirled layers.
Freeze for 15 minutes to help set the first layer.
Step 6: Add the Final Layers
Top the first layer with the remaining cream cheese mixture, then finish with the remaining strawberry mixture.
The layers should look beautifully marbled.
Step 7: Create the Crunchy Topping
Crush the remaining vanilla cream cookies and strawberry wafers into rustic, uneven pieces.
If you want a more vibrant color, add a touch of pink food coloring to the crumbs.
Step 8: Chill and Garnish
Sprinkle the crunchy cookie mixture generously over the top of the cheesecake.
Refrigerate for 4 hours to let all the flavors meld and the texture set perfectly.
Before serving, add swirls of whipped topping for an extra touch of decadence.
No-Bake Tips For A Crunchy Cheesecake
Try Fun Spins On Strawberry Crunch Cheesecake
Serve No-Bake Crunch Cheesecake For Dessert
Store Strawberry Crunch Cheesecake The Right Way
FAQs
The key ingredients are vanilla cream cookies, cream cheese, heavy cream, strawberry Jello, granulated sugar, and strawberry wafers.
Yes, this is a no-bake cheesecake recipe that doesn’t require an oven, making it perfect for summer or for those without baking equipment.
The total preparation and chilling time is around 4-5 hours, with active preparation taking approximately 30-45 minutes.
Absolutely! This cheesecake can be prepared a day ahead and stored in the refrigerator, which makes it great for planning ahead for gatherings or events.
Print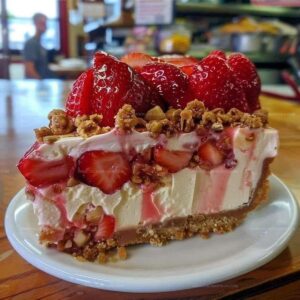
Strawberry Crunch Cheesecake Recipe
- Total Time: 4 hours 45 minutes
- Yield: 8 1x
Description
Creamy summer dream meets crisp strawberry crunch in this delightful no-bake cheesecake sensation. Sweet strawberries and graham cracker layers combine perfectly, promising a cool dessert that refreshes and delights you.
Ingredients
Crust Ingredients:
- 1 pound Vanilla Cream Cookies
- 6 tablespoons (90 milliliters) Butter
Filling Ingredients:
- 1 small box (3.3 ounces / 93 grams) Strawberry Jello
- 1 cup Boiling Water
- 16 ounces (454 grams) Cream Cheese
- 3/4 cup Granulated Sugar
- 2 cups Heavy Whipping Cream
- 1/2 cup Powdered Sugar
Topping Ingredients:
- 10 Strawberry Wafer Cookies
- Whipped Topping
Instructions
- Create a fine, uniform crumb mixture by pulverizing vanilla cream cookies and blending thoroughly with melted butter.
- Firmly compact the crumb base into a greased 10″ springform pan, ensuring an even layer, then chill in the freezer for 15 minutes to solidify.
- Prepare strawberry Jello by dissolving in boiling water, allowing it to cool to room temperature without refrigeration.
- Whip cream cheese and granulated sugar until achieving a silky, lump-free consistency.
- Craft a light whipped cream by beating heavy cream with powdered sugar until forming stiff, glossy peaks.
- Gently incorporate the whipped cream into the cream cheese mixture, then fold in the cooled strawberry Jello in two careful stages.
- Distribute half of the whipped cream mixture over the chilled crust, followed by a layer of half the strawberry Jello mixture.
- Freeze for 15 minutes to set initial layers, then add remaining cream cheese mixture and top with final strawberry layer.
- Transform remaining vanilla cream cookies and strawberry wafers into a coarse, textured crunch by crushing them thoroughly.
- Optional: Enhance the cookie crumble with a touch of pink food coloring for visual appeal.
- Generously scatter the crunchy cookie mixture across the cheesecake’s surface.
- Refrigerate for 4 hours to allow complete setting and flavor melding.
- Just before serving, embellish with delicate whipped cream swirls for an elegant finishing touch.
Notes
- Chill ingredients beforehand to ensure smooth, lump-free mixing and optimal texture for your no-bake cheesecake.
- Crush cookies finely and evenly to create a consistent, stable crust that holds together perfectly when sliced.
- Use room temperature cream cheese to prevent lumps and achieve a silky, creamy filling that blends seamlessly.
- Fold whipped cream gently into the mixture to maintain its light, airy texture and prevent deflation during mixing.
- Prep Time: 30 minutes
- Cook Time: 4 hours 15 minutes
- Category: Desserts
- Method: Blending
- Cuisine: American
Nutrition
- Serving Size: 8
- Calories: 323 kcal
- Sugar: 28 g
- Sodium: 190 mg
- Fat: 23 g
- Saturated Fat: 14 g
- Unsaturated Fat: 8 g
- Trans Fat: 0.5 g
- Carbohydrates: 26 g
- Fiber: 1 g
- Protein: 4 g
- Cholesterol: 70 mg
Natalie Brooks
Co-Founder & Content Strategist
Expertise
Education
eCornell
Natalie brings the vibrant, plant-powered side to Culinary Duo. After earning her Plant-Based Nutrition Certificate from eCornell, she combined her love for fresh ingredients with a passion for storytelling, aiming to make healthy cooking simple and satisfying.
Her kitchen motto: good food doesn’t need a fancy label, it just needs fresh ideas and a little creativity. Outside of writing and recipe testing, Natalie’s happiest in her garden, exploring farmers’ markets, or mixing global flavors into new kitchen experiments.