Fudgy Chocolate Brownie Cookies Recipe: 20-Minute Joy
Rich, decadent chocolate brownie cookies with a 20 minute preparation time tantalize taste buds and promise instant gratification.
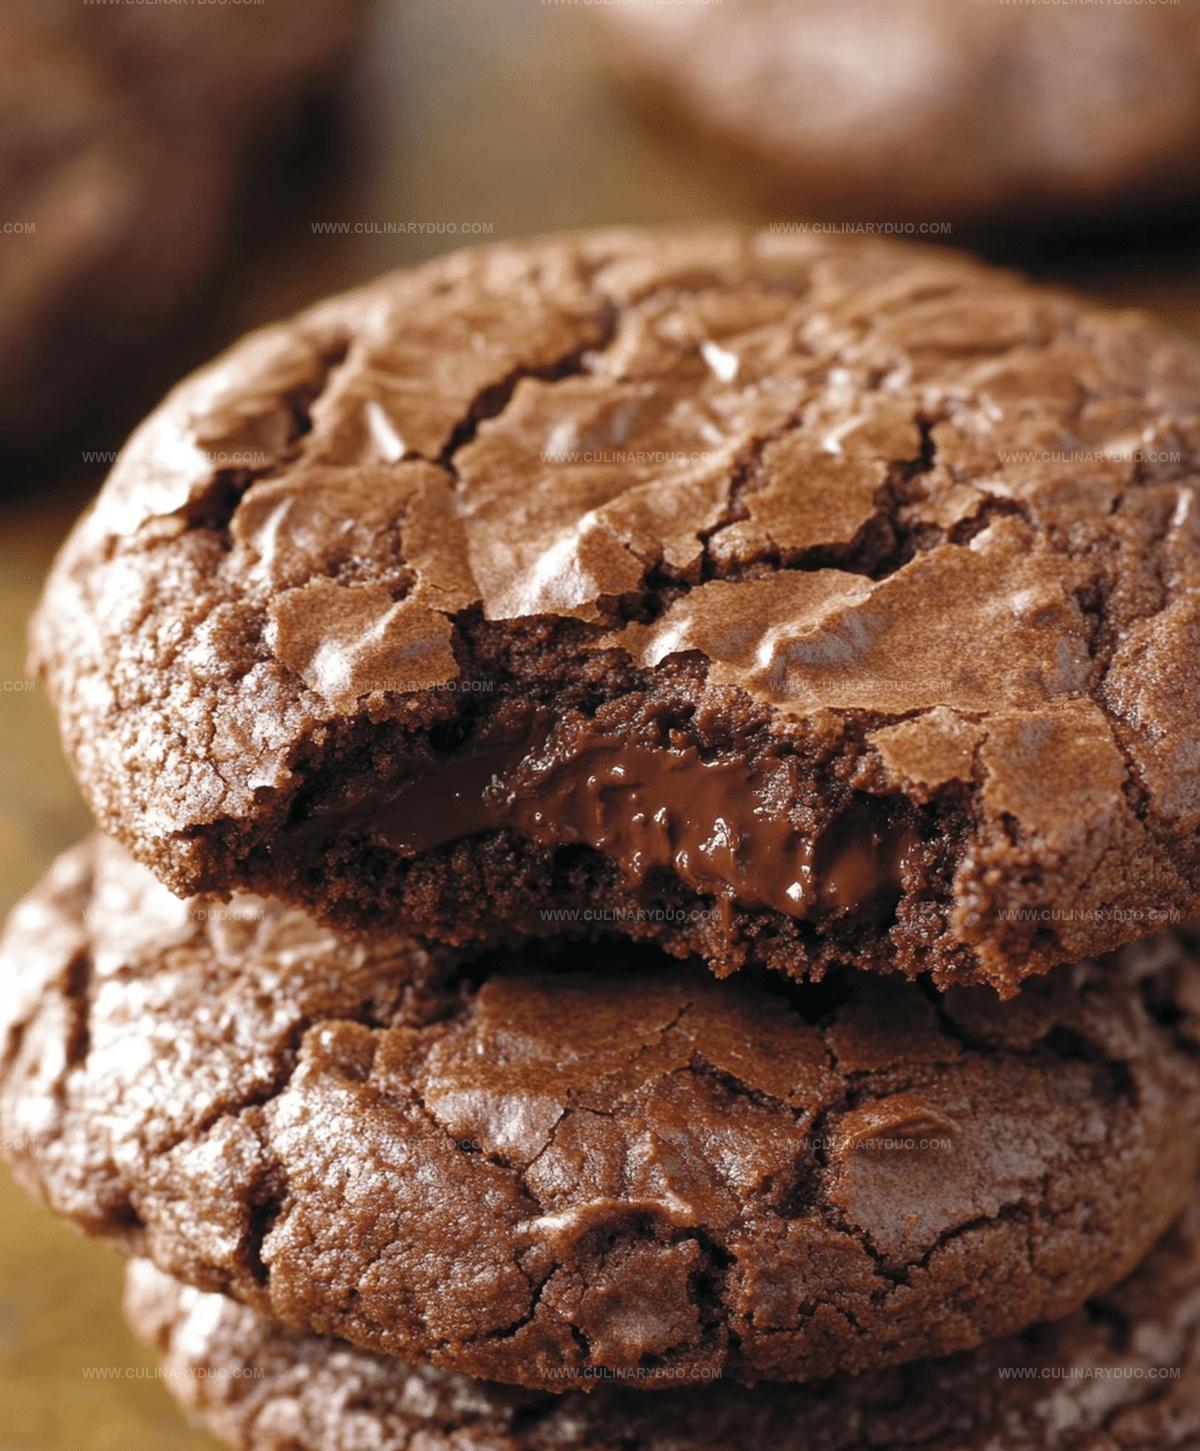
These irresistible treats blend the best of two dessert worlds into one spectacular bite.
Soft centers and crispy edges create a texture that melts in your mouth with intense chocolate flavor.
Minimal ingredients and quick steps make these cookies perfect for sudden sweet cravings.
Professional bakers and home cooks alike adore this simple yet impressive recipe.
The aroma of warm chocolate will fill your kitchen, drawing everyone to the cooling rack.
One batch of these cookies guarantees smiles and pure dessert joy.
Fudgy Brownie Cookies in 20 Minutes – Reasons to Bake
Must-Have Ingredients for Quick Cookies
Core Ingredients:Flavor Enhancers:Optional Add-Ins:Directions for Gooey Brownie Cookies
Step 1: Prepare Baking Station
Set oven to 350°F.
Cover baking sheet with parchment paper for smooth cookie release.
Ensure oven rack is centered for even baking.
Step 2: Create Silky Base
Whisk together:Mix until mixture becomes light and creamy with slight volume increase.
Step 3: Incorporate Chocolate Richness
Gently fold melted chocolate into egg mixture.
Stir carefully to create smooth, glossy texture without deflating initial egg mixture.
Step 4: Blend Dry Ingredients
Sift together dry components:Slowly incorporate into wet mixture, stirring until just combined to maintain tender cookie texture.
Step 5: Optional Chocolate Enhancement
Fold in extra chocolate chips for added decadence and melty pockets throughout cookies.
Step 6: Shape and Bake Cookies
Scoop rounded dollops of dough onto prepared baking sheet.
Space cookies slightly apart to allow spreading.
Step 7: Perfect Baking Technique
Bake for 8-10 minutes until cookie edges look set but centers remain slightly soft.
Cookies will continue firming as they cool.
Step 8: Cool and Serve
Allow cookies to rest on baking sheet for 2-3 minutes.
Transfer to wire cooling rack to prevent continued baking and achieve ideal chewy texture.
Cookie Tips for a Fudgy Finish
Brownie Cookie Twists and Additions
Fun Ways to Serve Fudgy Cookies
Cookie Storage Tips to Keep Them Fresh
FAQs
You can use either dark or milk chocolate based on your preference. Dark chocolate will create a richer, more intense flavor, while milk chocolate will make the cookies slightly sweeter.
No special equipment is needed. Just a regular mixing bowl, whisk, baking sheet, and parchment paper will work perfectly for this recipe.
The cookies are ready when the edges look set and slightly crisp, but the center remains soft and fudgy. They will continue to firm up as they cool on the baking sheet.
Print
20-Minute Fudgy Chocolate Brownie Cookies Recipe
- Total Time: 25 minutes
- Yield: 12 1x
Description
Delectable chocolate brownie cookies merge classic brownie richness with crisp cookie edges in mere minutes. Chocolate lovers savor this quick dessert that delivers intense flavor and irresistible texture you cannot resist.
Ingredients
Chocolate Ingredients:
- 1 cup (170 grams) semi-sweet chocolate chips, melted
- 1/2 cup (85 grams) chocolate chips
Wet Ingredients:
- 2 large eggs
- 3/4 cup (150 grams) granulated sugar
Dry Ingredients:
- 1/2 cup (60 grams) all-purpose flour
- 1/4 cup (25 grams) cocoa powder
- 1/4 teaspoon baking powder
- 1/4 teaspoon salt
Instructions
- Prepare the baking workspace by lining a sheet with parchment paper and heating the oven to 350°F.
- Vigorously whisk eggs and sugar in a mixing bowl until the mixture transforms into a light, creamy consistency.
- Incorporate melted chocolate into the egg mixture, stirring until achieving a uniform, glossy texture.
- Gently sift dry ingredients – flour, cocoa powder, baking powder, and salt – directly into the wet mixture, folding carefully to create a cohesive batter.
- Optional: Enhance the chocolate intensity by folding in additional chocolate chips throughout the dough.
- Using a cookie scoop, distribute the rich chocolate dough onto the prepared baking sheet, leaving adequate space between each cookie.
- Bake in the preheated oven for 8-10 minutes, watching for slightly set edges and a soft center, which indicates perfect fudgy consistency.
- Remove from oven and allow cookies to rest on the baking sheet for 2-3 minutes to stabilize their structure.
- Transfer the delicate cookies to a wire cooling rack, permitting them to cool completely and develop their ultimate chewy texture.
Notes
- Ensure chocolate is melted slowly and carefully to prevent burning, using a double boiler or microwave in short bursts.
- Whisk eggs and sugar thoroughly until the mixture becomes pale and slightly fluffy, creating a lighter cookie texture.
- Use high-quality cocoa powder and dark chocolate for a rich, intense chocolate flavor that elevates the entire dessert.
- For gluten-free options, swap regular flour with almond flour or a gluten-free blend, maintaining the same measurement proportions.
- Prep Time: 15 minutes
- Cook Time: 10 minutes
- Category: Desserts, Snacks
- Method: Baking
- Cuisine: American
Nutrition
- Serving Size: 12
- Calories: 157 kcal
- Sugar: 14 g
- Sodium: 80 mg
- Fat: 8 g
- Saturated Fat: 5 g
- Unsaturated Fat: 2 g
- Trans Fat: 0 g
- Carbohydrates: 21 g
- Fiber: 2 g
- Protein: 3 g
- Cholesterol: 37 mg
Michael Reyes
Founder & Lead Recipe Developer
Expertise
Education
Santa Fe Community College
Michael’s love for cooking runs deep, rooted in the bold, colorful flavors of his New Mexico upbringing.
After earning his Culinary Arts Certificate from Santa Fe Community College, he spent years sharpening his skills in kitchens that celebrated traditional Southwestern and Latin American dishes.
He believes cooking should feel approachable and fun, never complicated. When he’s not stirring up new recipe ideas, Michael’s out hiking scenic trails, chatting with farmers at local markets, or chasing the perfect sunset shot for inspiration.