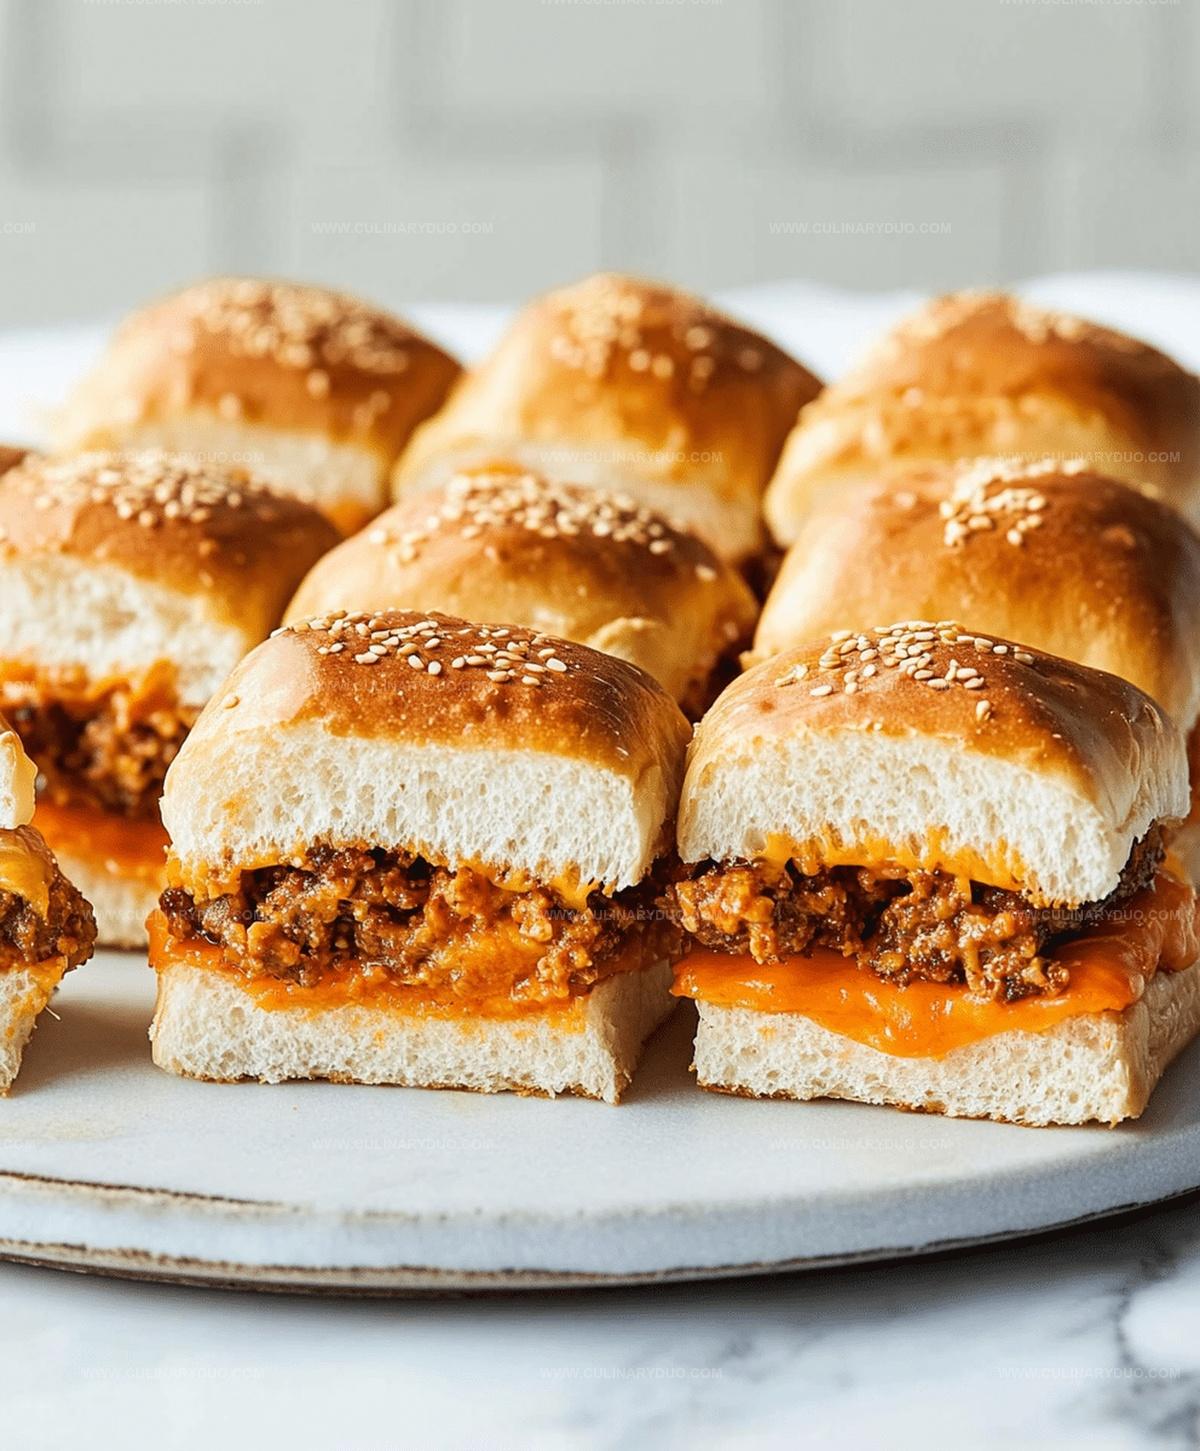
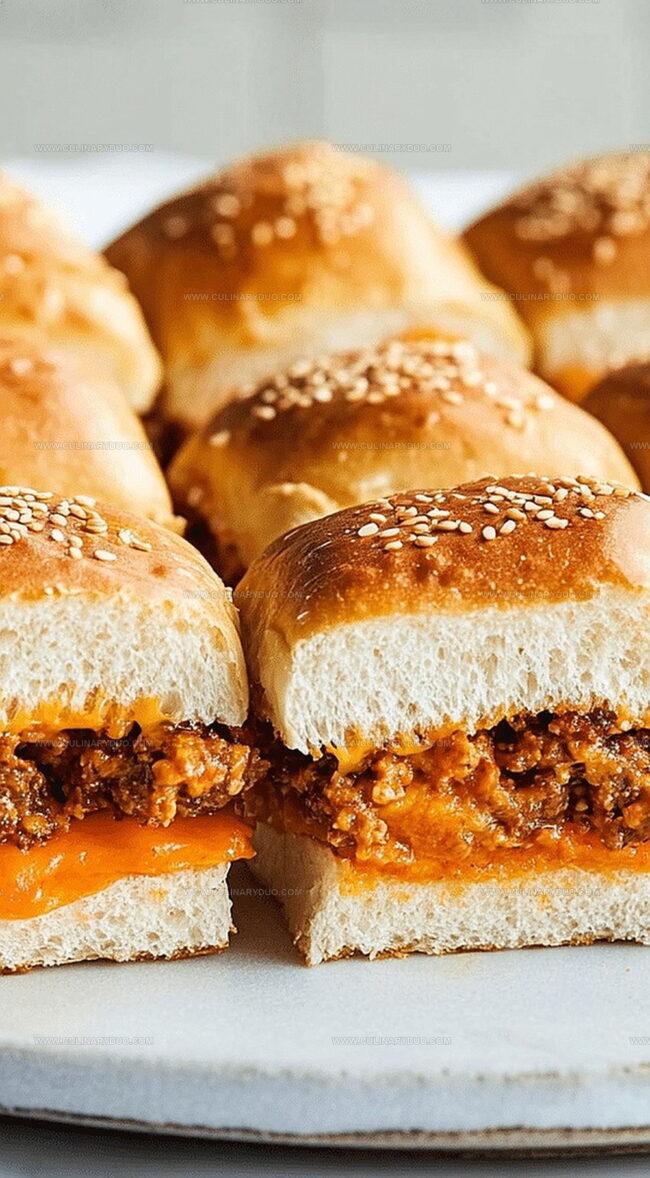
Juicy Cheeseburger Sliders With Hawaiian Rolls Recipe
Juicy beef patties nestled on sweet hawaiian rolls bring sliders to a whole new level of deliciousness.
These mini cheeseburger sliders pack incredible flavor in every bite.
Small enough to pop in your mouth yet big on taste, they’re perfect for game day or casual gatherings.
The combination of melted cheese, savory meat, and soft rolls creates an irresistible appetizer.
Topped with a blend of seasonings and a hint of butter, these sliders elevate casual eating to an art form.
Quick to assemble and even faster to disappear, they’ll become your go-to party favorite.
Hawaiian Roll Cheeseburger Sliders Win Hearts
What’s in Hawaiian Roll Sliders
Meat Base:Seasoning Blend:Bread Component:Cheese Topping:Finishing Touches:Hawaiian Roll Slider Instructions
Step 1: Warm Up The Oven
Fire up your oven to a toasty 350°F, getting ready for some slider magic.
Step 2: Sizzle The Beef
Cook ground beef in a skillet, adding:Brown the meat completely and drain any extra grease for a perfect base.
Step 3: Prepare The Slider Foundation
Slice the Hawaiian rolls horizontally, keeping the top and bottom sections connected.
Gently place the bottom half into a baking dish, creating a delicious canvas.
Step 4: Layer The Flavor Builders
Spread the cooked beef evenly across the bottom rolls.
Create a melty layer of cheese slices on top of the beef.
Step 5: Crown With Roll Tops
Carefully place the top half of the rolls over the cheese, creating a beautiful slider sandwich.
Step 6: Add Golden Shine
Brush melted butter generously over the roll tops.
Sprinkle sesame seeds for extra crunch and visual appeal if you want.
Step 7: Bake To Perfection
Slide the baking dish into the oven.
Bake for 12-15 minutes until the cheese transforms into a gooey dream and rolls turn beautifully golden.
Step 8: Serve And Enjoy
Slice the connected rolls into individual sliders.
Serve warm and watch them disappear quickly.
Tips for Soft and Gooey Sliders
New Variations for Cheeseburger Sliders

How to Serve Hawaiian Roll Sliders
Storage for Hawaiian Cheeseburger Sliders
FAQs
Yes, ground turkey or chicken works great as a lean alternative to beef while maintaining similar flavor profiles.
Drain beef thoroughly and avoid adding extra liquid to keep the rolls crisp and prevent sogginess.
No, you can substitute with dinner rolls or soft white rolls, though Hawaiian rolls provide a slightly sweet taste that complements the beef.
Yes, you can assemble the sliders up to 24 hours in advance, cover with foil, and refrigerate before baking. Just add 5-10 minutes to baking time when cooking from cold.
Print
Cheeseburger Sliders With Hawaiian Rolls Recipe
- Total Time: 30 minutes
- Yield: 12 1x
Description
Miniature cheeseburger sliders nestled on sweet Hawaiian rolls bring classic American comfort to bite-sized perfection. Rich beef patties and melted cheese create an irresistible mini-sandwich experience you’ll crave at every gathering.
Ingredients
Meat:
- 1 pound (1 lb) ground beef
Seasonings:
- 1 tablespoon (1 tbsp) Worcestershire sauce
- 1 teaspoon (1 tsp) garlic powder
- 1 teaspoon (1 tsp) onion powder
- Salt, to taste
- Black pepper, to taste
Bread and Cheese:
- 12 Hawaiian rolls
- 6 slices cheddar cheese
- 3 tablespoons (3 tbsp) butter, melted
- 1 teaspoon (1 tsp) sesame seeds
Instructions
- Heat oven to 350°F, preparing a baking dish for the sliders.
- Sauté ground beef with Worcestershire sauce, garlic powder, onion powder, salt, and pepper until thoroughly browned and fully cooked, then drain any accumulated fat.
- Carefully slice Hawaiian rolls horizontally, maintaining the connected roll structure, and gently separate into bottom and top halves.
- Arrange bottom roll section in the baking dish, creating a unified base for the sliders.
- Distribute the seasoned beef evenly across the bottom roll layer, ensuring complete coverage.
- Layer cheese slices precisely over the beef, creating a melty foundation.
- Position the top roll section over the cheese layer, aligning carefully with the bottom.
- Generously brush melted butter across the roll tops, creating a golden sheen.
- Optional: Sprinkle sesame seeds over the buttered surface for added texture and visual appeal.
- Bake in the preheated oven for 12-15 minutes until cheese melts completely and rolls turn golden brown.
- Remove from oven, allow to cool briefly, then slice into individual sliders for serving.
- Serve warm for optimal flavor and texture.
Notes
- Choose lean ground beef to reduce excess grease and create a healthier slider option.
- Try different cheese varieties like pepper jack or smoked cheddar for unique flavor profiles.
- For a gluten-free version, swap Hawaiian rolls with gluten-free slider buns or lettuce wraps.
- Prep ingredients ahead of time to make assembly quick and stress-free during gatherings or game day events.
- Prep Time: 15 minutes
- Cook Time: 15 minutes
- Category: Lunch, Dinner, Snacks
- Method: Baking
- Cuisine: American
Nutrition
- Serving Size: 12
- Calories: 303
- Sugar: 3 g
- Sodium: 460 mg
- Fat: 18 g
- Saturated Fat: 8 g
- Unsaturated Fat: 8 g
- Trans Fat: 0.5 g
- Carbohydrates: 20 g
- Fiber: 1 g
- Protein: 14 g
- Cholesterol: 45 mg
Michael Reyes
Founder & Lead Recipe Developer
Expertise
Education
Santa Fe Community College
Michael’s love for cooking runs deep, rooted in the bold, colorful flavors of his New Mexico upbringing.
After earning his Culinary Arts Certificate from Santa Fe Community College, he spent years sharpening his skills in kitchens that celebrated traditional Southwestern and Latin American dishes.
He believes cooking should feel approachable and fun, never complicated. When he’s not stirring up new recipe ideas, Michael’s out hiking scenic trails, chatting with farmers at local markets, or chasing the perfect sunset shot for inspiration.