Dreamy Cheesecake Cookie Cups Recipe: Sweet Handheld Joy
Sweet dreams come true with these irresistible cheesecake cookie cups that blend creamy decadence with classic cookie comfort.
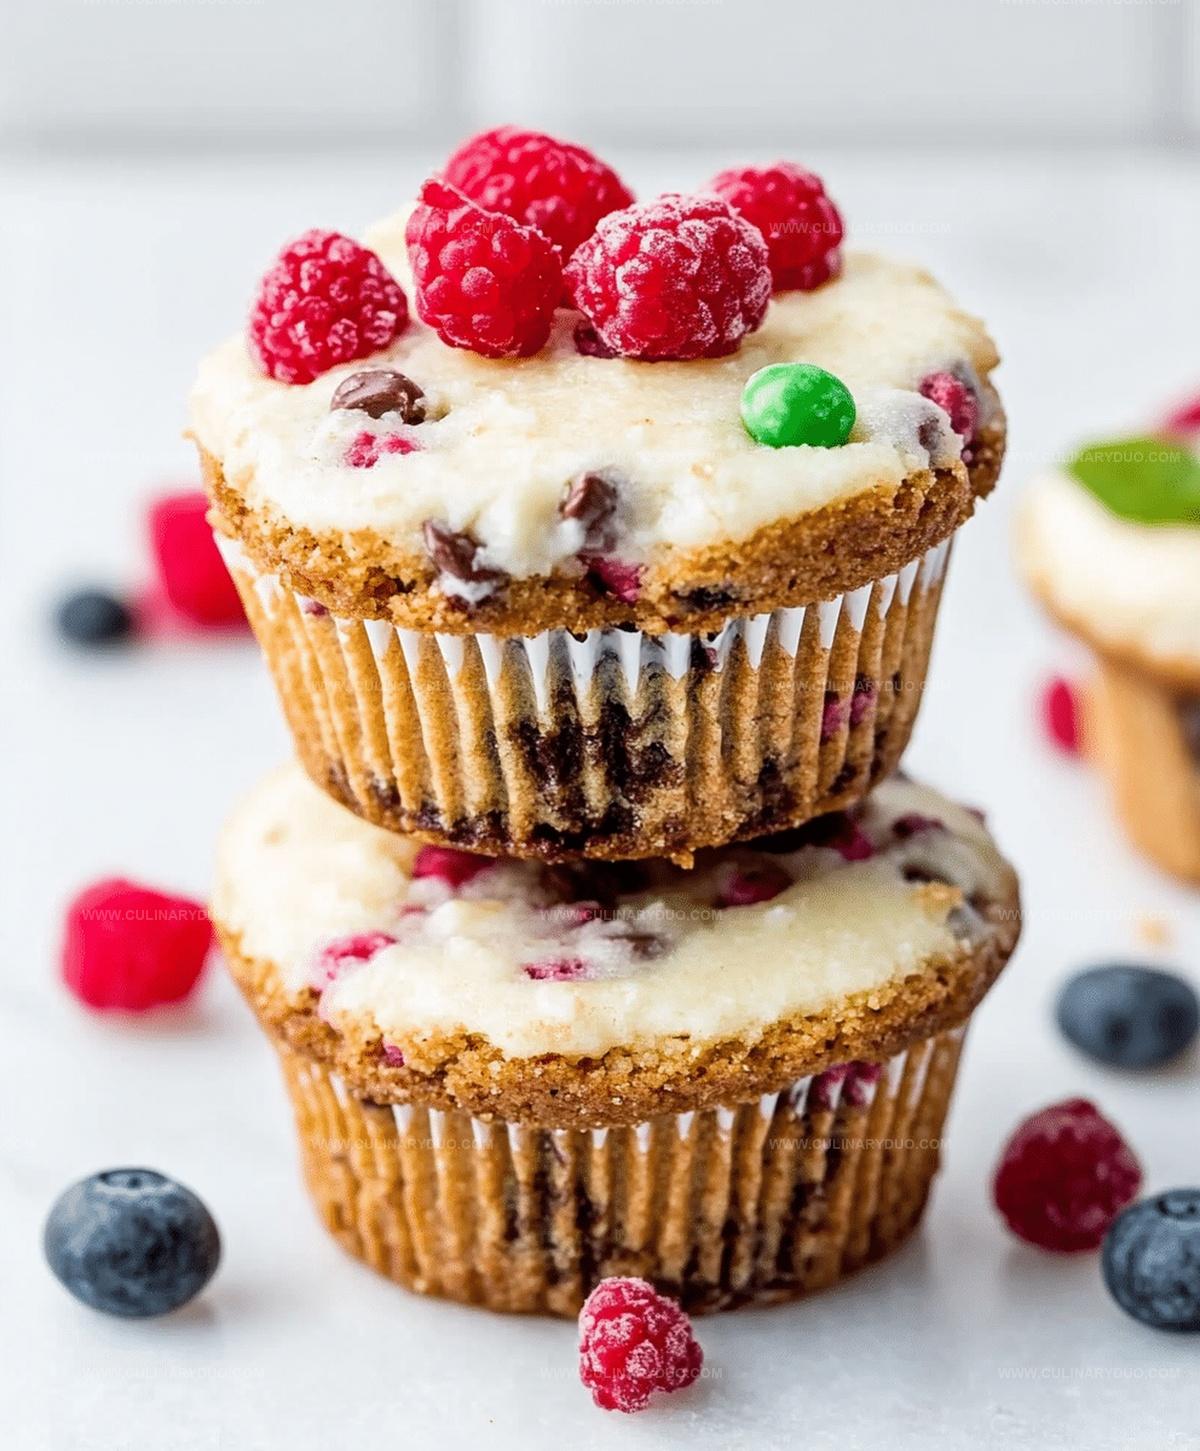
Soft chocolate chip cookies form the perfect crispy base for a luscious cheesecake filling that melts in your mouth.
Every bite of these delightful treats promises a symphony of textures and flavors that dance across your palate.
Rich cream cheese mingles with a buttery cookie shell, creating an indulgent dessert that’s both elegant and playful.
These miniature delights are surprisingly simple to craft, requiring just a handful of ingredients and minimal baking skills.
Each cup delivers a compact burst of pure dessert magic that will have everyone asking for seconds.
Cookie Cups Get Cheesecake’s Touch
Cheesecake Cookie Cups Ingredient List
Crust:Cheesecake Filling:Toppings:Making Cheesecake Cookie Cups, Step by Step
Step 1: Prepare Tasty Cookie Crust Base
Combine graham cracker crumbs, melted butter, and sugar until smooth.
Press the mixture firmly into each muffin cup liner, creating an even, compact base to hold the cheesecake filling.
Step 2: Create Creamy Cheesecake Mixture
Blend softened cream cheese, sugar, egg, vanilla extract, and sour cream until silky smooth and free of lumps.
The mixture should be creamy and consistent
Step 3: Fill Muffin Cups With Cheesecake
Spoon the cheesecake mixture evenly over the graham cracker crust in each muffin cup, ensuring each has a generous and uniform amount.
Step 4: Bake To Perfection
Bake the muffin tin in a preheated oven at 350°F for 15-18 minutes, until the centers are set and slightly firm.
Keep an eye to prevent overbaking.
Step 5: Cool And Chill
Let the cheesecake cups cool in the pan for 10 minutes.
Then transfer to the refrigerator and chill for at least one hour to fully set.
Step 6: Decorate And Serve
Top with chocolate chips, fresh berries, whipped cream, or caramel drizzle just before serving.
Secrets to Cookie Cups with Creamy Centers
Fun Twists for Cheesecake Cookie Cups
Ways to Serve Cookie Cups at Parties
How to Store Cheesecake Cookie Cups
FAQs
Yes, you can substitute graham crackers with crushed digestive biscuits, vanilla wafers, or shortbread cookies for a different flavor and texture.
Avoid overmixing the batter, don’t overbake, and let the cheesecake cups cool gradually at room temperature before refrigerating to minimize cracking.
Absolutely! You can prepare the cheesecake cups up to 3 days in advance and store them in an airtight container in the refrigerator until ready to serve.
Print
Cheesecake Cookie Cups Recipe
- Total Time: 38 minutes
- Yield: 12 1x
Description
Delightful Cheesecake Cookie Cups merge classic dessert magic into perfectly portioned handheld treats. Sweet graham cracker cookie shells cradle creamy cheesecake filling, creating an irresistible blend you’ll savor with pure indulgence.
Ingredients
Main Ingredients (Cookie Cup Base):
- 1.5 cups (360 milliliters) all-purpose flour
- 0.5 cup (113 grams) unsalted butter, softened
- 0.5 cup (100 grams) granulated sugar
- 0.5 cup (110 grams) brown sugar, packed
- 1 large egg
- 0.5 cup (85 grams) mini chocolate chips (optional)
- 1 teaspoon (5 milliliters) vanilla extract
Leavening and Seasoning Ingredients:
- 0.5 teaspoon (2.5 grams) baking soda
- 0.25 teaspoon (1.5 grams) salt
Cheesecake Filling Ingredients:
- 8 ounces (226 grams) cream cheese, softened
- 0.25 cup (50 grams) granulated sugar
- 1 large egg
- 1 teaspoon (5 milliliters) vanilla extract
Optional Toppings:
- Fresh berries
- Chocolate chips or drizzle
- Caramel sauce
- Whipped cream
Instructions
- Heat the oven to 350°F and prepare a muffin tin with paper liners, creating a foundation for delicate cheesecake cups.
- Combine graham cracker crumbs with melted butter and sugar, then firmly press the mixture into the bottom of each muffin compartment to form a crisp, buttery base.
- Whip cream cheese and sugar together until silky smooth, creating a luxurious texture that will define the cheesecake’s character.
- Incorporate egg and vanilla extract into the cream cheese mixture, gently folding until fully integrated and maintaining a velvety consistency.
- Blend sour cream into the mixture, ensuring a creamy, luscious filling that promises rich flavor and delicate texture.
- Distribute the cheesecake filling evenly across the graham cracker bases, filling each cup to just below the liner’s rim.
- Slide the muffin tin into the preheated oven and bake for 15-18 minutes, watching for a set center that signals perfect doneness.
- Allow the cheesecake cups to rest in the pan for 10 minutes, helping them stabilize and easily release from the liners.
- Transfer the cups to the refrigerator and chill for a minimum of 1 hour, allowing them to firm and develop deeper flavors.
- Just before serving, embellish with chocolate chips, fresh berries, or your preferred garnish to add visual appeal and complementary taste.
Notes
- Swap graham cracker crumbs with gluten-free alternatives like almond flour or crushed gluten-free cookies for those with wheat sensitivities.
- Use room temperature ingredients to ensure a smooth, lump-free cheesecake filling that blends perfectly and creates a silky texture.
- Prevent cracks by avoiding overmixing the cheesecake batter and baking at a consistent temperature, which helps maintain a creamy, even surface.
- Create endless flavor variations by adding lemon zest, cocoa powder, or different extracts to customize the cheesecake cups to your taste preferences.
- Prep Time: 20 minutes
- Cook Time: 18 minutes
- Category: Desserts, Snacks
- Method: Baking
- Cuisine: American
Nutrition
- Serving Size: 12
- Calories: 211 kcal
- Sugar: 15 g
- Sodium: 95 mg
- Fat: 11 g
- Saturated Fat: 6 g
- Unsaturated Fat: 4 g
- Trans Fat: 0.1 g
- Carbohydrates: 24 g
- Fiber: 1 g
- Protein: 3 g
- Cholesterol: 40 mg
Michael Reyes
Founder & Lead Recipe Developer
Expertise
Education
Santa Fe Community College
Michael’s love for cooking runs deep, rooted in the bold, colorful flavors of his New Mexico upbringing.
After earning his Culinary Arts Certificate from Santa Fe Community College, he spent years sharpening his skills in kitchens that celebrated traditional Southwestern and Latin American dishes.
He believes cooking should feel approachable and fun, never complicated. When he’s not stirring up new recipe ideas, Michael’s out hiking scenic trails, chatting with farmers at local markets, or chasing the perfect sunset shot for inspiration.