
Dreamy Cheesecake Tacos Recipe: A Sweet Twist on Classics
Sweet meets savory in these delectable cheesecake tacos that blend creamy richness with crispy shells.
Dessert enthusiasts will adore this unexpected fusion of classic flavors.
The delightful treat combines the smooth texture of cheesecake with the crunch of a traditional taco shell.
Unexpected and playful, these tacos promise a delicious adventure for your taste buds.
Drizzled with chocolate or caramel, each bite delivers a perfect balance of sweetness and texture.
You’ll fall in love with this creative dessert that breaks all the traditional dessert rules.
Cheesecake Tacos for a Unique Dessert
What’s Needed for Tasty Cheesecake Tacos
Shell Base:Cheesecake Filling:Toppings:Steps to Assemble Cheesecake Tacos
Step 1: Warm Up the Oven
Crank the oven to a toasty 375°F and grab your baking sheet.
This is where the magic begins!
Step 2: Transform Taco Shells
Lovingly brush each taco shell with melted butter, then sprinkle a generous coating of cinnamon sugar.
Arrange the shells on the baking sheet, gently curving them into that classic taco shape.
Step 3: Crisp the Shells
Slide the baking sheet into the oven and let the shells bake for 8-10 minutes.
You’re looking for a golden, crispy texture that’ll make your taste buds dance.
Step 4: Whip Up the Cheesecake Filling
In a mixing bowl, beat the cream cheese and powdered sugar until they become silky smooth.
Gently fold in the whipped cream and vanilla extract, creating a cloud-like filling that’s pure deliciousness.
Step 5: Fill the Shells
Once the shells have cooled down, carefully fill them with the dreamy cheesecake mixture.
You can use a spoon for a rustic look or a piping bag for a more elegant touch.
Step 6: Add Delightful Toppings
Crown your cheesecake tacos with a sprinkle of fresh berries or any other toppings that make your heart sing.
Serve immediately and watch everyone’s eyes light up with joy!
Pro Tips for Crisp Dessert Tacos
Creative Toppings for Cheesecake Tacos
Ways to Serve Dessert Tacos at Parties
Store Cheesecake Tacos for Next Day
FAQs
No, they’re super easy! The recipe requires basic ingredients and simple steps that even beginner bakers can follow quickly.
Yes, you can prepare the cinnamon taco shells and cheesecake filling separately in advance. Just fill the shells right before serving to keep them crispy.
Strawberries, raspberries, and blueberries are perfect. They add a fresh, sweet contrast to the creamy cheesecake filling and crispy shell.
Just basic kitchen tools like a mixing bowl, baking sheet, whisk, and either a spoon or piping bag for filling the shells. No fancy gadgets required!
Print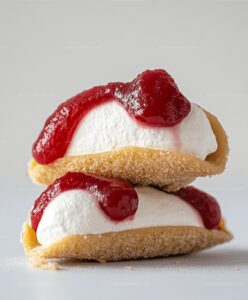
Cheesecake Tacos Recipe
- Total Time: 25 minutes
- Yield: 4 1x
Description
Delightful cheesecake tacos blend sweet and creamy dessert magic with crisp tortilla shells for an unexpected culinary adventure. Mexican-inspired treats deliver irresistible flavor combinations you’ll savor with pure dessert excitement.
Ingredients
Main Ingredients:
- 1 cup cream cheese, softened
- 0.5 cup powdered sugar
- 1 cup heavy cream, whipped
- 1 teaspoon vanilla extract
Shell and Coating Ingredients:
- Taco shells (flour tortillas or ready-made taco shells)
- Butter, melted (for brushing shells)
- Cinnamon sugar (for coating shells)
Topping Ingredients:
- Fresh berries (strawberries, blueberries) or other toppings
Instructions
- Warm the oven to 375°F and delicately coat taco shells with melted butter, then dust generously with cinnamon sugar.
- Arrange shells on a baking sheet, gently curving them into classic taco shapes, and bake for 8-10 minutes until golden and crispy.
- Whip cream cheese and powdered sugar in a mixing bowl, blending until achieving a silky, uniform consistency.
- Gently incorporate whipped cream and vanilla extract into the cream cheese mixture, creating a light and airy filling.
- Allow taco shells to cool completely after baking, ensuring they maintain their crisp texture.
- Fill each shell carefully with the prepared cheesecake mixture, using either a spoon or piping bag for precise distribution.
- Embellish the filled tacos with an array of fresh berries or preferred toppings, ensuring aesthetic appeal and additional flavor complexity.
- Serve immediately to preserve the shells’ crispness and the filling’s creamy texture, presenting a delightful dessert experience.
Notes
- Toast taco shells carefully to prevent burning, watching them closely during the 8-10 minute baking period.
- Use room temperature cream cheese for smoother, lump-free filling that blends easily and creates a silky texture.
- Choose sturdy taco shells that can hold the creamy filling without becoming soggy, preferring corn shells for better structural integrity.
- Customize toppings based on dietary preferences, swapping fresh berries with chocolate shavings, caramel drizzle, or crushed nuts for varied flavor profiles.
- Prep Time: 15 minutes
- Cook Time: 10 minutes
- Category: Desserts, Snacks
- Method: Baking
- Cuisine: American
Nutrition
- Serving Size: 4
- Calories: 375 kcal
- Sugar: 15 g
- Sodium: 210 mg
- Fat: 32 g
- Saturated Fat: 19 g
- Unsaturated Fat: 11 g
- Trans Fat: 0.5 g
- Carbohydrates: 12 g
- Fiber: 1 g
- Protein: 5 g
- Cholesterol: 110 mg
Michael Reyes
Founder & Lead Recipe Developer
Expertise
Education
Santa Fe Community College
Michael’s love for cooking runs deep, rooted in the bold, colorful flavors of his New Mexico upbringing.
After earning his Culinary Arts Certificate from Santa Fe Community College, he spent years sharpening his skills in kitchens that celebrated traditional Southwestern and Latin American dishes.
He believes cooking should feel approachable and fun, never complicated. When he’s not stirring up new recipe ideas, Michael’s out hiking scenic trails, chatting with farmers at local markets, or chasing the perfect sunset shot for inspiration.