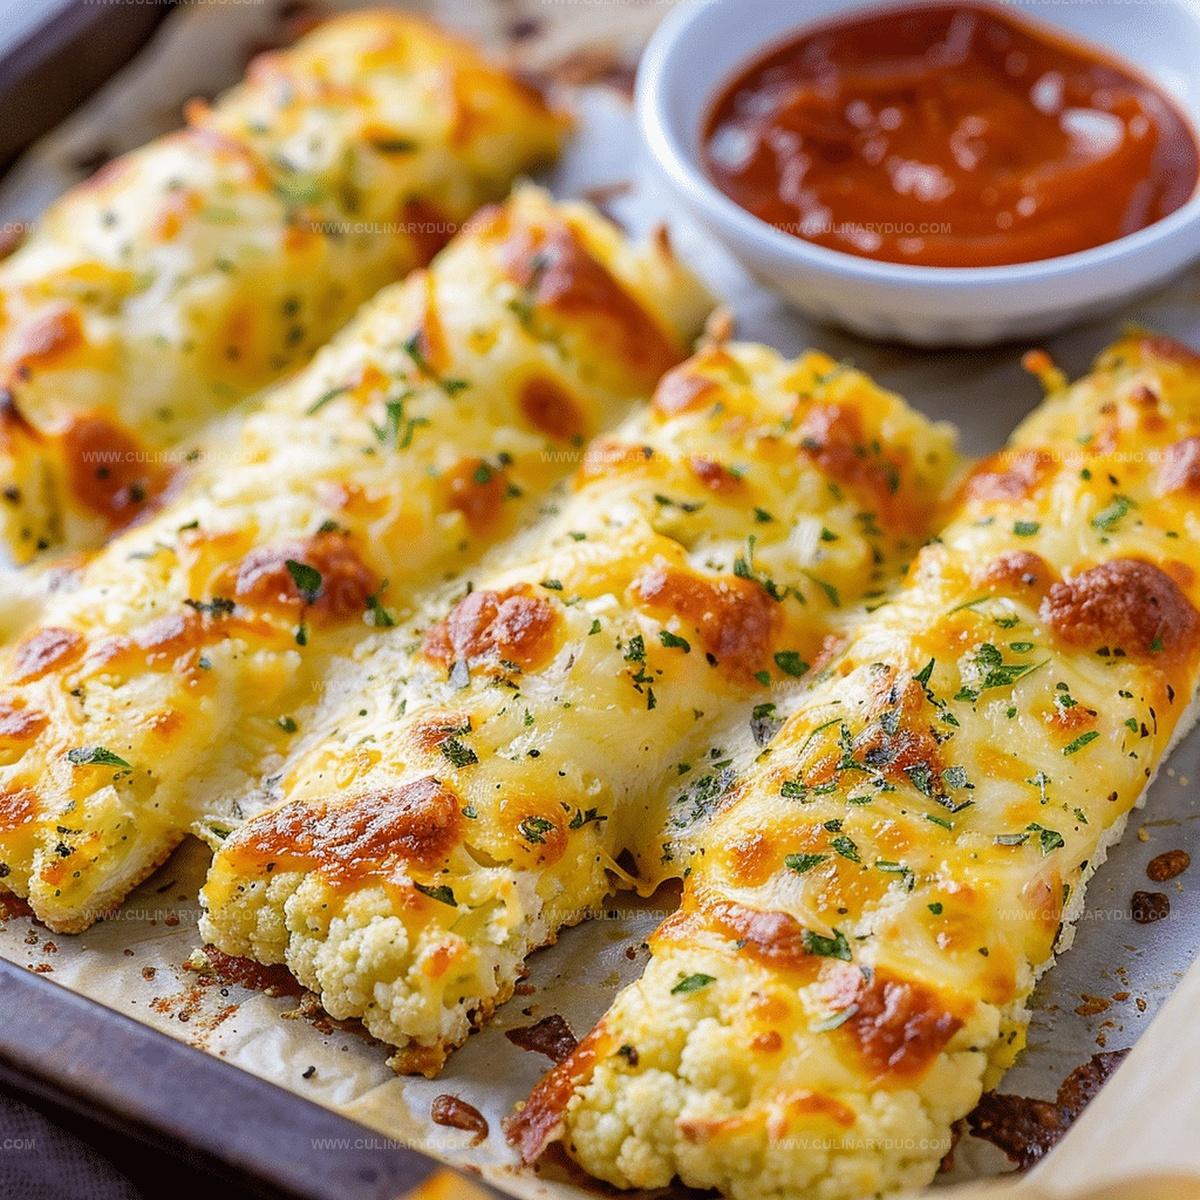
Easy Cheesy Cauliflower Breadsticks Recipe for Snack Magic
Crispy edges and gooey cheese make these cauliflower breadsticks a game-changer for anyone seeking a low-carb alternative.
Packed with flavor, this cauliflower breadsticks recipe delivers a surprisingly delightful twist on traditional appetizers.
The magic happens when riced cauliflower meets melted cheese, creating a mouthwatering base that rivals classic bread.
Each bite promises a perfect blend of crispy texture and savory goodness.
Gluten-free and loaded with nutrients, these breadsticks transform an ordinary vegetable into an irresistible snack.
Serve them hot and watch everyone reach for seconds.
Cheesy Cauliflower Breadsticks for Low-Carb Snack Lovers
Key Ingredients for Cheesy Cauliflower Breadsticks Magic
Main Ingredients:Seasoning and Flavor Enhancers:Preparation Support:Stepwise Instructions for Cheesy Cauliflower Breadsticks
Step 1: Prepare Baking Station
Grab your baking sheet and line it with parchment paper.
Fire up the oven to a toasty 425°F, getting ready for some cheesy magic.
Step 2: Transform Cauliflower
Break down the cauliflower into rice-like pieces.
Steam or zap in the microwave until it’s super soft.
Cool it down, then channel your inner strength and squeeze out every drop of moisture using a clean kitchen towel.
Step 3: Mix Flavor Explosion
Grab a big mixing bowl and combine these delicious ingredients:Stir everything until it becomes a harmonious blend of yumminess.
Step 4: Shape Your Masterpiece
Spread the mixture onto the prepared baking sheet.
Craft a rectangular shape about half an inch thick, making sure it’s even and smooth.
Step 5: First Bake Adventure
Slide the baking sheet into the hot oven.
Bake for 25 minutes until the edges turn a beautiful golden brown and the top looks crispy and delightful.
Step 6: Cheese Lover’s Dream
Pull out the baking sheet and sprinkle the remaining mozzarella cheese all over the top.
Return to the oven for another 5-10 minutes until the cheese melts into a bubbly, irresistible blanket.
Step 7: Serve and Devour
Let the cheesy creation cool for a few minutes.
Slice into tempting breadsticks and serve while they’re still warm.
Watch them disappear in seconds!
Breadstick Tips for Crispy Cheesy Cauliflower Perfection
Cheesy Cauliflower Breadstick Twists You’ll Want to Try
Plating Cheesy Cauliflower Breadsticks for Appetizers
Breadstick Storage Solutions for Freshness and Crunch
FAQs
Cauliflower rice is essential as it forms the base of these breadsticks, providing a low-carb alternative to traditional bread and creating the right texture.
Yes, frozen cauliflower rice works perfectly. Just ensure you thaw and drain it completely to remove excess moisture before using in the recipe.
The breadsticks are done when they turn golden brown around the edges and feel firm to the touch. The top should look crispy and the cheese should be melted.
Print
Cheesy Cauliflower Breadsticks Recipe
- Total Time: 55 minutes
- Yield: 8 1x
Description
Irresistible cheesy cauliflower breadsticks bring Italian-inspired comfort to your table with a low-carb twist. Crispy edges, melted cheese, and herb-infused goodness make you crave another delicious bite of this guilt-free appetizer.
Ingredients
Main Ingredients:
- 4 cups cauliflower, riced (about 1 large head of cauliflower)
- 4 large eggs
- 2 cups mozzarella cheese
- 3 teaspoons oregano
- 4 cloves garlic, minced
Seasonings:
- Salt (to taste)
- Black pepper (to taste)
Topping:
- 1 cup mozzarella cheese (or more, depending on preference)
Instructions
- Preheat the oven to 425°F and prepare a baking sheet with parchment paper for optimal non-stick surface.
- Transform cauliflower into fine rice-like texture using a food processor, then steam or microwave until completely tender.
- Carefully drain excess liquid from cauliflower by pressing firmly with a clean kitchen towel, removing as much moisture as possible.
- Combine the dried cauliflower with eggs, majority of mozzarella, oregano, minced garlic, salt, and pepper in a mixing bowl, ensuring thorough and even integration.
- Spread the mixture evenly across the parchment-lined baking sheet, creating a uniform rectangular shape approximately half an inch thick.
- Bake for 25 minutes until the edges turn golden brown and the surface appears crisp and set.
- Carefully remove from oven and generously sprinkle remaining mozzarella across the surface.
- Return to oven for an additional 5-10 minutes, allowing cheese to melt completely and develop a bubbly, slightly browned texture.
- Allow the cauliflower breadsticks to cool for a few minutes, which helps them firm up and become easier to slice.
- Cut into stick-shaped portions and serve warm for maximum flavor and enjoyment.
Notes
- Replace eggs with flax eggs for a vegan version, mixing 1 tablespoon ground flaxseed with 3 tablespoons water per egg.
- Pat cauliflower extremely dry to prevent soggy breadsticks and ensure crispy texture.
- Use parchment paper for easy removal and minimal cleanup, preventing sticking and burning.
- Try different cheese blends like parmesan or cheddar for varied flavor profiles.
- Prep Time: 20 minutes
- Cook Time: 35 minutes
- Category: Appetizer, Snacks
- Method: Baking
- Cuisine: American
Nutrition
- Serving Size: 8
- Calories: 182 kcal
- Sugar: 1 g
- Sodium: 345 mg
- Fat: 11 g
- Saturated Fat: 6 g
- Unsaturated Fat: 4 g
- Trans Fat: 0 g
- Carbohydrates: 5 g
- Fiber: 2 g
- Protein: 14 g
- Cholesterol: 95 mg
Michael Reyes
Founder & Lead Recipe Developer
Expertise
Education
Santa Fe Community College
Michael’s love for cooking runs deep, rooted in the bold, colorful flavors of his New Mexico upbringing.
After earning his Culinary Arts Certificate from Santa Fe Community College, he spent years sharpening his skills in kitchens that celebrated traditional Southwestern and Latin American dishes.
He believes cooking should feel approachable and fun, never complicated. When he’s not stirring up new recipe ideas, Michael’s out hiking scenic trails, chatting with farmers at local markets, or chasing the perfect sunset shot for inspiration.