The Fluffiest Choco Swiss Roll Delight Recipe Ever Created
Baking a decadent choco swiss roll delight recipe sparks pure joy in every kitchen.
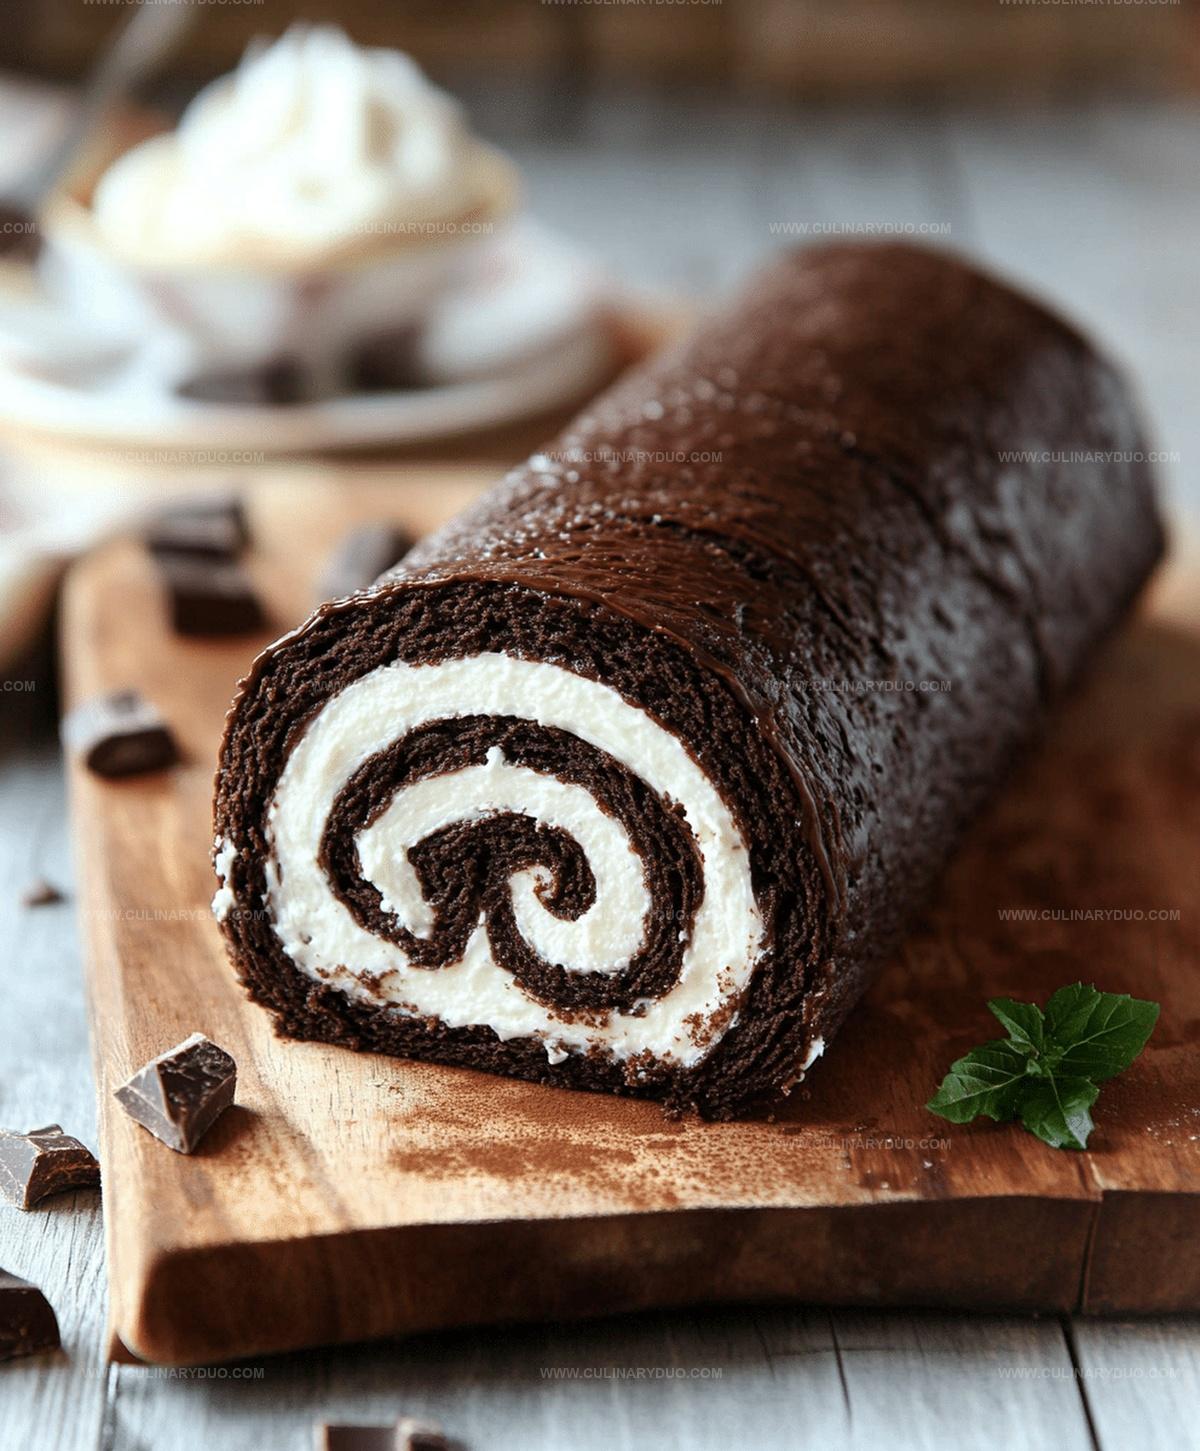
Chocolate lovers rejoice with this elegant dessert that promises pure bliss.
Rich cocoa layers meld with smooth cream, creating a heavenly treat.
Delicate and light, this roll melts in your mouth with each delectable bite.
Soft sponge cake wrapped around luscious filling makes this dessert irresistible.
The secret lies in perfect technique and quality ingredients.
You’ll fall in love with this show-stopping dessert that transforms an ordinary afternoon into a sweet celebration.
Why Choco Swiss Roll Delight Wins Hearts
What You’ll Need for Chocolate Rolls
Cake Base Ingredients:Wet Ingredients:Filling and Topping Ingredients:Instructions for a Fluffy, Swirled Roll
Step 1: Warm Up The Oven
Crank your oven to a toasty 350°F.
Grab a jelly roll pan and line it with parchment paper, giving it a quick spray of cooking oil to prevent sticking.
Step 2: Create The Chocolate Base
Whisk together your dry ingredients in a bowl:Step 3: Whip Up The Cake Mixture
In a separate large bowl, beat eggs and sugar until they transform into a thick, pale dreamscape.
Pour in milk and vanilla, then gently fold in your dry ingredient mixture.
Spread this batter smoothly across your prepared pan.
Step 4: Bake To Perfection
Pop the pan into the oven for 10-12 minutes.
The cake is ready when it bounces back after a gentle touch.
Immediately flip the hot cake onto a sugar-dusted kitchen towel.
Step 5: Roll And Cool
Carefully peel away the parchment paper.
Roll the cake inside the towel from the short end, creating a beautiful spiral.
Let it cool completely.
Step 6: Whip Up Chocolate Filling
Heat cream until it simmers.
Pour over chocolate chips and let sit.
Stir until silky smooth.
Chill briefly, then whip in powdered sugar until light and fluffy.
Step 7: Assemble The Swiss Roll
Gently unroll the cooled cake.
Spread chocolate filling evenly across the surface.
Carefully re-roll into a gorgeous log.
Refrigerate for 30 minutes to set.
Step 8: Finish And Serve
Dust with powdered sugar or drizzle with chocolate ganache.
Slice and indulge in your homemade masterpiece!
Rolling Tips for a Swiss Roll Success
Try These Swiss Roll Twists Next Time
Swiss Roll Serving Fun for Parties
Roll Storage Made Easy
FAQs
The Swiss roll is known for its thin, flexible sponge cake that’s rolled with a delicious filling, creating a beautiful spiral pattern when sliced.
Yes, you can prepare the Swiss roll a day in advance and store it in the refrigerator, which can actually help the flavors meld together.
You’ll need a jelly roll pan, parchment paper, and a clean kitchen towel. A stand mixer or hand mixer helps, but isn’t absolutely required.
Roll the cake while it’s still warm and use a towel dusted with powdered sugar to help prevent sticking and cracking during the rolling process.
Print
Choco Swiss Roll Delight Recipe
- Total Time: 37 minutes
- Yield: 8 1x
Description
Sweet chocolate Swiss roll weaves magic with its delicate sponge and luscious cream filling, creating a delightful dessert experience. Silky layers melt in your mouth, inviting you to savor each heavenly bite of this classic European treat.
Ingredients
Cake Base Ingredients:
- 4 large eggs
- 3/4 cup (150 grams) granulated sugar
- 1/4 cup (30 grams) whole milk
- 1 teaspoon vanilla extract
- 3/4 cup (90 grams) all-purpose flour
- 1/4 cup (25 grams) unsweetened cocoa powder
- 1 teaspoon baking powder
- 1/4 teaspoon salt
Filling Ingredients:
- 1 cup (240 milliliters) heavy cream
- 1/2 cup (85 grams) semi-sweet or dark chocolate chips
- 1 tablespoon powdered sugar
- 1 teaspoon vanilla extract
Glaze and Garnish Ingredients:
- 1/2 cup (85 grams) semi-sweet or dark chocolate chips
- 1/2 cup (120 milliliters) heavy cream
- 1 tablespoon unsalted butter
- Chocolate shavings or curls
- Powdered sugar
- Cocoa powder
Instructions
- Prepare the kitchen workspace by preheating the oven to 350°F. Line a 10×15-inch jelly roll pan with parchment paper, applying a light grease to prevent sticking.
- Sift together flour, cocoa powder, and baking powder in a medium bowl to ensure smooth, lump-free dry ingredients.
- In a large mixing bowl, vigorously whip eggs and sugar for approximately 5 minutes until the mixture becomes thick and pale, creating a light, airy base.
- Gently incorporate milk and vanilla extract into the egg mixture, stirring carefully to maintain the volume and texture.
- Fold the dry ingredients into the wet mixture with a delicate hand, ensuring minimal deflation of the batter. Spread the mixture evenly across the prepared pan, creating a uniform layer.
- Bake for 10-12 minutes, watching for the cake to spring back when lightly touched, indicating perfect doneness.
- Immediately after baking, flip the warm cake onto a kitchen towel generously dusted with powdered sugar. Carefully remove the parchment paper.
- While still warm, tightly roll the cake with the towel from one short end, allowing it to cool completely in this cylindrical shape.
- Create the chocolate filling by heating heavy cream until it reaches a gentle simmer. Pour the hot cream over chocolate chips in a separate bowl.
- Allow the cream and chocolate to rest for 5 minutes, then stir until achieving a smooth, glossy consistency.
- Refrigerate the chocolate mixture for 10-15 minutes, then whip in powdered sugar until the filling becomes light and fluffy.
- Gently unroll the cooled cake and spread the chocolate filling evenly across the surface, maintaining a consistent layer.
- Carefully re-roll the cake, ensuring a tight and neat presentation.
- Refrigerate the Swiss roll for 30 minutes to set the filling and maintain its shape.
- Before serving, dust with powdered sugar or drizzle with chocolate ganache for an elegant finish. Slice and serve chilled.
Notes
- Ensure eggs are at room temperature for maximum volume when beating, creating a lighter, airier cake texture.
- Use a light hand when folding dry ingredients to prevent deflating the delicate egg mixture, maintaining the cake’s soft structure.
- Dust the kitchen towel generously with powdered sugar to prevent sticking and make rolling easier without tearing the warm cake.
- For a gluten-free version, substitute all-purpose flour with almond flour or a gluten-free blend, keeping the same measurements.
- Prep Time: 25 minutes
- Cook Time: 12 minutes
- Category: Desserts
- Method: Baking
- Cuisine: Western
Nutrition
- Serving Size: 8
- Calories: 271 kcal
- Sugar: 22 g
- Sodium: 85 mg
- Fat: 18 g
- Saturated Fat: 11 g
- Unsaturated Fat: 6 g
- Trans Fat: 0.2 g
- Carbohydrates: 22 g
- Fiber: 2 g
- Protein: 5 g
- Cholesterol: 110 mg
Michael Reyes
Founder & Lead Recipe Developer
Expertise
Education
Santa Fe Community College
Michael’s love for cooking runs deep, rooted in the bold, colorful flavors of his New Mexico upbringing.
After earning his Culinary Arts Certificate from Santa Fe Community College, he spent years sharpening his skills in kitchens that celebrated traditional Southwestern and Latin American dishes.
He believes cooking should feel approachable and fun, never complicated. When he’s not stirring up new recipe ideas, Michael’s out hiking scenic trails, chatting with farmers at local markets, or chasing the perfect sunset shot for inspiration.