
The Ultimate Fluffy Chocolate Bread Recipe for Sweet Moments
Sweet aromas of homemade chocolate bread often fill kitchens with warmth and excitement.
Memories of childhood comfort drift through the air, tempting everyone nearby.
Soft crumbs promise delightful moments of pure indulgence.
Rich cocoa notes blend seamlessly with tender, pillowy textures that melt on your tongue.
Baking becomes an intimate experience connecting generations through simple ingredients and shared joy.
Each slice tells a story of love, creativity, and delectable comfort.
You’ll want to slice into this heavenly creation and savor every delicious moment.
Chocolate Bread That’s Moist And Rich Always
What’s Needed For The Best Chocolate Bread
Dry Ingredients:Wet Ingredients:Chocolate Chips:Simple Steps For Homemade Chocolate Bread Magic
Step 1: Fire Up the Oven
Crank your oven to a cozy 350°F.
Grab a 9×5 loaf pan and lovingly line it with parchment paper or give it a quick spray of nonstick cooking spray.
Step 2: Create Dry Chocolate Magic
Grab a spacious mixing bowl and toss in:Whisk these dry ingredients until they’re perfectly blended and look like a chocolatey dream.
Step 3: Blend Liquid Goodness
In another bowl, gently combine:Whisk these wet ingredients until they’re smooth and harmonious.
Step 4: Marry the Mixtures
Pour the wet ingredients into the dry mixture.
Splash in some buttermilk and stir everything together.
Fold in most of the chocolate chips, saving a handful for the top.
Step 5: Bake to Perfection
Transfer the batter to your prepared pan.
Sprinkle the remaining chocolate chips across the top for a beautiful finish.
Slide into the preheated oven and bake for 40-45 minutes.
The bread is done when a toothpick inserted in the center comes out clean with just a few moist crumbs.
Step 6: Cool and Enjoy
Let the bread rest in the pan for 10 minutes, then transfer to a wire rack.
Allow it to cool completely before slicing into this decadent chocolate treasure.
Tips For Moist And Rich Chocolate Bread
Chocolate Bread Variations To Try Next
Serving Chocolate Bread For Brunch Or Snack
Storing Chocolate Bread For Later Enjoyment
FAQs
This recipe uses a perfect balance of cocoa powder and chocolate chips, creating a rich, intensely chocolatey flavor with a moist, tender crumb.
Yes, you can substitute buttermilk with regular milk mixed with a tablespoon of vinegar or lemon juice. Let the mixture sit for 5 minutes before adding to the recipe.
Insert a toothpick in the center of the bread. If it comes out with a few moist crumbs but no wet batter, the bread is done. The top should also look set and slightly cracked.
Print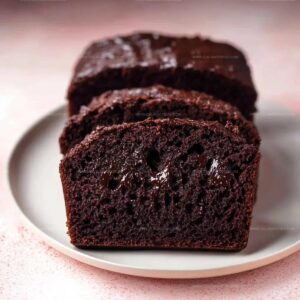
Chocolate Bread Recipe
- Total Time: 1 hour
- Yield: 8 1x
Description
Irresistible chocolate bread emerges as a delightful treat that promises pure indulgence. Rich cocoa notes and tender crumb invite chocolate enthusiasts to savor each delectable slice with pure pleasure.
Ingredients
Dry Ingredients:
- 1 1/4 cups (157 grams) all-purpose flour
- 1/2 cup (50 grams) cocoa powder
- 1 teaspoon baking soda
- 1 1/2 teaspoons baking powder
- 1/4 teaspoon salt
- 1/2 cup (100 grams) brown sugar
- 1/4 cup (50 grams) granulated sugar
Wet Ingredients:
- 1/2 cup (113 grams) unsalted butter, melted
- 1 teaspoon vanilla extract
- 2 large eggs
- 3/4 cup (180 milliliters) buttermilk
Mix-ins:
- 3/4 cup (128 grams) chocolate chips
Instructions
- Preheat the oven to 350°F and prepare a 9×5 inch loaf pan by lining it with parchment paper or greasing thoroughly.
- In a large mixing bowl, sift together the dry ingredients, ensuring an even distribution of flour, cocoa powder, baking powder, baking soda, salt, and sugars.
- In a separate bowl, whisk melted butter with vanilla extract and eggs until smooth and well-incorporated.
- Create a well in the center of the dry ingredients and pour in the wet mixture along with buttermilk. Gently fold the ingredients together, stirring until just combined without overmixing.
- Fold most of the chocolate chips into the batter, reserving a small portion for topping.
- Transfer the batter to the prepared loaf pan, spreading it evenly and smoothing the top with a spatula.
- Sprinkle the remaining chocolate chips across the surface of the batter.
- Bake in the preheated oven for 40-45 minutes, or until a toothpick inserted into the center comes out clean with minimal crumbs.
- Remove from the oven and let the bread cool in the pan for 10 minutes before transferring to a wire rack to cool completely.
Notes
- Customize the chocolate intensity by adjusting cocoa powder quantity for richer or milder flavor profiles.
- Prevent chocolate chips from sinking during baking by tossing them in a tablespoon of flour before adding to the batter.
- Replace buttermilk with yogurt or milk mixed with vinegar for similar moisture and tanginess if buttermilk isn’t available.
- Store bread wrapped tightly at room temperature for 3-4 days or freeze for up to a month to maintain freshness and texture.
- Prep Time: 15 minutes
- Cook Time: 45 minutes
- Category: Breakfast, Snacks, Desserts
- Method: Baking
- Cuisine: American
Nutrition
- Serving Size: 8
- Calories: 251 kcal
- Sugar: 18 g
- Sodium: 190 mg
- Fat: 14 g
- Saturated Fat: 8 g
- Unsaturated Fat: 6 g
- Trans Fat: 0.3 g
- Carbohydrates: 29 g
- Fiber: 3 g
- Protein: 4 g
- Cholesterol: 55 mg
Michael Reyes
Founder & Lead Recipe Developer
Expertise
Education
Santa Fe Community College
Michael’s love for cooking runs deep, rooted in the bold, colorful flavors of his New Mexico upbringing.
After earning his Culinary Arts Certificate from Santa Fe Community College, he spent years sharpening his skills in kitchens that celebrated traditional Southwestern and Latin American dishes.
He believes cooking should feel approachable and fun, never complicated. When he’s not stirring up new recipe ideas, Michael’s out hiking scenic trails, chatting with farmers at local markets, or chasing the perfect sunset shot for inspiration.