Fluffy Cloud Cotton Candy Cookies Recipe: A Sweet Dream Treat
Sweet dreams come alive with these cotton candy cookies that capture childhood whimsy in every delightful bite.
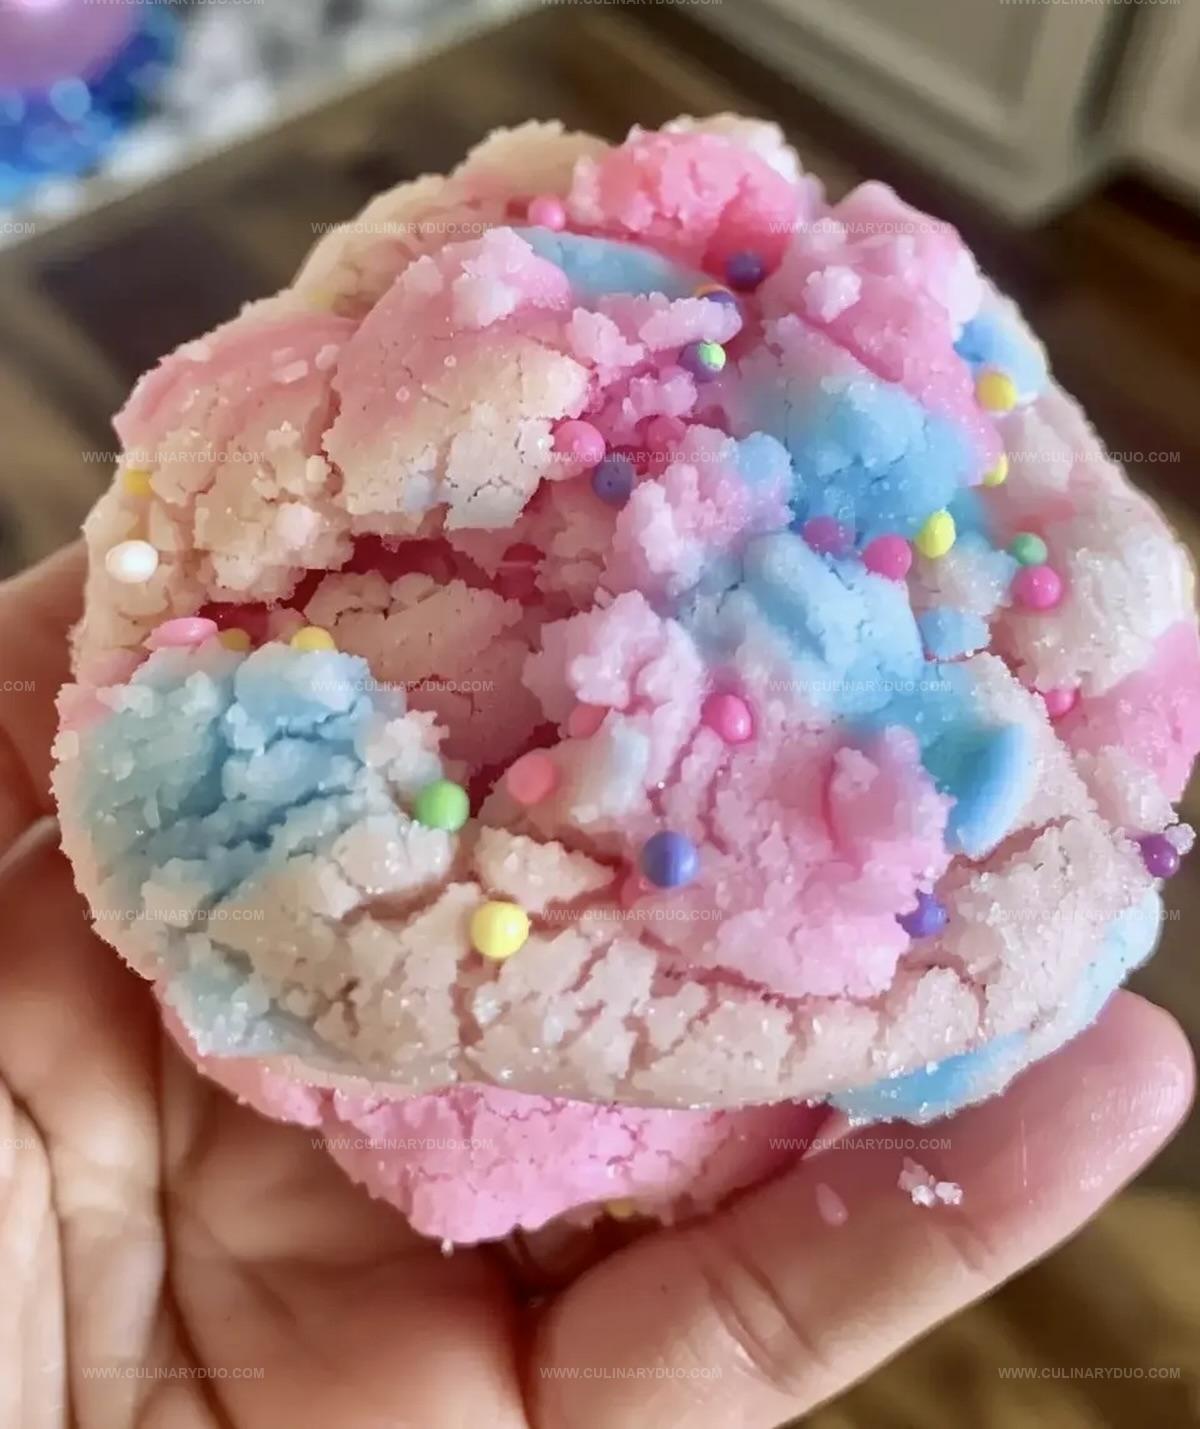
Soft, pillowy textures melt into surprising bursts of sugary nostalgia.
Pastel-colored morsels dance across a tender canvas of buttery dough.
Kids and adults alike will fall in love with this playful treat that brings memories flooding back.
Magical sprinkles and a delicate swirl of color make these cookies impossible to resist.
Quick mixing and simple ingredients mean you can whip up happiness in minutes.
Prepare to unleash pure joy with just one magical crumb.
Cotton Candy Cookies For Carnival-Inspired Joy
What You’ll Need For Cotton Candy Cookies Fun
Dry Ingredients:Wet Ingredients:Flavor and Color Enhancers:Steps For Fluffy Cotton Candy Cookie Creation
Step 1: Warm Up the Oven
Set your oven to toasty 350F (175C).
Cover a baking sheet with parchment paper or a non-stick silicone mat.
Step 2: Create Dry Mixture
Grab a medium bowl and whisk together:Set this powdery blend aside.
Step 3: Whip Butter and Sugar
In a spacious mixing bowl, blend softened butter and sugar until the mixture looks fluffy and cloud-like.
Step 4: Introduce Liquid Friends
Blend in these tasty companions:Mix until everything looks smooth and happy.
Step 5: Marry Wet and Dry Ingredients
Slowly fold dry ingredients into wet mixture.
Stir gently until just combined – no overmixing allowed!
Step 6: Paint the Dough
Divide dough into two equal portions.
Transform one half pink and the other blue using food coloring.
Swirl colors gently.
Step 7: Shape Playful Cookies
Grab bits of pink and blue dough.
Smoosh them together and roll into adorable balls.
Gently press to create cookie shapes.
Step 8: Dress Up Cookies
Arrange cookie balls on prepared baking sheet.
Leave space between each cookie.
Sprinkle with colorful toppings if desired.
Step 9: Bake to Perfection
Slide cookies into the oven.
Bake for 8-10 minutes until edges look set but centers remain soft.
Watch carefully to avoid overcooking.
Step 10: Cool and Celebrate
Let cookies rest on baking sheet for 5 minutes.
Transfer to wire rack and allow complete cooling.
Enjoy your whimsical cotton candy creation!
Tips For Soft Cotton Candy Cookies Every Time
Cotton Candy Cookie Variations For Extra Color
Creative Ways To Serve Cotton Candy Cookies
Storing Cotton Candy Cookies To Keep Softness
FAQs
The key is to slightly underbake the cookies, removing them from the oven when the edges are set but the centers are still soft. This ensures a tender, melt-in-your-mouth texture that’s characteristic of cotton candy cookies.
Yes, you can skip the food coloring and still enjoy the cotton candy flavor. The cookies will be a standard vanilla color but will still have the delightful cotton candy taste from the flavoring or extracts.
The mixture should look light, fluffy, and almost white in color. It typically takes about 3-4 minutes of beating with an electric mixer to achieve the right consistency, which helps create a softer cookie texture.
Print
Cotton Candy Cookies Recipe
- Total Time: 30 minutes
- Yield: 24 1x
Description
Sweet cotton candy cookies bring nostalgic carnival magic to your dessert plate. Delightful pink-swirled treats deliver sugary childhood memories with each playful, melt-in-your-mouth bite you’ll cherish.
Ingredients
Dry Ingredients:
- 2 3/4 cups all-purpose flour
- 1 teaspoon baking soda
- 1/2 teaspoon baking powder
- 1/2 teaspoon salt
Wet and Flavoring Ingredients:
- 1 cup unsalted butter, softened
- 1 1/2 cups granulated sugar
- 1 large egg
- 1 teaspoon vanilla extract
- 1/2 teaspoon almond extract
Coloring and Decoration:
- A few drops pink food coloring
- A few drops blue food coloring
- Cotton candy flavoring (optional), adjust to taste
- Sprinkles (optional), for decoration
Instructions
- Prepare the oven at 350F (175C) and line a baking sheet with parchment paper or silicone mat.
- Combine flour, baking soda, baking powder, and salt in a medium bowl, whisking thoroughly to ensure even distribution.
- In a large mixing bowl, cream butter and sugar until the mixture becomes airy and pale, creating a smooth base.
- Incorporate egg, vanilla, almond extract, and cotton candy flavoring, blending until the mixture achieves a uniform consistency.
- Gradually fold dry ingredients into wet ingredients, stirring gently to prevent overmixing and maintain a tender texture.
- Separate dough into two equal portions, adding pink and blue food coloring to each section, mixing until colors are vibrant and evenly spread.
- Create a marbled effect by gently pressing pink and blue dough together, then rolling into uniform balls and flattening slightly on the baking sheet.
- Arrange cookie dough balls approximately 2 inches apart, optionally sprinkling decorative toppings for additional visual appeal.
- Bake for 8-10 minutes, watching for set edges and soft centers – a key indicator of perfectly textured cookies.
- Allow cookies to rest on the baking sheet for 5 minutes, then transfer to a wire rack for complete cooling, ensuring a delightful, soft texture.
Notes
- Customize color combinations by experimenting with different food coloring hues for a playful, unique twist on the classic cotton candy cookie.
- Swap vanilla extract with cotton candy flavoring for an intensified sweet carnival-like taste that kids and adults will adore.
- Chill dough for 30 minutes before shaping to prevent spreading and maintain vibrant color definition during baking.
- Use gel food coloring instead of liquid for more saturated colors without altering dough consistency.
- Prep Time: 20 minutes
- Cook Time: 10 minutes
- Category: Desserts, Snacks
- Method: Baking
- Cuisine: American
Nutrition
- Serving Size: 24
- Calories: 132 kcal
- Sugar: 8 g
- Sodium: 80 mg
- Fat: 6 g
- Saturated Fat: 3.7 g
- Unsaturated Fat: 2.3 g
- Trans Fat: 0.1 g
- Carbohydrates: 18 g
- Fiber: 0.4 g
- Protein: 1.5 g
- Cholesterol: 25 mg
Michael Reyes
Founder & Lead Recipe Developer
Expertise
Education
Santa Fe Community College
Michael’s love for cooking runs deep, rooted in the bold, colorful flavors of his New Mexico upbringing.
After earning his Culinary Arts Certificate from Santa Fe Community College, he spent years sharpening his skills in kitchens that celebrated traditional Southwestern and Latin American dishes.
He believes cooking should feel approachable and fun, never complicated. When he’s not stirring up new recipe ideas, Michael’s out hiking scenic trails, chatting with farmers at local markets, or chasing the perfect sunset shot for inspiration.