
Luscious Creamy Banana Pudding Cheesecake Bars Recipe for Dessert
Crafting a decadent banana pudding cheesecake bars sensation promises pure dessert magic.
Sweet aromas will dance through your kitchen with this nostalgic treat.
Childhood memories blend seamlessly with sophisticated bakery-style indulgence.
Layers of silky cream cheese and ripe banana create an irresistible harmony.
Crisp vanilla wafer crusts provide delightful textural contrast to smooth filling.
Delicate swirls of pudding peek through rich cheesecake landscapes.
Each bite transports you to comfort and pure bliss.
Tempt your taste buds and surprise everyone at the next gathering.
Creamy Banana Pudding Cheesecake Bars Are Irresistible
Ingredients Needed For Banana Pudding Cheesecake Bars
Crust Ingredients:Filling Ingredients:Topping Ingredients:Instructions For Banana Pudding Cheesecake Bars Bliss
Step 1: Prep Your Baking Pan
Grab an 8″x8″ pan and line it with parchment paper.
Make sure the paper hangs over the edges so you can easily lift out your delicious bars later.
Step 2: Create Crunchy Crust
Grab a mixing bowl and combine:Mix everything until it looks like perfect sandy crumbs.
Step 3: Pack Down Crust
Press the crumbly mixture firmly into the bottom of your lined pan.
Use the back of a spoon or your fingers to create an even, compact layer.
Pop the pan in the freezer while you work on the filling.
Step 4: Whip Cream Cheese Base
In a large bowl, beat cream cheese until it becomes light and fluffy.
Add sugar and mix until the mixture looks smooth and creamy.
Step 5: Fold In Whipped Goodness
Gently fold whipped topping into the cream cheese mixture.
Be careful not to deflate the mixture – keep it light and airy.
Step 6: Prepare Banana Pudding
In a separate bowl, whisk banana pudding mix with milk until it thickens beautifully.
Let it chill in the refrigerator for a few minutes to set.
Step 7: Marry The Mixtures
Carefully fold the chilled pudding into the cream cheese mixture.
Stir until everything is perfectly combined and looks like a dream.
Step 8: Create Layers
Spread the filling evenly over your prepared crust.
Make sure it’s smooth and reaches all the corners.
Step 9: Freeze And Set
Place the pan in the freezer for at least 4 hours or overnight.
This helps the bars firm up and develop amazing texture.
Step 10: Slice And Garnish
Once set, lift the bars out using the parchment paper.
Slice into 9 perfect squares.
Top each square with:Serve and watch everyone’s eyes light up!
Pro Tips For Creamy Banana Cheesecake Bar Perfection
Cheesecake Bar Variations With Banana Pudding Twist
How To Serve Banana Cheesecake Bars For Dessert
Keeping Banana Cheesecake Bars Moist For Days
FAQs
Nilla Wafers are classic vanilla-flavored cookies made by Nabisco, often used in desserts like banana pudding. They have a light, crisp texture and sweet vanilla taste.
Yes, you can substitute banana pudding mix with vanilla or cheesecake pudding mix for a similar creamy texture and flavor profile.
While an electric mixer helps create a smoother texture, you can use a whisk and some arm strength to mix the ingredients if needed. Just ensure cream cheese is well-blended.
Choose bananas that are yellow with a few brown spots – this indicates they’re sweet and soft, perfect for adding to the cheesecake bars.
Print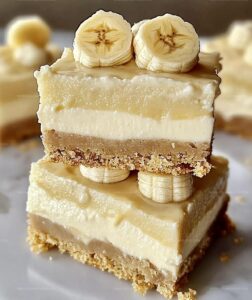
Creamy Banana Pudding Cheesecake Bars Recipe
- Total Time: 20 minutes
- Yield: 12 1x
Description
Indulgent Banana Pudding Cheesecake Bars merge classic Southern comfort with luxurious dessert innovation. Silky cheesecake layers and banana pudding create a nostalgic treat that will transport you to sweet, memorable moments of culinary bliss.
Ingredients
Main Ingredients:
- 12 ounces (340 grams) cream cheese, softened
- 1 1/2 cups (360 milliliters) whipped topping (for filling)
- 1 (3.4 ounces/96 grams) package instant banana pudding mix
- 1 3/4 cups (420 milliliters) whole milk
- 1/2 banana, sliced (for topping)
Crust Ingredients:
- 1 1/2 cups crushed Nilla Wafers
- 5 tablespoons butter, melted
- 2 tablespoons sugar
- 1 pinch sea salt
Garnish Ingredients:
- Whipped topping (for garnish)
- 9 Nilla Wafers (for topping)
Instructions
- Prepare the baking vessel by lining an 8″x8″ pan with parchment paper, ensuring extended edges for effortless removal.
- Craft the crust by combining crushed Nilla Wafers with melted butter, sugar, and sea salt until thoroughly integrated.
- Compress the crust mixture firmly into the pan’s base, creating a compact foundation. Transfer to the freezer during filling preparation.
- Whip the cream cheese until airy and light, then incorporate sugar, blending until smooth and homogeneous.
- Delicately incorporate whipped topping into the cream cheese mixture, maintaining a soft, consistent texture.
- Construct the banana pudding by whisking pudding mix with milk until it thickens, then chill for 3 minutes to achieve proper consistency.
- Gently merge the pudding with the cream cheese mixture, ensuring complete and uniform integration.
- Distribute the filling evenly across the frozen crust, creating a level surface. Freeze for 4-6 hours or overnight until completely solidified.
- Once set, partition into 9 uniform squares. Embellish each portion with a generous whipped topping swirl, fresh banana slice, and a classic Nilla Wafer for garnish.
Notes
- Perfectly Line Pan Use parchment paper with extra hanging edges to effortlessly lift bars out without breaking.
- Crushing Wafers Crush Nilla Wafers into fine, even crumbs for a consistent, smooth crust texture that holds together well.
- Chilling Technique Freeze the bars for minimum 4 hours to ensure a firm, sliceable cheesecake with clean edges and stable structure.
- Dietary Adaptations Swap traditional ingredients with gluten-free wafers, dairy-free cream cheese, and plant-based whipped topping for alternative diet versions.
- Prep Time: 20 minutes
- Cook Time: 0 minutes
- Category: Desserts
- Method: None
- Cuisine: American
Nutrition
- Serving Size: 12
- Calories: 284 kcal
- Sugar: 19 g
- Sodium: 173 mg
- Fat: 18 g
- Saturated Fat: 10 g
- Unsaturated Fat: 7 g
- Trans Fat: 0.3 g
- Carbohydrates: 26 g
- Fiber: 1 g
- Protein: 4 g
- Cholesterol: 53 mg
Michael Reyes
Founder & Lead Recipe Developer
Expertise
Education
Santa Fe Community College
Michael’s love for cooking runs deep, rooted in the bold, colorful flavors of his New Mexico upbringing.
After earning his Culinary Arts Certificate from Santa Fe Community College, he spent years sharpening his skills in kitchens that celebrated traditional Southwestern and Latin American dishes.
He believes cooking should feel approachable and fun, never complicated. When he’s not stirring up new recipe ideas, Michael’s out hiking scenic trails, chatting with farmers at local markets, or chasing the perfect sunset shot for inspiration.