Irresistibly Crispy Chicken Sandwich Recipe for Lunch Bliss
Weeknight dinners demand something special, and this crispy chicken sandwich recipe delivers pure culinary magic.
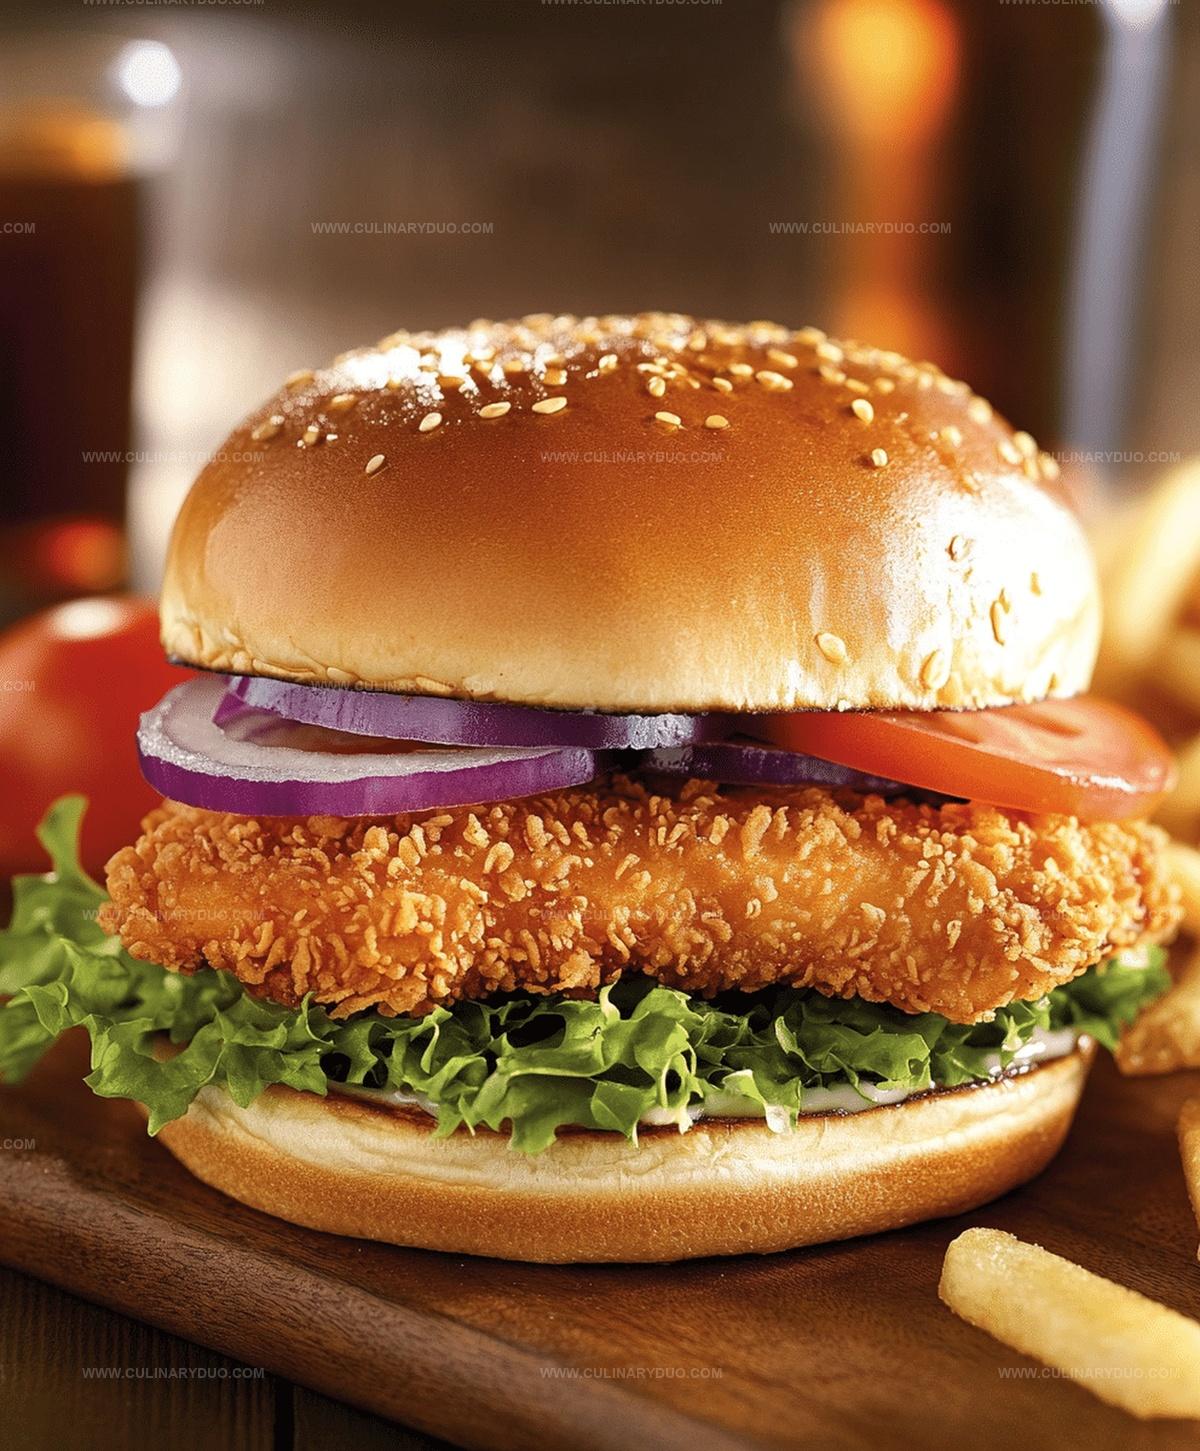
Crunchy breading meets tender meat in a mouthwatering creation that’ll make taste buds dance.
Golden-brown chicken nestled between soft buns promises a flavor explosion.
Each bite combines perfectly seasoned breading with juicy chicken that crackles with every mouthful.
Simple ingredients and straightforward techniques ensure anyone can master this delectable sandwich.
The secret lies in a perfectly crisp coating that seals in moisture and flavor.
Crispy Chicken Sandwich Fresh Flavor Focus
Ingredients For Crispy Chicken Sandwiches
Main Protein:Marinade:Coating:Cooking Elements:Sandwich Assembly:Seasoning:Sauce:Steps For Crispy Sandwich Perfection
Step 1: Prepare the Chicken
Slice each chicken breast horizontally to create four even fillets.
This technique ensures uniform cooking and maximizes crispiness.
Step 2: Create Flavor-Packed Marinade
Submerge chicken fillets in buttermilk, seasoning with salt and pepper.
Let the chicken soak for a minimum of 30 minutes or up to 4 hours in the refrigerator.
This process tenderizes the meat and infuses deep flavor.
Step 3: Mix Crunchy Coating
Combine dry ingredients in a wide bowl:Whisk these ingredients to create a complex, seasoned coating that guarantees maximum crunch.
Step 4: Heat Cooking Oil
Pour vegetable oil into a heavy skillet, filling about 1/2 inch deep.
Heat over medium-high temperature until the oil shimmers and reaches optimal frying temperature.
Step 5: Coat Chicken Thoroughly
Remove chicken from buttermilk marinade and generously coat each piece in the seasoned flour mixture.
Press firmly to ensure a thick, even layer of coating that will create a spectacular crispy exterior.
Step 6: Fry to Golden Perfection
Carefully place coated chicken into hot oil.
Fry each side for 4-5 minutes until the exterior turns a beautiful golden brown.
Ensure internal temperature reaches 165°F using a meat thermometer for safe consumption.
Step 7: Drain and Rest
Transfer fried chicken to a paper towel-lined plate.
Allow excess oil to drain, which helps maintain the crispy texture.
Step 8: Build Your Sandwich
Toast burger buns until lightly golden.
Layer with:Place the hot, crispy chicken on top of the prepared bun.
Step 9: Serve and Enjoy
Plate your sandwich immediately alongside crispy french fries or your favorite side dish.
Devour while hot and crispy!
Tips To Keep Chicken Sandwiches Crunchy
Fun Twists On Crispy Chicken Sandwiches
Best Ways To Serve Crispy Sandwiches
Storing Sandwiches For Later Crunch
FAQs
Buttermilk helps tenderize the chicken, making it juicy and soft by breaking down proteins. The acid in buttermilk also helps the seasoning penetrate deeper into the meat.
Vegetable oil works best for this recipe, but you can also use canola or peanut oil. Avoid olive oil as it has a low smoke point and can burn quickly at high temperatures.
Use a thermometer to check that the oil reaches 350°F (175°C). If you don’t have a thermometer, drop a small piece of bread into the oil – if it sizzles and turns golden quickly, the oil is ready.
Print
Crispy Chicken Sandwich Recipe
- Total Time: 4 hours 50 minutes
- Yield: 4 1x
Description
Indulgent crispy chicken sandwich promises a flavor explosion of golden-brown perfection. Crunchy breading, juicy meat, and zesty toppings create a mouthwatering experience you’ll crave again and again.
Ingredients
Protein:
- 2 large boneless, skinless chicken breasts
- 2 large boneless, skinless chicken thighs
Breading and Seasoning:
- 1 cup buttermilk
- 1 1/2 cups all-purpose flour
- 1/2 cup cornstarch
- 1 teaspoon garlic powder
- 1 teaspoon onion powder
- 1/2 teaspoon smoked paprika
- 1/2 teaspoon cayenne pepper
- Salt
- Black pepper
Sandwich Components and Condiments:
- 4 brioche buns
- Butter
- Vegetable oil
- Leafy lettuce
- Sliced tomatoes
- Pickles
- Mayonnaise
Instructions
- Carefully slice chicken breasts horizontally to create 4 evenly sized fillets, ensuring uniform thickness for consistent cooking.
- Submerge chicken pieces in buttermilk seasoned with salt and pepper, allowing flavors to penetrate for 30 minutes to 4 hours in refrigerator.
- Prepare a seasoned coating mixture by combining flour, cornstarch, paprika, garlic powder, onion powder, salt, and pepper in a wide, shallow dish.
- Warm vegetable oil in a heavy skillet to 350°F, creating a consistent, shimmering surface for frying.
- Remove chicken from buttermilk, allowing excess liquid to drip off, then thoroughly coat each piece in seasoned flour mixture, pressing firmly to create a complete, textured exterior.
- Carefully lower coated chicken into hot oil, frying for 4-5 minutes per side until exterior turns deep golden brown and internal temperature reaches 165°F, ensuring crispy texture and thorough cooking.
- Transfer fried chicken to paper towel-lined plate to drain excess oil and maintain crispiness.
- Lightly toast burger buns until edges are golden and crisp.
- Construct sandwiches by layering crispy chicken with fresh lettuce, ripe tomato slices, tangy pickles, and preferred condiment for maximum flavor complexity.
- Serve immediately alongside crisp french fries or preferred side dish for optimal taste and temperature.
Notes
- Achieve maximum crispiness by ensuring the oil is hot enough before adding chicken, around 350°F (175°C), which prevents soggy breading.
- For gluten-free variations, swap wheat flour with rice flour or gluten-free all-purpose flour blend, maintaining the same crispy texture.
- after first flour coating, dip back into buttermilk and then re-coat with seasoned flour for extra crispy layers.
- Use a meat thermometer to guarantee perfectly cooked chicken without overcooking, checking internal temperature reaches 165°F (75°C) for food safety.
- Prep Time: 40 minutes (or up to 4 hours)
- Cook Time: 10 minutes
- Category: Lunch, Dinner, Snacks
- Method: Frying
- Cuisine: American
Nutrition
- Serving Size: 4
- Calories: 580 kcal
- Sugar: 4 g
- Sodium: 750 mg
- Fat: 30 g
- Saturated Fat: 8 g
- Unsaturated Fat: 20 g
- Trans Fat: 0.5 g
- Carbohydrates: 45 g
- Fiber: 2 g
- Protein: 35 g
- Cholesterol: 90 mg
Michael Reyes
Founder & Lead Recipe Developer
Expertise
Education
Santa Fe Community College
Michael’s love for cooking runs deep, rooted in the bold, colorful flavors of his New Mexico upbringing.
After earning his Culinary Arts Certificate from Santa Fe Community College, he spent years sharpening his skills in kitchens that celebrated traditional Southwestern and Latin American dishes.
He believes cooking should feel approachable and fun, never complicated. When he’s not stirring up new recipe ideas, Michael’s out hiking scenic trails, chatting with farmers at local markets, or chasing the perfect sunset shot for inspiration.