
The Best Chocolate Pie Recipe That Melts in Your Mouth
Chocolate dreams come alive with this incredibly simple chocolate pie recipe that promises pure dessert bliss.
Every baker, from novice to expert, can master this delectable treat with ease.
The creamy, rich chocolate filling melts perfectly into a buttery graham cracker crust.
Each slice delivers a decadent chocolate experience that will make taste buds dance with joy.
No complicated techniques or fancy equipment stand between you and this heavenly dessert.
The ingredients are straightforward and likely already in your pantry.
Chocolate lovers will swoon over this effortless pie that transforms ordinary ingredients into an extraordinary sweet sensation.
Chocolate Pie That’s Pure Comfort
What You’ll Need for Chocolate Pie
Base Ingredients:Flavor Enhancers:Texture Ingredients:Simple Chocolate Pie Instructions
Step 1: Melt Chocolate Goodness
In a medium saucepan, create a dreamy chocolate base by gently melting:Stir continuously over medium heat until the mixture transforms into a silky smooth chocolate paradise.
Step 2: Add Flavor Boost
Remove the saucepan from heat and splash in vanilla extract, stirring to infuse the mixture with rich, aromatic flavor.
Step 3: Fold in Creamy Clouds
Allow the chocolate mixture to cool slightly, then gently fold in whipped cream.
Mix until the filling becomes light, fluffy, and perfectly combined.
Step 4: Create the Pie Base
Carefully pour the luscious chocolate mixture into a prepared graham cracker crust, making sure to spread it evenly.
Step 5: Chill and Set
Place the pie in the refrigerator and let it chill for at least 2 hours.
This allows the filling to set and develop its ultimate creamy texture.
Step 6: Serve with Flair
When ready to serve, pull out your masterpiece and add a final touch of:Slice and enjoy this decadent chocolate pie that’s sure to make everyone’s taste buds dance with joy!
Tips for Rich, Silky Chocolate Pie
Creative Ways to Make It Different
How to Serve a Slice of Chocolate Pie
Chocolate Pie Storage Tips
FAQs
Yes, you can substitute dark chocolate for chocolate chips. Just chop the dark chocolate into small pieces to ensure smooth melting.
The mixture should look smooth and glossy, with no lumps. It will have a silky texture when you stir it and all ingredients are fully incorporated.
No, you can use other types of crusts like Oreo cookie crust or a pre-baked pie crust. Each will give a slightly different flavor and texture to the pie.
Absolutely! This pie can be prepared a day or two in advance and kept refrigerated. Just add the whipped cream garnish right before serving to keep it fresh.
Print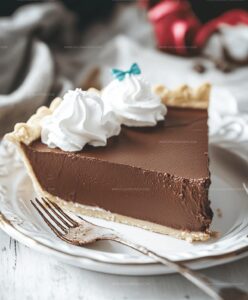
Easy Chocolate Pie Recipe
- Total Time: 2 hours 25 minutes
- Yield: 8 1x
Description
Chocolate lovers rejoice with this simple yet luxurious chocolate pie that whispers pure indulgence. Rich chocolate fills a buttery crust, promising delightful moments of sweet satisfaction you’ll savor down to the last delectable crumb.
Ingredients
Main Ingredients:
- 1 pre-made graham cracker crust
- 1 cup (240 ml) semi-sweet chocolate chips
- 1/2 cup (120 ml) milk
Dairy and Sweeteners:
- 1 cup (240 ml) heavy cream, whipped
- 1/4 cup (60 ml) sugar
Flavor Enhancers:
- 1 teaspoon (5 ml) vanilla extract
Instructions
- Gently melt chocolate chips, milk, and sugar in a saucepan over medium heat, stirring continuously until the mixture becomes silky and uniform.
- Remove the pan from heat and incorporate vanilla extract, creating a rich, aromatic chocolate base.
- Allow the chocolate mixture to cool for approximately 5-7 minutes, preventing potential cream separation.
- Delicately fold whipped cream into the chocolate mixture, ensuring a light and fluffy texture without deflating the cream.
- Transfer the velvety chocolate mixture into the prepared graham cracker crust, spreading evenly to create a smooth surface.
- Chill the pie in the refrigerator for a minimum of 2 hours, allowing the filling to set and develop a firm, creamy consistency.
- Before serving, optionally garnish with additional whipped cream or delicate chocolate shavings to enhance visual appeal and flavor complexity.
- Slice and serve the pie directly from the refrigerator to maintain its perfect, cool texture.
Notes
- Swap traditional milk with almond or oat milk for a dairy-free version that’s equally creamy and delicious.
- For a richer flavor, use dark chocolate chips instead of semi-sweet, which adds depth and intensity to the pie.
- Prevent a soggy crust by lightly toasting the graham cracker base in the oven for 5 minutes before adding the filling, creating a crisp texture that holds up beautifully.
- Make the pie extra special by sprinkling sea salt flakes on top just before serving, which enhances the chocolate’s complexity and adds a gourmet touch.
- Prep Time: 15 minutes
- Cook Time: 2 hours 10 minutes
- Category: Desserts
- Method: Simmering
- Cuisine: American
Nutrition
- Serving Size: 8
- Calories: 290 kcal
- Sugar: 27 g
- Sodium: 120 mg
- Fat: 18 g
- Saturated Fat: 11 g
- Unsaturated Fat: 6 g
- Trans Fat: 0.2 g
- Carbohydrates: 31 g
- Fiber: 2 g
- Protein: 3 g
- Cholesterol: 55 mg
Michael Reyes
Founder & Lead Recipe Developer
Expertise
Education
Santa Fe Community College
Michael’s love for cooking runs deep, rooted in the bold, colorful flavors of his New Mexico upbringing.
After earning his Culinary Arts Certificate from Santa Fe Community College, he spent years sharpening his skills in kitchens that celebrated traditional Southwestern and Latin American dishes.
He believes cooking should feel approachable and fun, never complicated. When he’s not stirring up new recipe ideas, Michael’s out hiking scenic trails, chatting with farmers at local markets, or chasing the perfect sunset shot for inspiration.