The Irresistible Easy Fried Cheese Bites Recipe for Snack Lovers
Crispy cheese bites offer a delightful snack that melts in your mouth with irresistible flavor.
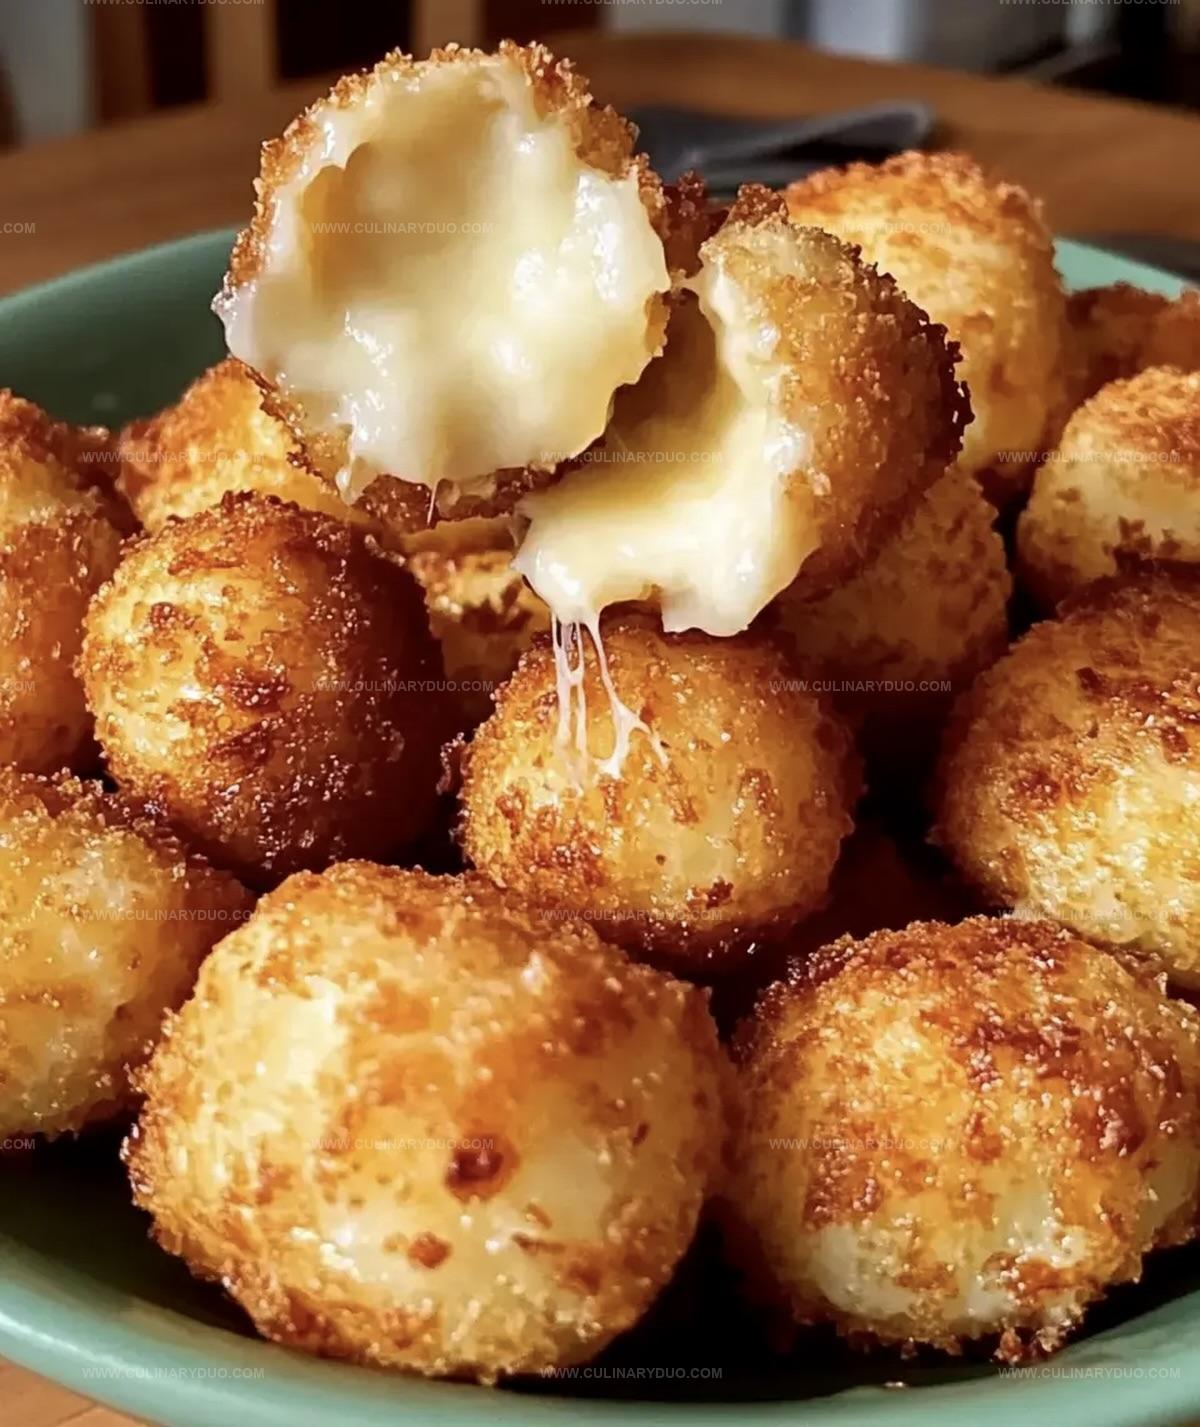
Bubbling golden edges and a soft center make these little morsels pure comfort.
cheese lovers will adore how simple ingredients combine into something magical.
Small gatherings or movie nights become special with these crunchy treats.
Minimal kitchen skills work perfectly for creating these addictive bites.
Quick preparation means you can whip up a batch faster than ordering takeout.
Dive into this recipe and watch everyone ask for seconds!
Why Easy Fried Cheese Bites Are Irresistible Snacks
What You Need For The Best Cheese Bites
Main Ingredients:Coating Ingredients:Cooking and Seasoning Ingredients:Instructions For Crispy Fried Cheese Bites At Home
Step 1: Prepare Cheese Balls
Grab your mozzarella and start crafting adorable little cheese nuggets.
Use your hands to roll the shredded cheese into compact, bite-sized spheres or cute cubes.
Make sure they’re tightly packed so they won’t fall apart during cooking.
Step 2: Create Coating Stations
Set up three welcoming bowls for your cheese adventure:Step 3: Dress Up Cheese Bites
Give each cheese ball a delicious makeover by rolling it through the stations:Ensure every inch is covered for maximum crunchiness.
Step 4: Heat Cooking Oil
Pour vegetable oil into a deep skillet.
Warm it up until it reaches a sizzling 350°F.
Use a thermometer for precision or watch for slight shimmering.
Step 5: Fry to Golden Perfection
Gently lower cheese bites into the hot oil.
Fry in small batches to maintain oil temperature.
Cook for 2-3 minutes until they transform into gorgeous golden-brown treasures.
Use a slotted spoon to rescue them onto paper towels.
Step 6: Final Flavor Boost
While still warm, sprinkle with salt and pepper.
These little cheese bombs are ready to rock your taste buds!
Tips For Gooey Cheese Bites Every Time
Fun Cheese Bite Flavors You Can Experiment With
Serving Fried Cheese Bites For A Snack Attack
Keeping Fried Cheese Bites Warm And Melty
FAQs
Mozzarella is ideal due to its melting properties and mild flavor, creating perfect gooey centers with crispy exteriors.
Yes, you can assemble and coat the cheese bites in advance, then refrigerate for up to 2 hours before frying to maintain their shape.
Ensure the cheese is completely sealed with breadcrumb coating and keep oil temperature consistent at 350F to create a protective crispy shell that prevents melting.
Not in the standard recipe. To make them gluten-free, substitute regular flour with almond flour or gluten-free flour blend, and use gluten-free breadcrumbs.
Print
Easy Fried Cheese Bites Recipe
- Total Time: 20 minutes
- Yield: 4 1x
Description
Crispy cheese bites deliver mouthwatering Mediterranean magic in mere minutes. Gooey golden squares promise a perfect appetizer that satisfies hunger and delights senses with each irresistible crunchy bite.
Ingredients
Main Ingredients:
- 1 cup (240 ml) shredded mozzarella cheese
- 1/4 cup (30 g) grated Parmesan cheese
- 1 large egg
Coating Ingredients:
- 1/2 cup (60 g) all-purpose flour
- 1/2 cup (120 g) breadcrumbs
Seasoning Ingredients:
- 1/2 teaspoon garlic powder
- 1/2 teaspoon onion powder
- Salt and pepper to taste
- Vegetable oil (for frying)
Instructions
- Craft compact spheres from shredded mozzarella, forming uniform bite-sized morsels.
- Arrange three culinary vessels: one with delicate flour, another combining crisp breadcrumbs and aged Parmesan, and the third hosting whisked egg blended with milk.
- Execute precise coating technique by gently rolling each cheese sphere first through flour, then submerging in egg mixture, and finally encasing completely in seasoned breadcrumb mixture.
- Prepare a deep skillet, heating vegetable oil to precisely 350°F, ensuring optimal frying temperature for golden transformation.
- Delicately introduce cheese spheres into sizzling oil, maintaining moderate batches to preserve consistent heat and prevent overcrowding.
- Monitor frying process, allowing bites to transform into crisp, amber-hued delicacies within 2-3 minutes, rotating occasionally for even browning.
- Extract cheese bites using perforated utensil, transferring onto absorbent paper towels to eliminate excess oil.
- Sprinkle warm morsels with refined salt and freshly cracked pepper, enhancing their savory profile moments before serving.
Notes
- Ensure cheese is cold and firm before shaping to prevent melting during handling, which helps maintain the bite’s structure.
- Use a cookie scoop or wet hands to create uniform cheese balls for consistent cooking and appearance.
- Freeze cheese bites for 15 minutes after coating to help breading stick better and prevent cheese from leaking during frying.
- Consider alternative coatings like crushed panko for extra crunch or add herbs like dried basil or oregano to breadcrumb mixture for enhanced flavor.
- Prep Time: 15 minutes
- Cook Time: 5 minutes
- Category: Appetizer, Snacks
- Method: Frying
- Cuisine: American
Nutrition
- Serving Size: 4
- Calories: 330 kcal
- Sugar: 1 g
- Sodium: 520 mg
- Fat: 22 g
- Saturated Fat: 9 g
- Unsaturated Fat: 11 g
- Trans Fat: 0.2 g
- Carbohydrates: 14 g
- Fiber: 1 g
- Protein: 18 g
- Cholesterol: 110 mg
Michael Reyes
Founder & Lead Recipe Developer
Expertise
Education
Santa Fe Community College
Michael’s love for cooking runs deep, rooted in the bold, colorful flavors of his New Mexico upbringing.
After earning his Culinary Arts Certificate from Santa Fe Community College, he spent years sharpening his skills in kitchens that celebrated traditional Southwestern and Latin American dishes.
He believes cooking should feel approachable and fun, never complicated. When he’s not stirring up new recipe ideas, Michael’s out hiking scenic trails, chatting with farmers at local markets, or chasing the perfect sunset shot for inspiration.