Easy Key Lime Pie Bars Recipe: Fresh, Tangy Bliss in Every Bite
Creamy, tangy key lime pie bars burst with tropical sunshine on a buttery graham cracker crust.
These zesty key lime pie bars deliver a refreshing dessert that dances between sweet and tart.
Bright citrus notes mingle with smooth, velvety filling for an irresistible treat.
Summer or winter, these bars bring a slice of Florida’s vibrant flavor to your table.
No baking skills required – just simple ingredients and a few easy steps.
The recipe promises a delightful dessert that will have everyone asking for seconds.
Bright & Tart: Key Lime Pie Bars for Summer
Everything for Key Lime Pie Bars, Gathered Here
Crust Ingredients:Filling Ingredients:Topping Ingredients:How to Make Key Lime Bars Stepwise
Step 1: Prepare Baking Dish
Grab a 9×13-inch baking dish and line it completely with parchment paper.
Ensure the paper covers the bottom and sides for easy removal later.
Step 2: Create Crunchy Crust
Mix together graham cracker crumbs, sugar, and melted butter in a bowl.
Press the mixture firmly and evenly into the bottom of the prepared dish.
Slide the dish into a preheated oven at 350°F and bake for 8-10 minutes until lightly golden.
Remove and let cool.
Step 3: Whip Up Zesty Filling
In a separate mixing bowl, combine:Whisk all ingredients until the mixture becomes smooth and creamy.
Step 4: Pour and Spread Filling
Gently pour the lime mixture over the cooled crust.
Use a spatula to spread it evenly across the surface.
Step 5: Bake to Perfection
Return the dish to the oven and bake for 15-20 minutes.
The filling should look just set with a slight jiggle in the center when gently shaken.
Step 6: Chill and Set
Allow the bars to cool completely at room temperature.
Transfer to the refrigerator and chill for at least 2 hours to help the bars firm up.
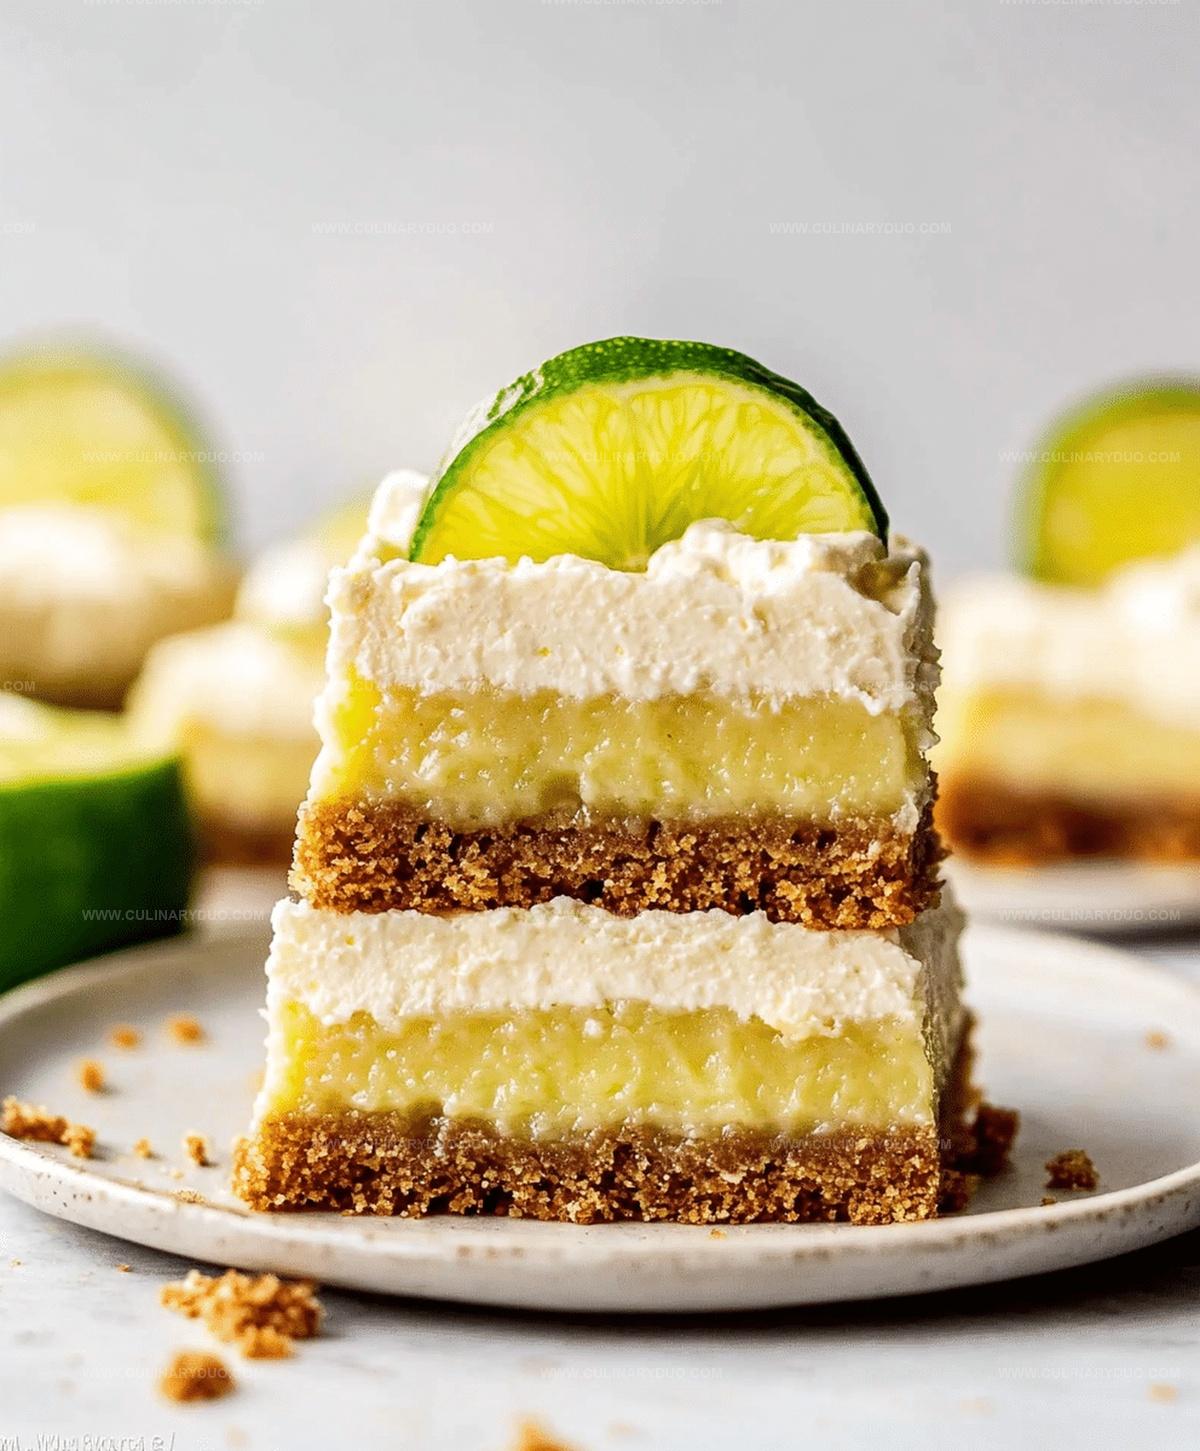
Step 7: Garnish and Serve
Once chilled, lift the bars out using the parchment paper.
Cut into squares.
Top with dollops of whipped cream and garnish with thin lime slices if desired.
Pro Tips for Tangy Key Lime Bars
Key Lime Pie Bar Mix-Ins and Upgrades
Serving Key Lime Pie Bars Chilled
Best Storage for Key Lime Pie Bars
FAQs
Key limes are smaller, more tart, and have a more intense flavor compared to regular Persian limes. They’re typically grown in Florida and Mexico, with a yellowish-green color and a distinct aromatic profile that gives key lime pie its signature tangy taste.
Yes, bottled key lime juice works perfectly fine if fresh key limes are unavailable. Just ensure you’re using 100% key lime juice for the most authentic flavor. Most grocery stores carry bottled key lime juice in the baking or cocktail mixers section.
The filling should look set around the edges but still have a slight jiggle in the center when gently shaken. It will continue to firm up as it cools.
Print
Easy Key Lime Pie Bars Recipe
- Total Time: 45 minutes
- Yield: 16 1x
Description
Zesty key lime pie bars bring sunshine from Florida’s orchards to your dessert table. Creamy, tangy filling nestled on a buttery graham cracker crust delivers refreshing summer flavors you’ll crave with each delightful bite.
Ingredients
Crust Ingredients:
- 1.5 cups graham cracker crumbs
- 0.25 cups granulated sugar
- 0.5 cups (1 stick/113 grams) unsalted butter, melted
Filling Ingredients:
- 4 large egg yolks
- 1 (14 ounces/397 grams) can sweetened condensed milk
- 0.5 cups fresh key lime juice
- 2 teaspoons lime zest
Garnish Ingredients:
- Whipped cream
- Lime zest
- Powdered sugar
Instructions
- Prepare the oven at 350°F and line a 9×13-inch baking dish with parchment paper, ensuring complete coverage.
- Mix graham cracker crumbs with sugar and melted butter, creating a cohesive base mixture that will form the crust.
- Press the graham cracker mixture firmly and evenly into the prepared baking dish, creating a compact foundation.
- Bake the crust for 8-10 minutes until lightly golden, then remove and allow to cool completely.
- Whisk sweetened condensed milk with key lime juice, lime zest, and egg yolks until the mixture becomes silky and uniform.
- Gently pour the lime filling over the cooled crust, ensuring an even distribution across the entire surface.
- Return the dish to the oven and bake for 15-20 minutes, watching for a slight jiggle in the center which indicates perfect doneness.
- Remove from oven and let the bars cool to room temperature, which helps the filling set properly.
- Refrigerate the bars for a minimum of 2 hours to achieve a firm, sliceable consistency.
- Cut into individual squares and optionally garnish with dollops of whipped cream and delicate lime slice accents before serving.
Notes
- Achieve a perfectly crisp crust by pressing graham cracker mixture firmly and evenly into the pan, using the back of a measuring cup for uniform compaction.
- Enhance flavor complexity by adding a pinch of salt to the graham cracker base, which balances the sweetness and highlights the tangy lime notes.
- Create a gluten-free version by substituting graham cracker crumbs with almond flour or gluten-free cookie crumbs, maintaining the same binding technique with melted butter.
- Prevent overbaking the filling by watching for a slight jiggle in the center, ensuring a creamy, silky texture that doesn’t become rubbery or dry.
- Prep Time: 15 minutes
- Cook Time: 30 minutes
- Category: Desserts
- Method: Baking
- Cuisine: American
Nutrition
- Serving Size: 16
- Calories: 200 kcal
- Sugar: 18 g
- Sodium: 90 mg
- Fat: 10 g
- Saturated Fat: 6 g
- Unsaturated Fat: 4 g
- Trans Fat: 0 g
- Carbohydrates: 25 g
- Fiber: 0.5 g
- Protein: 3 g
- Cholesterol: 95 mg
Michael Reyes
Founder & Lead Recipe Developer
Expertise
Education
Santa Fe Community College
Michael’s love for cooking runs deep, rooted in the bold, colorful flavors of his New Mexico upbringing.
After earning his Culinary Arts Certificate from Santa Fe Community College, he spent years sharpening his skills in kitchens that celebrated traditional Southwestern and Latin American dishes.
He believes cooking should feel approachable and fun, never complicated. When he’s not stirring up new recipe ideas, Michael’s out hiking scenic trails, chatting with farmers at local markets, or chasing the perfect sunset shot for inspiration.