Sizzling Garlic Parmesan Bacon Cheeseburger Bombs Recipe
Bursting with savory goodness, these irresistible garlic parmesan bacon cheeseburger bombs blend comfort and excitement in every single bite.
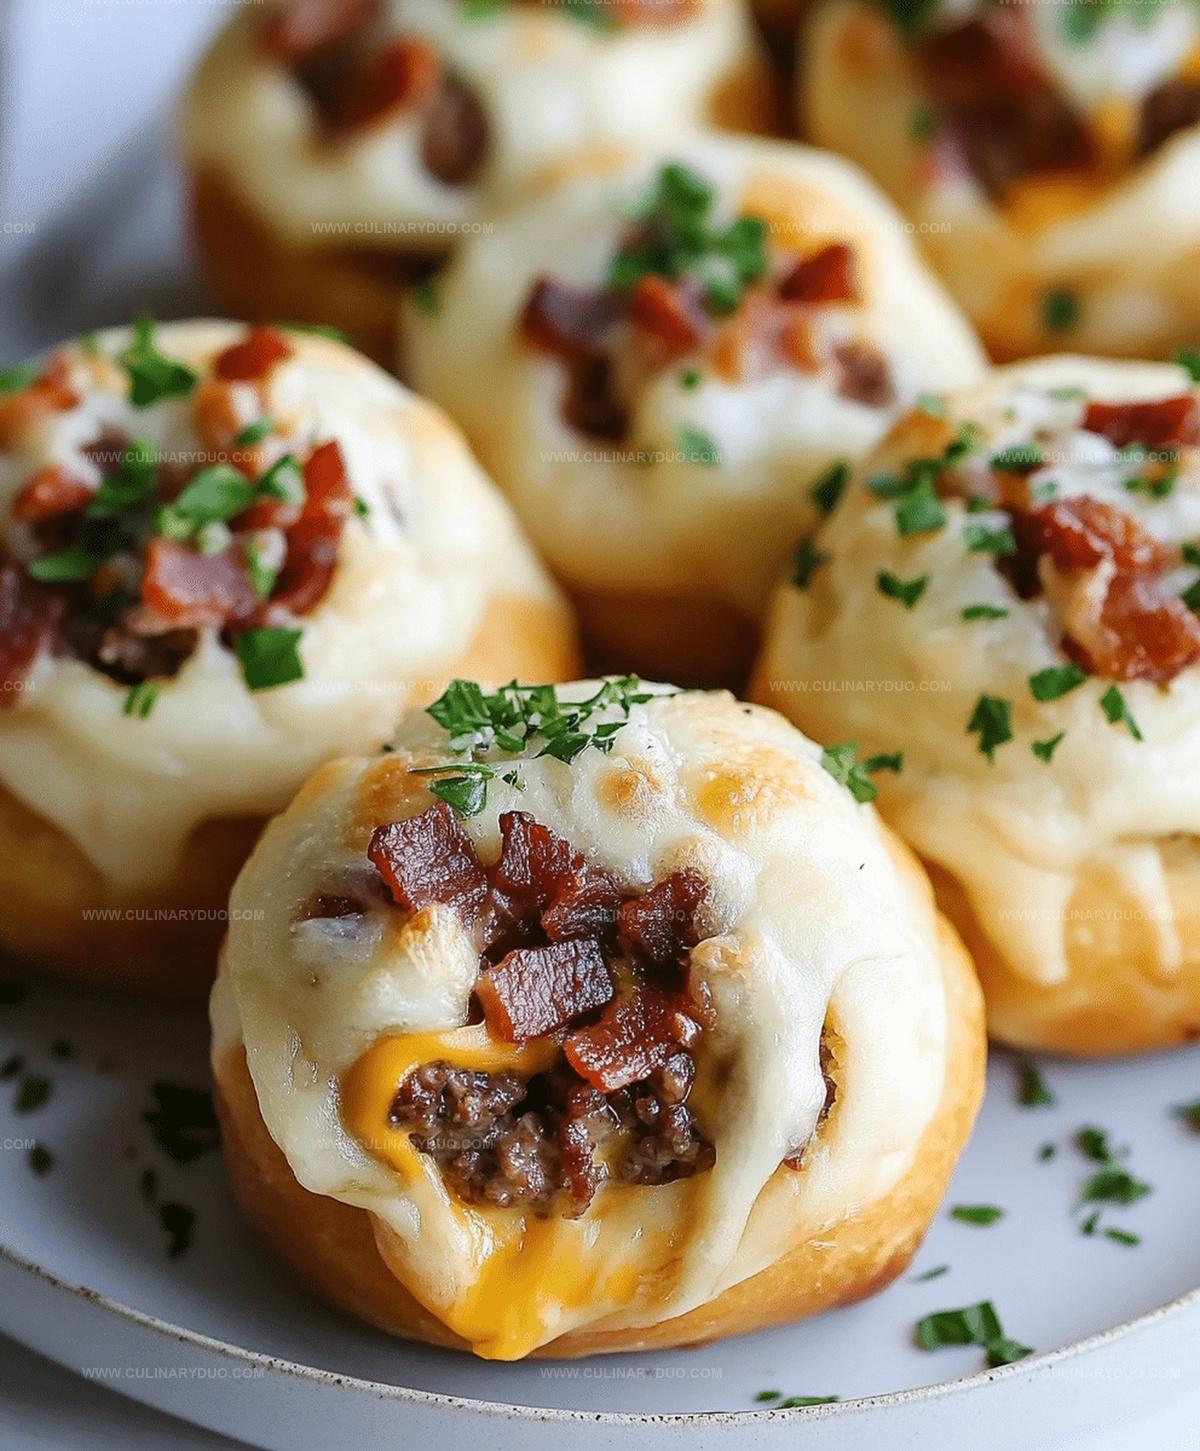
A culinary marvel that combines classic burger flavors with an unexpected twist, this recipe promises pure deliciousness.
Crispy bacon adds a smoky crunch while melted cheese creates an oozing center of pure satisfaction.
Parmesan brings a sharp, nutty depth that elevates the entire experience.
Garlic infuses each morsel with robust, aromatic intensity that keeps you coming back for more.
Each bomb packs a delectable punch that will have everyone at the table asking for seconds.
Cheesy Bacon Cheeseburger Bombs You’ll Crave Again
Ingredients for Garlic Parmesan Bombs
Protein Base:Cheese and Dairy:Dough and Seasoning:Garnish and Finishing Touches:Simple Instructions for Cheeseburger Bombs
Step 1: Warm Up the Oven
Fire up your oven to 375°F and grab a baking sheet.
Line it with parchment paper to prevent any sticky situations.
Step 2: Brown the Beef
Toss ground beef into a hot skillet over medium heat.
Sprinkle in:Cook the meat until it transforms into a delicious golden-brown color, about 5-7 minutes.
Drain away any extra grease.
Step 3: Mix in Flavor Boosters
Fold crumbled bacon and cheddar cheese into the beef.
Let the cheese melt and create a gooey, irresistible mixture.
Take the skillet off the heat and let it cool down slightly.
Step 4: Wrap the Flavor Bombs
Gently flatten each biscuit dough piece.
Scoop about two spoonfuls of the beef mixture into the center.
Carefully fold the edges over the filling, pinching them closed to create a perfect little ball.
Step 5: Arrange on Baking Sheet
Place the filled dough balls seam-side down on the prepared baking sheet, ensuring they have a little breathing room.
Step 6: Garlic Butter Magic
Whisk together melted butter and minced garlic.
Brush this liquid gold over the top of each dough ball.
Sprinkle Parmesan cheese generously on top for an extra flavor punch.
Step 7: Bake to Golden Perfection
Slide the baking sheet into the oven.
Bake for 12-15 minutes until the bombs turn a gorgeous golden brown and are cooked through.
Step 8: Serve and Celebrate
Garnish with freshly chopped parsley.
Serve these flavor explosions piping hot and watch everyone’s eyes light up!
Cheeseburger Bombs Tips and Tricks
Creative Takes on Cheeseburger Bombs
Serving Up Bacon Cheeseburger Bombs
Storage Solutions for Cheeseburger Bombs
FAQs
The filling contains seasoned ground beef, crumbled bacon, and melted cheddar cheese, creating a savory and rich center within the soft biscuit dough.
Yes, you can prepare the bombs and refrigerate them before baking. Just add an extra 2-3 minutes to the baking time when cooking them directly from the refrigerator.
Absolutely! Kids love handheld foods with cheesy, meaty fillings. These bombs are perfect for parties, game nights, or quick dinners that both children and adults will enjoy.
Print
Garlic Parmesan Bacon Cheeseburger Bombs Recipe
- Total Time: 35 minutes
- Yield: 6 1x
Description
Garlic parmesan bacon cheeseburger bombs elevate classic comfort food with explosive flavor combinations. Crispy exterior meets melted cheese and savory beef, promising a mouthwatering experience that satisfies deep cravings for hearty, indulgent bites you’ll devour.
Ingredients
Main Protein and Cheese:
- 1 pound ground beef
- 6 slices bacon, cooked and crumbled
- 1 cup shredded cheddar cheese
Seasonings and Aromatics:
- 1 tablespoon garlic powder (for beef mixture)
- 1 tablespoon garlic powder (for topping)
- 1 teaspoon onion powder
- 1 small onion, finely diced
- 1 tablespoon Worcestershire sauce
- Salt and pepper, to taste
Dough and Topping:
- 1 tube refrigerated biscuit dough
- 1/4 cup melted butter
- 1/4 cup grated Parmesan cheese
- 1 tablespoon chopped parsley
Instructions
- Warm the oven to 375°F and prepare a parchment-lined baking sheet for the upcoming culinary adventure.
- In a sizzling skillet, transform ground beef over medium heat, infusing it with aromatic garlic powder, onion powder, salt, and pepper. Cook until the meat browns beautifully, approximately 5-7 minutes, then drain excess fat.
- Incorporate crispy crumbled bacon and melted cheddar cheese into the seasoned beef, creating a rich and savory filling. Allow the mixture to cool slightly.
- Gently flatten each biscuit dough piece, creating a delicate canvas for the meat mixture. Carefully spoon the beef filling into the center of each dough round.
- Artfully fold the dough edges over the filling, pinching and sealing meticulously to form perfect compact spheres.
- Arrange the sealed dough balls carefully on the prepared baking sheet, positioning them seam side down for an elegant presentation.
- Craft a luxurious garlic butter by combining melted butter and minced garlic. Generously brush the tops of each dough ball with this aromatic mixture.
- Sprinkle a generous layer of Parmesan cheese over the butter-glazed dough balls, adding a delightful crispy texture.
- Slide the baking sheet into the preheated oven, baking for 12-15 minutes until the bombs transform into golden-brown delicacies.
- Finish with a light garnish of freshly chopped parsley and serve these delectable bombs piping hot for maximum enjoyment.
Notes
- Customize meat selection by using ground turkey or plant-based alternatives for dietary preferences and healthier options.
- Ensure meat mixture is slightly cooled before filling biscuits to prevent dough from becoming soggy or difficult to seal.
- Roll dough balls gently and seal edges completely to prevent filling from leaking during baking.
- Try additional cheese varieties like Swiss or pepper jack for unique flavor combinations.
- Prep Time: 20 minutes
- Cook Time: 15 minutes
- Category: Lunch, Dinner, Appetizer, Snacks
- Method: Baking
- Cuisine: American
Nutrition
- Serving Size: 6
- Calories: 408 kcal
- Sugar: 1 g
- Sodium: 590 mg
- Fat: 31 g
- Saturated Fat: 13 g
- Unsaturated Fat: 16 g
- Trans Fat: 0.5 g
- Carbohydrates: 14 g
- Fiber: 1 g
- Protein: 22 g
- Cholesterol: 95 mg
Michael Reyes
Founder & Lead Recipe Developer
Expertise
Education
Santa Fe Community College
Michael’s love for cooking runs deep, rooted in the bold, colorful flavors of his New Mexico upbringing.
After earning his Culinary Arts Certificate from Santa Fe Community College, he spent years sharpening his skills in kitchens that celebrated traditional Southwestern and Latin American dishes.
He believes cooking should feel approachable and fun, never complicated. When he’s not stirring up new recipe ideas, Michael’s out hiking scenic trails, chatting with farmers at local markets, or chasing the perfect sunset shot for inspiration.