Spooky-Good Halloween Chocolate Cookies Recipe for Fall Fun
Dark nights and crisp autumn air spark cravings for halloween chocolate cookies that melt in your mouth.
Sweet treats beckon from every corner during this spooky season.
Chocolate lovers rejoice with these decadent morsels that capture the spirit of Halloween.
Rich cocoa and unexpected hints of warmth create a delightful combination.
Baking these cookies fills your kitchen with irresistible aromas that draw everyone closer.
Each bite promises a perfect blend of chocolatey goodness and festive charm.
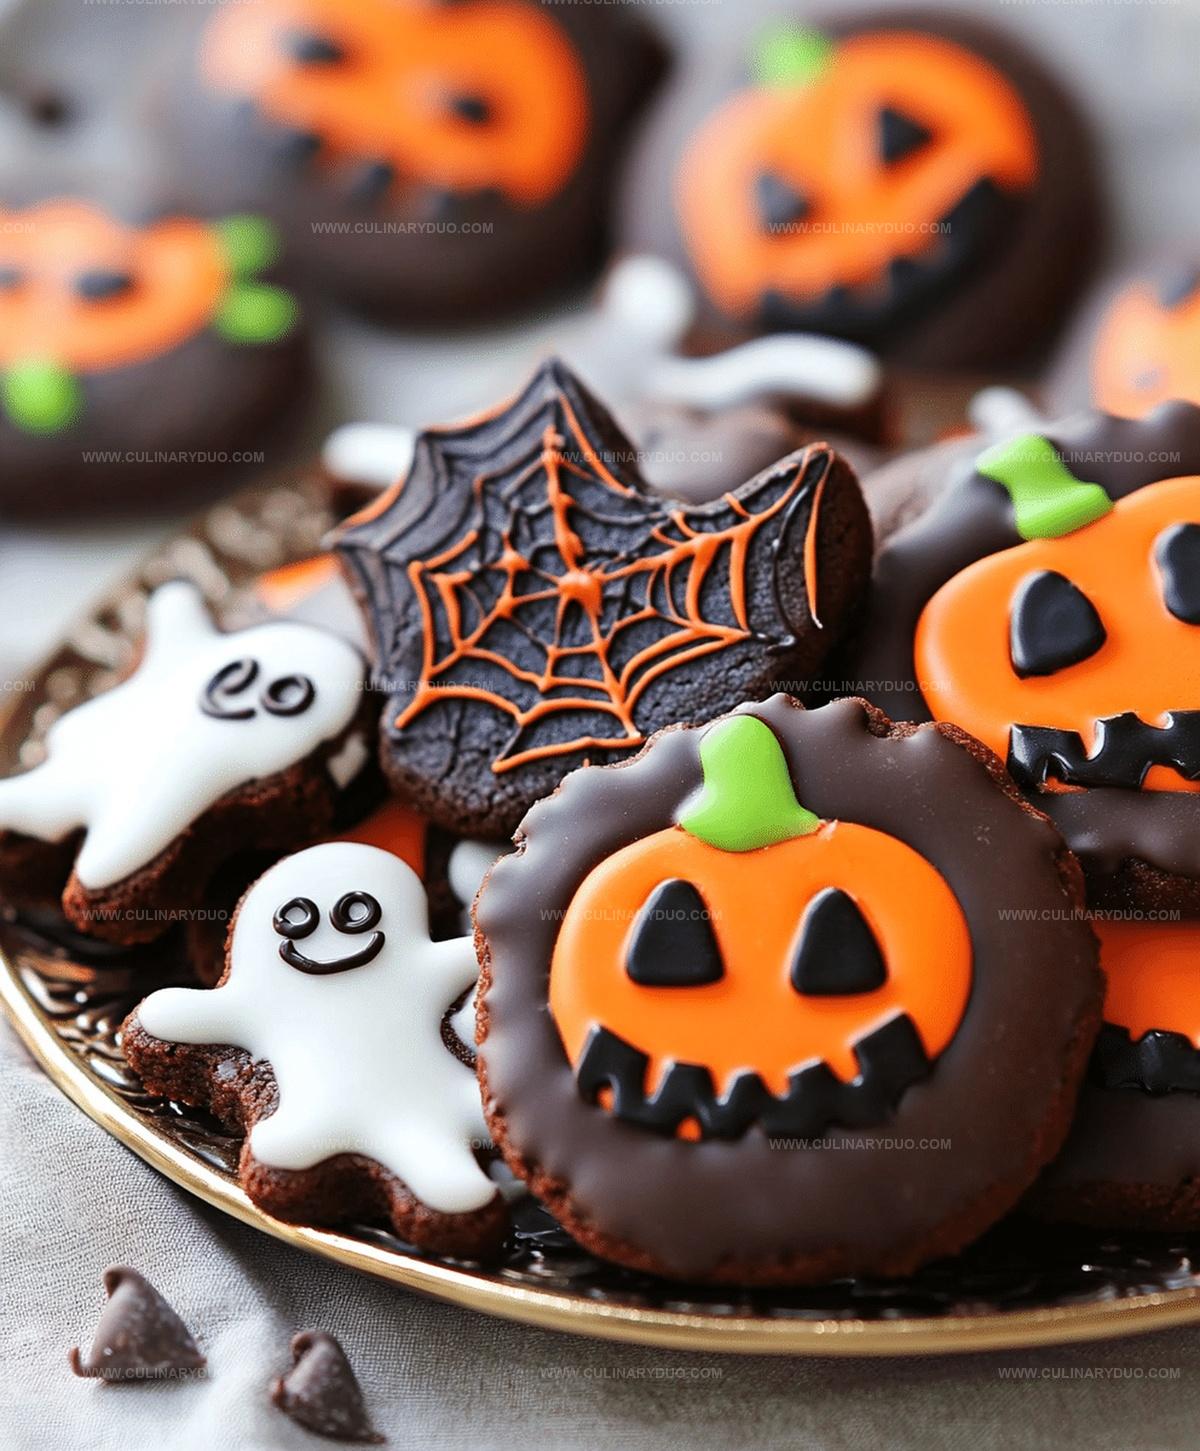
Halloween Fun in Every Chocolate Cookie
Ingredients for Spooky Halloween Chocolate Cookies
Wet Ingredients:Dry Ingredients:Decorative Ingredients:Steps to Create Halloween-Themed Cookies
Step 1: Prepare Baking Station
Grab a baking sheet and line it with parchment paper.
Preheat the oven to 350°F (175°C) to create the perfect baking environment for your Halloween treats.
Step 2: Create Creamy Base
In a mixing bowl, blend together:Whip these ingredients until they become light and fluffy, creating a smooth and creamy foundation for your cookies.
Step 3: Mix Wet Ingredients
Incorporate into the creamy mixture:Stir until all ingredients are thoroughly combined and create a uniform mixture.
Step 4: Combine Dry Ingredients
In a separate bowl, whisk together:Ensure all dry ingredients are well mixed and free of lumps.
Step 5: Merge Wet and Dry Mixtures
Gradually add the dry ingredient mixture to the wet ingredients.
Mix carefully until everything is fully incorporated, creating a rich chocolate cookie dough.
Step 6: Shape Spooky Cookies
Scoop the dough onto the prepared baking sheet.
Gently flatten each cookie to create a perfect shape.
Step 7: Add Halloween Flair
Decorate the cookies with:Press the decorations lightly into the cookie dough to ensure they stick.
Step 8: Bake and Cool
Place the baking sheet in the preheated oven.
Bake for 10-12 minutes or until the edges look set.
Remove and let the cookies cool completely on a wire rack.
Your ghoulishly delicious chocolate cookies are ready to enjoy!
Tips for Decorating and Baking Halloween Cookies
Halloween Cookie Variations for Any Party
Serving Up Halloween Chocolate Cookies
How to Store Halloween Cookies
FAQs
Use Halloween-themed cookie cutters to shape the dough or add edible googly eyes made from white chocolate and black icing. You can also create spider web designs using white royal icing drizzled over the chocolate cookies.
Absolutely! Kids will love helping decorate the cookies with Halloween sprinkles and creating fun designs. It’s a great baking activity that allows children to get creative and enjoy the festive spirit.
Yes, you can prepare the cookie dough in advance and refrigerate it for up to 3 days. If you want to store it longer, freeze the dough for up to 2 weeks. Just thaw in the refrigerator before baking.
Print
Halloween Chocolate Cookies Recipe
- Total Time: 27 minutes
- Yield: 24 1x
Description
Spooky Halloween Chocolate Cookies blend dark chocolate magic with festive seasonal spirit. Crisp edges and chewy centers create delightful treats you’ll crave all autumn long.
Ingredients
Main Ingredients:
- 1 cup (226 grams/8 ounces) unsalted butter
- 2 large eggs
- 2 cups (240 grams) all-purpose flour
- 1 1/2 cups (270 grams) semi-sweet chocolate chips
- 3/4 cup (65 grams) unsweetened cocoa powder
Sweet Ingredients:
- 1 cup (200 grams) granulated sugar
- 1/2 cup (100 grams) brown sugar
Flavoring and Leavening Ingredients:
- 1 teaspoon vanilla extract
- 1 teaspoon baking soda
- 1/2 teaspoon salt
Decoration:
- Halloween-themed sprinkles
- Candy eyeballs
Instructions
- Arrange the oven rack in the middle position and heat to 350°F. Cover a baking sheet with parchment paper.
- Using an electric mixer, blend butter with white and brown sugars until the mixture becomes airy and pale.
- Incorporate eggs and vanilla extract, mixing thoroughly until smooth and uniform.
- In a separate mixing bowl, sift together flour, cocoa powder, baking soda, and salt until well combined.
- Slowly fold dry ingredients into the wet mixture, stirring gently until a consistent chocolate dough forms.
- Drop rounded spoonfuls of dough onto the prepared baking sheet, leaving space between each cookie.
- Gently press down on each cookie mound to create a slightly flattened shape.
- Sprinkle festive Halloween-themed decorations across the cookie surfaces for a spooky touch.
- Place in the preheated oven and bake for 10-12 minutes, watching for set edges and slightly cracked tops.
- Remove from oven and allow cookies to cool completely on a wire rack before serving or storing.
Notes
- Swap cocoa powder with black cocoa for an ultra-dark, spooky Halloween appearance that intensifies the chocolate flavor.
- Use gluten-free flour blend to make these cookies suitable for those with wheat sensitivities, ensuring everyone can enjoy the festive treat.
- Create different Halloween designs by using themed cookie cutters or piping spooky royal icing decorations for a more personalized touch.
- Freeze unbaked cookie dough balls for up to one month, allowing you to have fresh Halloween cookies ready anytime during the holiday season.
- Prep Time: 15 minutes
- Cook Time: 12 minutes
- Category: Desserts, Snacks
- Method: Baking
- Cuisine: American
Nutrition
- Serving Size: 24
- Calories: 178
- Sugar: 13 g
- Sodium: 97 mg
- Fat: 10 g
- Saturated Fat: 6 g
- Unsaturated Fat: 4 g
- Trans Fat: 0 g
- Carbohydrates: 22 g
- Fiber: 2 g
- Protein: 2 g
- Cholesterol: 19 mg
Michael Reyes
Founder & Lead Recipe Developer
Expertise
Education
Santa Fe Community College
Michael’s love for cooking runs deep, rooted in the bold, colorful flavors of his New Mexico upbringing.
After earning his Culinary Arts Certificate from Santa Fe Community College, he spent years sharpening his skills in kitchens that celebrated traditional Southwestern and Latin American dishes.
He believes cooking should feel approachable and fun, never complicated. When he’s not stirring up new recipe ideas, Michael’s out hiking scenic trails, chatting with farmers at local markets, or chasing the perfect sunset shot for inspiration.