Hauntingly Delicious Halloween Graveyard Chocolate Poke Cake Recipe
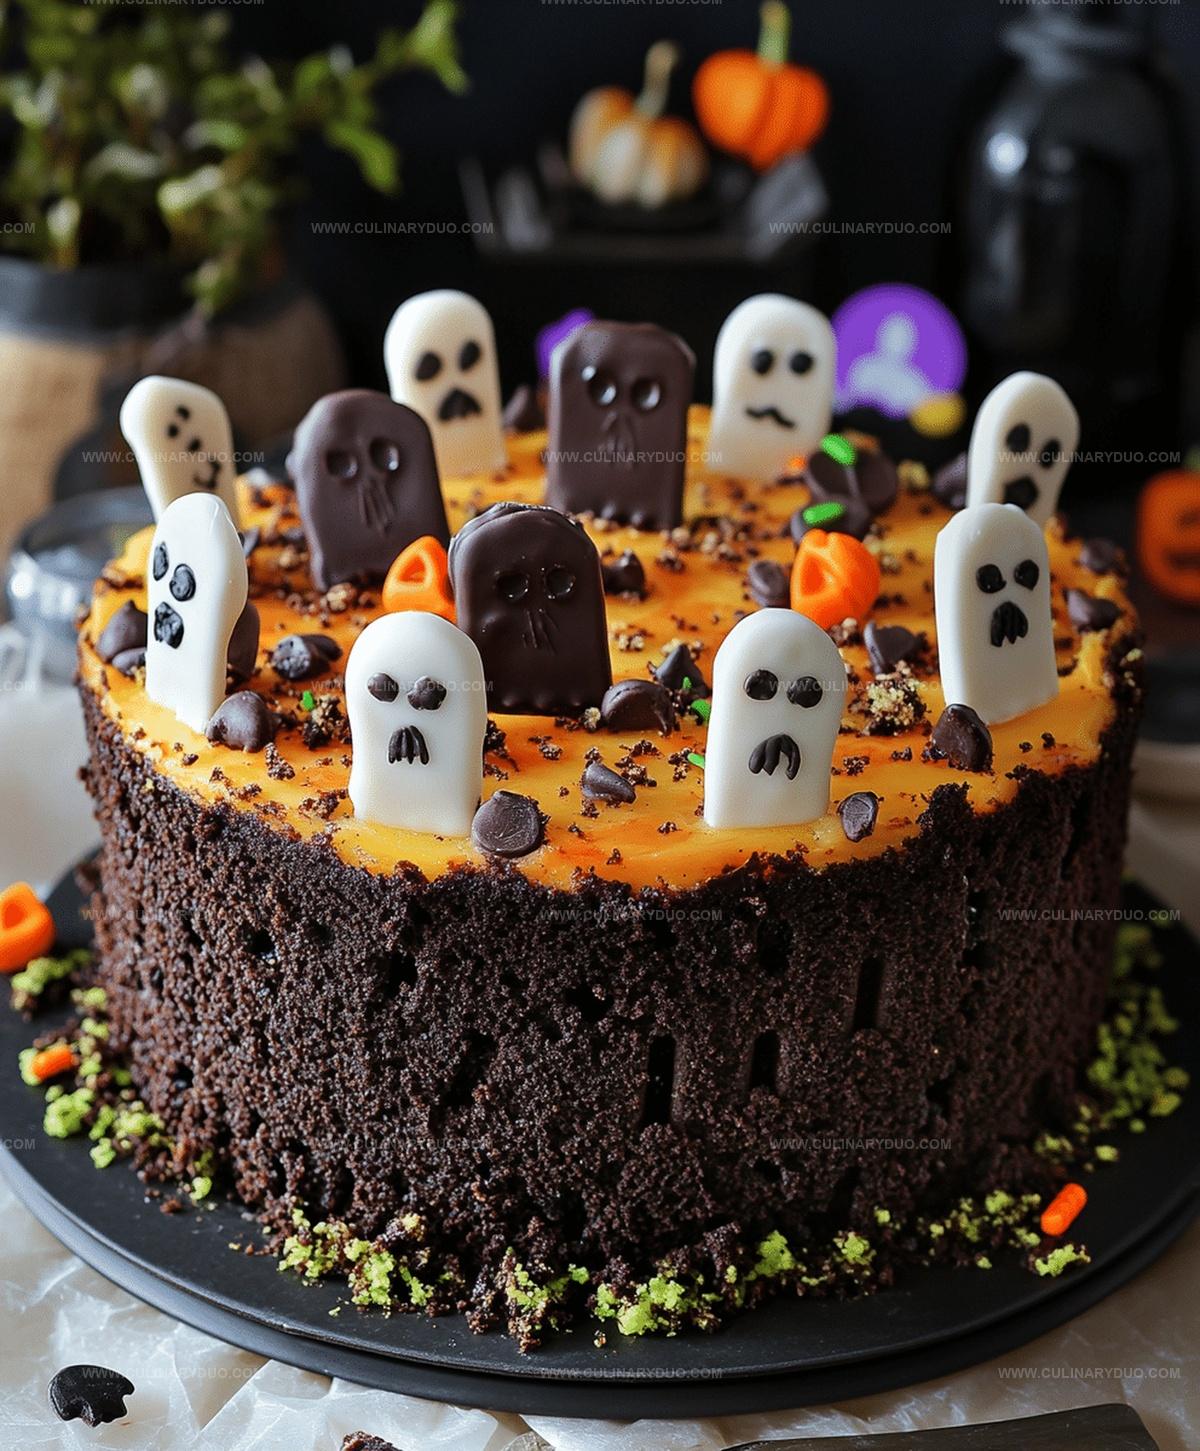
Chilling nights call for a deliciously spooky halloween graveyard chocolate poke cake that sends shivers down your spine.
Creamy chocolate goodness seeps into every crevice of this ghoulish dessert.
Dark chocolate layers create a rich, decadent base for the haunting design.
Marshmallow ghosts and cookie tombstones bring this graveyard scene to life with playful terror.
Crushed chocolate cookies scattered like dirt add an eerie texture to the cake’s landscape.
Each slice promises a frighteningly delectable experience that will have everyone howling for more.
Poke Cake Turns Graveyard for Halloween
Ingredients for Halloween Graveyard Poke Cake
Base Cake:Pudding Mixture:Decoration Elements:How to Make Graveyard Chocolate Poke Cake
Step 1: Bake Chocolate Cake
Grab a chocolate cake mix and prepare it following the package instructions in a 9×13-inch baking pan.
Allow the cake to cool down completely at room temperature.
Step 2: Create Cake Holes
Take the handle of a wooden spoon and poke multiple holes throughout the entire surface of the cooled cake.
Step 3: Prepare Chocolate Pudding
In a medium mixing bowl, whisk together:Blend the ingredients until the mixture thickens and becomes smooth.
Step 4: Fill Cake with Pudding
Pour the prepared chocolate pudding over the cake, carefully spreading it into all the poked holes.
Place the cake in the refrigerator for 30 minutes to let the pudding set.
Step 5: Add Whipped Topping
Spread a generous layer of whipped topping evenly across the entire cake surface.
Step 6: Create Graveyard Ground
Sprinkle crushed Oreo cookies over the whipped topping to create a dirt-like texture for the graveyard scene.
Step 7: Design Tombstones
Use black decorating gel to write spooky messages like “RIP” or creepy names on Milano cookies or graham crackers.
Carefully insert these tombstones into the cake.
Step 8: Add Spooky Decorations
Scatter gummy worms and candy pumpkins around the cake to enhance the graveyard Halloween theme.
Step 9: Chill and Serve
Refrigerate the cake until you’re ready to serve this frightfully delicious dessert.
Tips for Spooky Cake Decorations
Poke Cake Variations for Halloween
Serving Up a Graveyard-Themed Cake
Storing Poke Cake Slices
FAQs
Yes, you can prepare the Halloween Graveyard Cake 1-2 days in advance. Store it covered in the refrigerator and add the tombstone cookies and decorations just before serving to keep them crisp.
Absolutely! Kids will love helping to poke holes in the cake, crush Oreos, and decorate the graveyard scene with gummy worms and candy pumpkins. It’s a fun and interactive dessert to make together.
Instant chocolate pudding is recommended, but you can also use vanilla or dark chocolate pudding mix if preferred. The key is using instant pudding for the right consistency.
Print
Halloween Graveyard Chocolate Poke Cake Recipe
- Total Time: 1 hour 40 minutes
- Yield: 12 1x
Description
Spooky Halloween graveyard chocolate poke cake brings ghoulish delight to seasonal dessert tables. Chocolate layers dripping with creamy filling and decorated with cookie tombstones promise a wickedly delicious treat you cannot resist.
Ingredients
Main Ingredients:
- 1 box chocolate cake mix
- 3.9 ounces (110 grams) instant chocolate pudding mix
- 2 cups cold milk
Toppings and Decorations:
- 8 ounces (226 grams) whipped topping
- 15–20 Oreo cookies
- Milano cookies or graham crackers
- Gummy worms
- Candy pumpkins
- Halloween candy
- Black decorating gel
- Green decorating gel
Additional Cake Mix Ingredients:
- Eggs (as specified on cake mix box)
- Vegetable oil (as specified on cake mix box)
- Water (as specified on cake mix box)
Instructions
- Craft the chocolate cake following package guidelines in a 9×13-inch pan, ensuring complete cooling at room temperature.
- Puncture consistent holes across the entire cake surface using a wooden spoon handle.
- Combine instant chocolate pudding mix with cold milk, whisking vigorously until mixture thickens and becomes smooth.
- Generously drizzle pudding over cake, carefully allowing it to seep into created holes. Chill for 30 minutes to solidify pudding layer.
- Apply whipped topping uniformly across the entire cake surface, creating an even layer.
- Crush Oreo cookies into fine crumbs, then sprinkle extensively over whipped topping to mimic graveyard terrain.
- Transform Milano cookies or graham crackers into tombstones by inscribing eerie messages or “RIP” using black decorating gel.
- Strategically place tombstone cookies into cake surface, creating a spooky cemetery landscape.
- Scatter gummy worms and candy pumpkins around the cake, enhancing the haunting Halloween theme.
- Refrigerate cake until serving time to maintain optimal texture and presentation.
Notes
- Prevent dry cake by ensuring you don’t overbake the chocolate cake base during initial preparation.
- Use room temperature milk when mixing pudding to achieve smoother, lump-free consistency for better cake absorption.
- Create dairy-free version by substituting pudding mix with coconut milk and using non-dairy whipped topping alternative.
- Customize decoration complexity based on skill level – simple designs work perfectly for younger bakers or time-constrained situations.
- Prep Time: 1 hour 5 minutes
- Cook Time: 35 minutes
- Category: Desserts
- Method: Baking
- Cuisine: American
Nutrition
- Serving Size: 12
- Calories: 296 kcal
- Sugar: 28 g
- Sodium: 270 mg
- Fat: 13 g
- Saturated Fat: 5 g
- Unsaturated Fat: 7 g
- Trans Fat: 0.2 g
- Carbohydrates: 42 g
- Fiber: 2 g
- Protein: 4 g
- Cholesterol: 25 mg


Michael Reyes
Founder & Lead Recipe Developer
Expertise
Education
Santa Fe Community College
Michael’s love for cooking runs deep, rooted in the bold, colorful flavors of his New Mexico upbringing.
After earning his Culinary Arts Certificate from Santa Fe Community College, he spent years sharpening his skills in kitchens that celebrated traditional Southwestern and Latin American dishes.
He believes cooking should feel approachable and fun, never complicated. When he’s not stirring up new recipe ideas, Michael’s out hiking scenic trails, chatting with farmers at local markets, or chasing the perfect sunset shot for inspiration.