The Spookiest Halloween Oreo Fudge Recipe for Sweet Treats
Crafting a spooky Halloween Oreo fudge brings delightful chills to your festive dessert table.
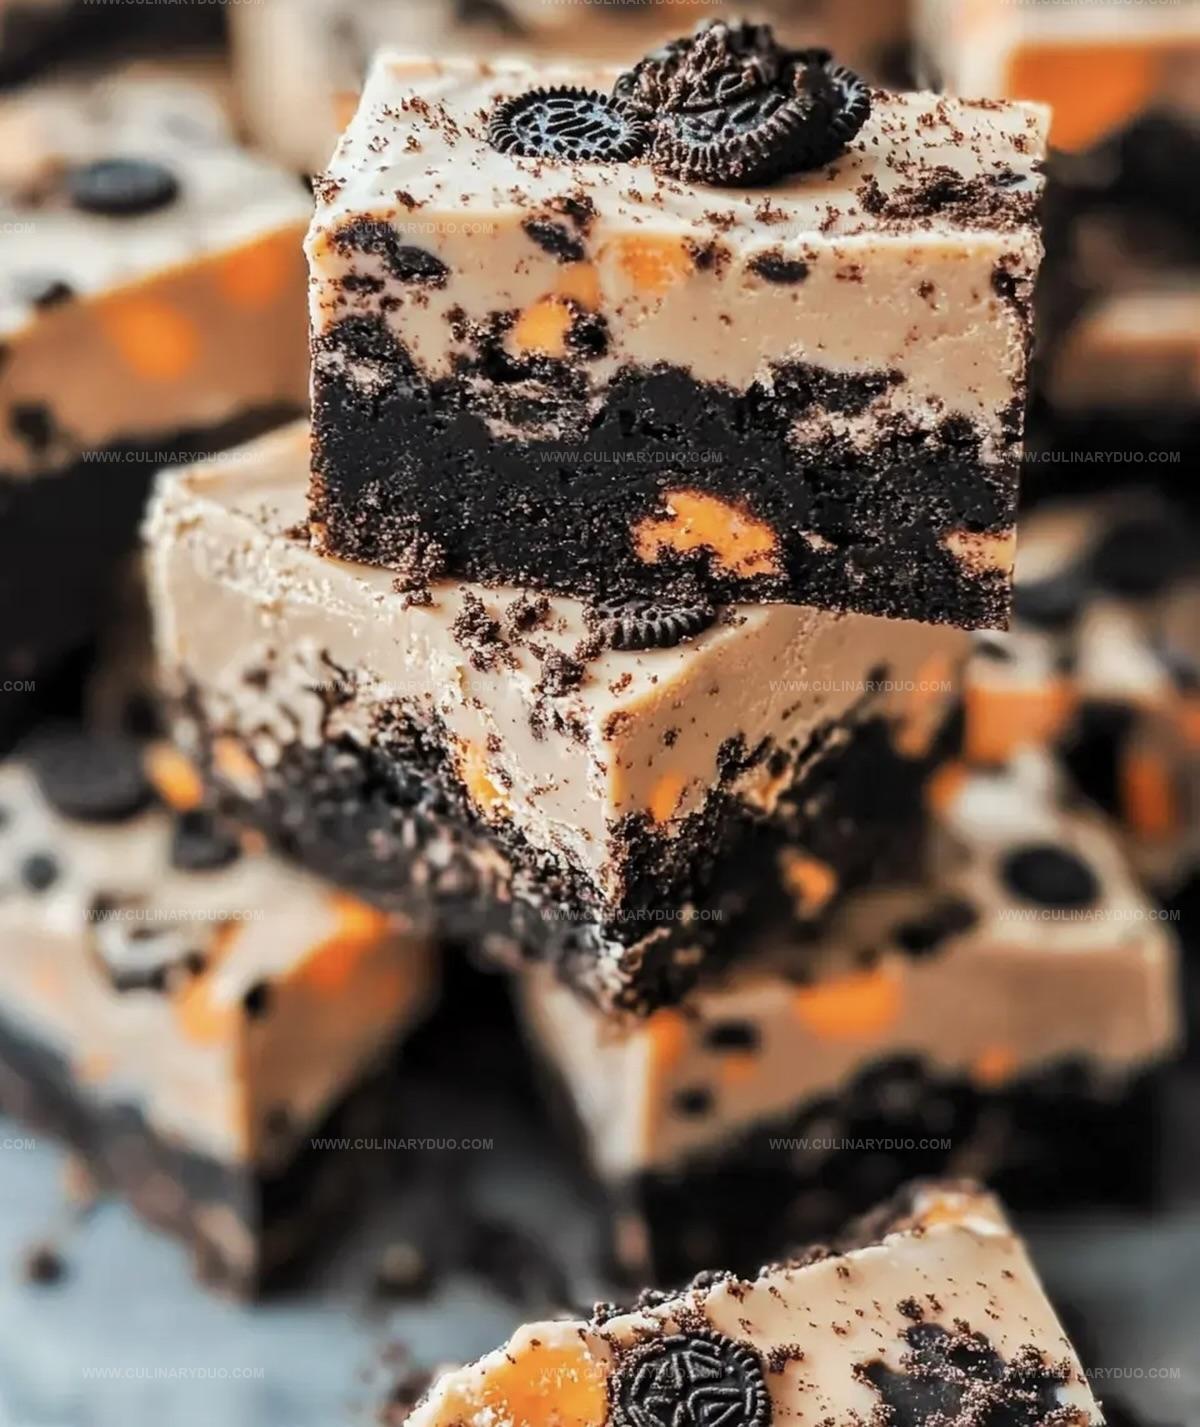
Creamy chocolate swirls with crushed cookie pieces create a wickedly delicious treat.
Dark and mysterious flavors dance across each decadent square.
Ghostly white chocolate drizzles add haunting elegance to this simple confection.
Kids and adults alike will marvel at the playful Halloween design.
Cool decorative sprinkles hint at the seasonal magic waiting inside.
You’ll want to snatch every last crumbly, chocolatey bite before the night vanishes.
Halloween Oreo Fudge To Sweeten Any Celebration
Ingredient Checklist For Fun Halloween Oreo Fudge
Base Ingredients:Flavor and Texture Enhancers:Preparation Ingredient:How To Make Halloween Oreo Fudge In Minutes
Step 1: Prepare the Canvas
Line an 8×8 inch baking pan with parchment paper, ensuring extra edges hang over the sides for easy lifting later.
This will help you remove the fudge smoothly without any messy struggles.
Step 2: Create Chocolate Magic
Grab a large saucepan and combine these yummy ingredients over medium heat:Stir the mixture continuously until everything melts into a silky, glossy pool of chocolatey goodness.
Keep the heat gentle to prevent burning.
Step 3: Enhance the Flavor
Remove the saucepan from heat and splash in vanilla extract.
Stir thoroughly to spread the aromatic essence throughout the mixture.
Step 4: Crumble and Mix
Gently fold in these delightful ingredients:Ensure they’re evenly distributed for a perfect Halloween treat that looks as good as it tastes.
Step 5: Pour and Smooth
Transfer the mixture into your prepared pan.
Use a spatula to spread it evenly, creating a smooth surface that looks tempting and professional.
Step 6: Chill and Set
Place the pan in the refrigerator for at least 2 hours.
This allows the fudge to firm up and develop its rich, creamy texture.
Step 7: Slice and Serve
Once the fudge is completely set, lift it out using the parchment paper edges.
Cut into squares and watch everyone’s eyes light up with excitement!
Top Tips For Creamy Halloween Oreo Fudge
Halloween Oreo Fudge Twists To Try Next Time
Ways To Serve Halloween Oreo Fudge With Style
Storage Instructions For Halloween Oreo Fudge Squares
FAQs
Yes, you can substitute semi-sweet or white chocolate chips with milk chocolate or dark chocolate chips for a different flavor profile.
Place Oreos in a sealed plastic bag and gently crush them using a rolling pin or the back of a spoon to keep your workspace clean.
Absolutely! Kids can help crush Oreos, stir ingredients, and spread the mixture in the pan, making it a fun family activity.
Yes, you can add a few drops of orange or black food coloring to the white chocolate mixture to create a spooky Halloween look.
Print
Halloween Oreo Fudge Recipe
- Total Time: 2 hours 15 minutes
- Yield: 16 1x
Description
Spooky season calls for Halloween Oreo Fudge, a ghoulishly delightful treat that combines creamy chocolate with crunchy cookie pieces. Haunting chocolate layers studded with classic Oreos create a wickedly simple dessert perfect for Halloween parties or midnight monster cravings.
Ingredients
Main Chocolate Ingredients:
- 1 cup (240 ml) semi-sweet chocolate chips
- 1 cup (240 ml) white chocolate chips
- 1 can (14 ounces or 396 grams) sweetened condensed milk
Dairy and Binding Ingredients:
- 1/4 cup (57 grams) unsalted butter
- 1/2 teaspoons vanilla extract
Texture and Decoration Ingredients:
- 1 cup (240 ml) crushed Oreo cookies
- 1/2 cup (120 ml) mini marshmallows
Instructions
- Prepare a festive 8×8 inch baking vessel by lining with parchment paper, ensuring overhang for effortless extraction.
- Create a luxurious chocolate base by gently melting semi-sweet and white chocolate chips with sweetened condensed milk and butter over medium heat, stirring continuously until achieving a silky, uniform consistency.
- Enhance the molten mixture with a splash of vanilla extract, infusing depth and aromatic complexity.
- Incorporate crushed Oreo cookies and mini marshmallows, gently folding to distribute the crunchy Halloween-themed elements throughout the creamy foundation.
- Transfer the decadent blend into the prepared pan, using a spatula to smooth the surface and create an even layer.
- Chill the confection in the refrigerator for approximately 2 hours, allowing the fudge to solidify and develop a perfect, slice-able texture.
- Once completely set, elevate the fudge using parchment paper handles and slice into bite-sized squares, revealing the speckled Oreo surprise within.
Notes
- Customize Texture Crush Oreos coarsely for chunkier bits, or finely for smoother texture that blends seamlessly into fudge.
- Dietary Swap Use gluten-free chocolate sandwich cookies and dairy-free chocolate chips to create allergy-friendly version that tastes identical to original recipe.
- Temperature Control Remove fudge from refrigerator 10-15 minutes before serving for softer, melt-in-your-mouth consistency that enhances flavor and makes cutting easier.
- Decorative Touch Sprinkle additional crushed Oreos or Halloween-themed sprinkles on top before chilling for festive presentation that adds visual appeal and extra crunch.
- Prep Time: 15 minutes
- Cook Time: 2 hours
- Category: Desserts, Snacks
- Method: Baking
- Cuisine: American
Nutrition
- Serving Size: 16
- Calories: 184
- Sugar: 22 g
- Sodium: 44 mg
- Fat: 8 g
- Saturated Fat: 5 g
- Unsaturated Fat: 3 g
- Trans Fat: 0.1 g
- Carbohydrates: 27 g
- Fiber: 1 g
- Protein: 2 g
- Cholesterol: 11 mg
Michael Reyes
Founder & Lead Recipe Developer
Expertise
Education
Santa Fe Community College
Michael’s love for cooking runs deep, rooted in the bold, colorful flavors of his New Mexico upbringing.
After earning his Culinary Arts Certificate from Santa Fe Community College, he spent years sharpening his skills in kitchens that celebrated traditional Southwestern and Latin American dishes.
He believes cooking should feel approachable and fun, never complicated. When he’s not stirring up new recipe ideas, Michael’s out hiking scenic trails, chatting with farmers at local markets, or chasing the perfect sunset shot for inspiration.