
Quick & Creamy Homemade Baked Mac And Cheese Recipe From Scratch
Creamy, cheesy comfort beckons with this classic homemade baked mac and cheese recipe that promises pure indulgence.
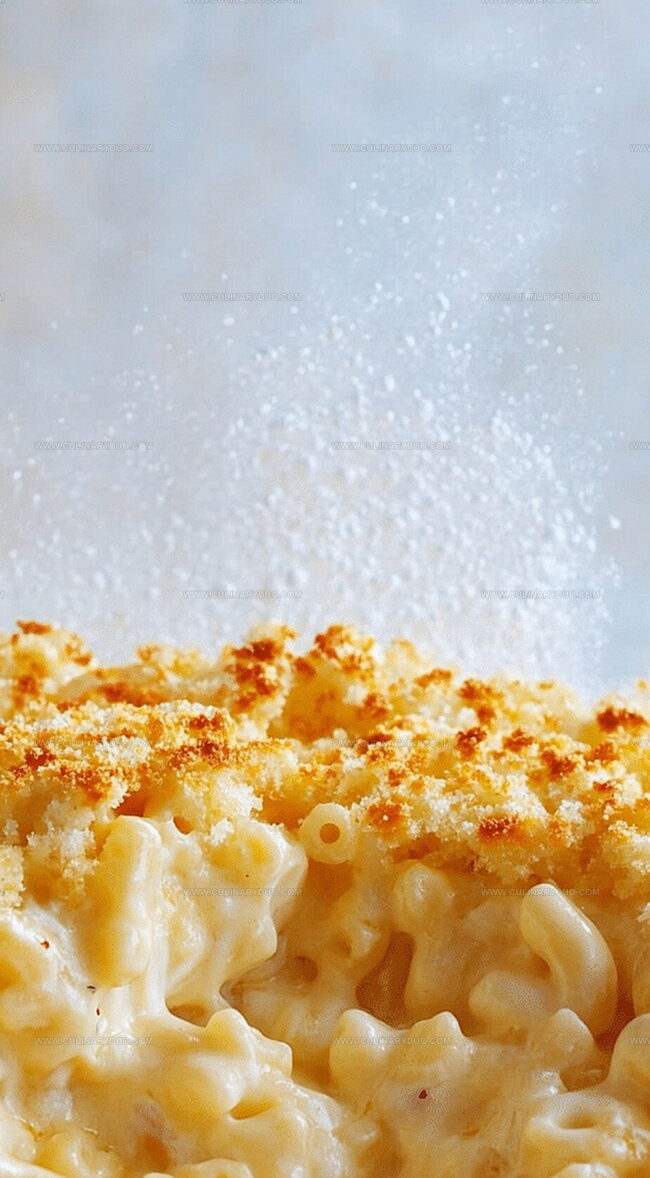
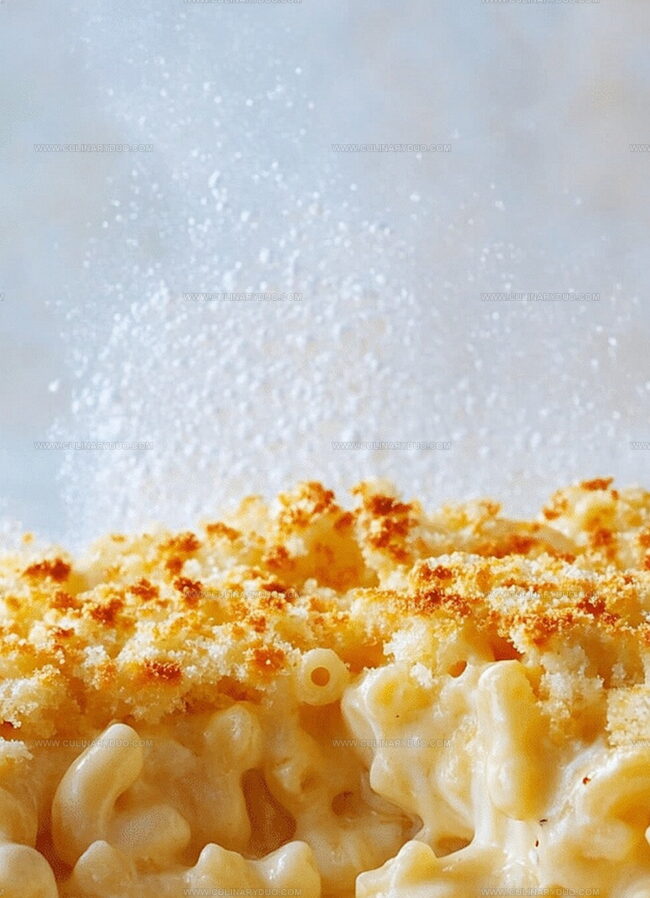
Melted cheese cascades over perfectly cooked pasta, creating a golden, bubbling masterpiece.
Every forkful delivers rich, velvety goodness that warms the soul.
The simple blend of sharp cheddar and smooth gruyère creates an irresistible flavor profile.
Crispy breadcrumb topping adds a delightful crunch to the silky underneath.
Weeknight dinners or weekend gatherings become extraordinary with this crowd-pleasing dish.
Homemade Baked Mac & Cheese: Why It’s Special
Ingredients for Classic Mac & Cheese
Pasta Base:Cheese Blend:Sauce and Seasoning Components:Crispy Topping:Making Baked Mac & Cheese at Home
Step 1: Fire Up the Oven
Crank the oven to a toasty 375°F.
Grab your 9×13-inch baking dish and give it a generous coating of cooking spray or butter to prevent sticking.
Step 2: Boil the Pasta
Cook the macaroni in a pot of salted water until it reaches that perfect al dente texture.
Drain thoroughly and set aside, ready for cheesy transformation.
Step 3: Create the Roux Magic
Melt butter in a large saucepan over medium heat.
Sprinkle in flour and whisk energetically for about a minute.
This creates a magical base that’ll make your sauce super creamy.
Step 4: Whisk in the Silky Liquid
Slowly pour in milk, whisking continuously.
Keep stirring until the mixture thickens and becomes smooth like a velvety dream.
Step 5: Cheese Explosion
Toss in your cheese trio:Add a dash of paprika, salt, and pepper.
Stir until the cheese melts into a gloriously smooth sauce that’ll make your taste buds dance.
Step 6: Marry the Pasta and Cheese
Pour the molten cheese sauce over the cooked macaroni.
Mix thoroughly, ensuring every single pasta piece gets a luxurious cheese coating.
Step 7: Transfer to Baking Dish
Scoop the cheesy pasta mixture into your prepared baking dish, spreading it evenly.
Step 8: Crispy Topping Preparation
Mix breadcrumbs with melted butter until they’re perfectly coated.
Sprinkle this golden mixture over the mac and cheese for a crunchy crown.
Step 9: Bake to Perfection
Slide the dish into the preheated oven.
Bake for 20-25 minutes until the top turns golden brown and the edges bubble with cheesy excitement.
Step 10: Rest and Serve
Allow the mac and cheese to cool for a few minutes.
This helps the sauce set and makes serving easier.
Dig in and enjoy your creamy, crunchy masterpiece!
Mac & Cheese Tips for Extra Creaminess
Easy Mac & Cheese Variations
Serving Up Baked Mac & Cheese
Storage for Mac & Cheese Leftovers
FAQs
Sharp cheddar provides the most flavor, while a mix of cheddar, mozzarella, and Parmesan creates a rich, creamy texture that melts smoothly and adds depth to the dish.
Yes, simply substitute regular flour with gluten-free flour and use gluten-free breadcrumbs or crushed gluten-free crackers for the topping. Ensure all other ingredients are gluten-free as well.
Whisking the milk slowly and consistently while cooking creates a smooth sauce. Don’t overcook in the oven, and remove when the top is golden but still bubbling to maintain moisture.
Print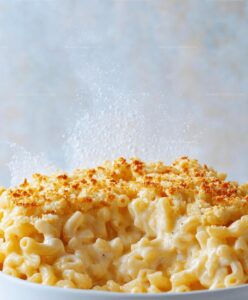
Homemade Baked Mac And Cheese Recipe
- Total Time: 50 minutes
- Yield: 6 1x
Description
Classic Homemade Baked Mac and Cheese brings comfort straight from grandma’s kitchen to your dinner table. Creamy cheddar, golden breadcrumbs, and perfectly al dente pasta create a nostalgic dish you’ll crave with every comforting bite.
Ingredients
Main Ingredients:
- 16 ounces (453 grams) elbow macaroni
- 4 cups whole milk
- 2 cups sharp cheddar cheese, shredded
- 1 cup mozzarella cheese, shredded
- 1/2 cup grated Parmesan cheese
Cheese Sauce Ingredients:
- 4 tablespoons unsalted butter
- 1/4 cup all-purpose flour
- 1/2 teaspoon paprika
- Salt and pepper to taste
Topping Ingredients:
- 1/2 cup breadcrumbs
- 2 tablespoons melted butter
Instructions
- Warm the oven to 375°F and prepare a 9×13-inch baking dish with a light grease coating.
- Prepare macaroni according to package guidelines, then drain thoroughly and set aside.
- Create a roux by melting butter in a large saucepan over medium heat, then whisk in flour and cook for one minute until fragrant.
- Pour milk gradually into the roux, whisking continuously until the mixture thickens and becomes smooth.
- Incorporate cheddar, mozzarella, and Parmesan cheeses into the sauce, stirring until completely melted and integrated.
- Season the cheese sauce with paprika, salt, and pepper for enhanced flavor profile.
- Fold the cooked macaroni into the creamy cheese sauce, ensuring every pasta piece is evenly coated.
- Transfer the cheesy macaroni mixture into the prepared baking dish, spreading it evenly.
- Combine breadcrumbs with melted butter to create a crispy topping, then sprinkle generously over the mac and cheese.
- Bake in the preheated oven for 20-25 minutes until the top turns golden brown and the edges become bubbly.
- Remove from oven and allow to rest for 5-10 minutes before serving to let the sauce set and flavors meld.
Notes
- Select high-quality, sharp cheddar cheese for a more robust flavor profile and creamy texture.
- Use whole milk or half-and-half instead of low-fat milk to achieve a richer, more indulgent mac and cheese.
- Add a pinch of nutmeg or mustard powder to the cheese sauce for an unexpected depth of flavor that elevates the classic dish.
- Try gluten-free pasta and alternative flour for a celiac-friendly version without compromising taste or creaminess.
- Prep Time: 25 minutes
- Cook Time: 25 minutes
- Category: Lunch, Dinner, Snacks
- Method: Baking
- Cuisine: American
Nutrition
- Serving Size: 6
- Calories: 480 kcal
- Sugar: 5 g
- Sodium: 420 mg
- Fat: 22 g
- Saturated Fat: 13 g
- Unsaturated Fat: 8 g
- Trans Fat: 0.5 g
- Carbohydrates: 50 g
- Fiber: 2 g
- Protein: 22 g
- Cholesterol: 60 mg
Michael Reyes
Founder & Lead Recipe Developer
Expertise
Education
Santa Fe Community College
Michael’s love for cooking runs deep, rooted in the bold, colorful flavors of his New Mexico upbringing.
After earning his Culinary Arts Certificate from Santa Fe Community College, he spent years sharpening his skills in kitchens that celebrated traditional Southwestern and Latin American dishes.
He believes cooking should feel approachable and fun, never complicated. When he’s not stirring up new recipe ideas, Michael’s out hiking scenic trails, chatting with farmers at local markets, or chasing the perfect sunset shot for inspiration.