
Creamy Homemade Mayonnaise Recipe: Silky Magic in Minutes
Whipping up a smooth and creamy homemade mayonnaise can revolutionize your culinary homemade mayonnaise skills in unexpected ways.
Most store-bought versions pale in comparison to the rich, fresh taste of a hand-crafted spread.
Blending eggs, oil, and seasonings creates a magical emulsion that brings depth to countless dishes.
Simple ingredients from your kitchen can produce something extraordinary with just a few careful movements.
Professional chefs know that mastering this technique opens doors to incredible flavor combinations.
Small batches ensure maximum freshness and allow you to experiment with unique additions like herbs or spices.
Prepare to amaze everyone at your next gathering with this delightful condiment that transforms ordinary meals into memorable experiences.
Why The Basic Kitchen Staple Is Essential
Ingredients List For Any Basic Kitchen Staple
Base Ingredients:Optional Flavor Enhancer:Oil Component:Simple Steps For Basic Kitchen Staple Preparation
Step 1: Prepare the Blending Base
Crack the egg into a food processor.
Add salt, lemon juice, and a splash of garlic juice if you’re feeling adventurous.
Pulse these ingredients together for about half a minute until they’re well combined and looking smooth.
Step 2: Gradually Introduce Oil
With the food processor running, start drizzling oil in a slow, steady stream.
This is the magic moment where your mixture will begin to transform.
Keep pouring for approximately 90 seconds, watching as the liquid starts to emulsify and thicken.
Step 3: Whip to Perfection
Stop the processor and scrape down the sides with a spatula to ensure everything gets incorporated.
Restart and blend for another 30 seconds.
You’ll notice the mixture becoming incredibly creamy and dense.
Step 4: Rest and Develop Flavors
Transfer your freshly made creation to a sealed container and pop it into the refrigerator.
Let it chill and allow the flavors to mingle and develop.
Waiting at least 4 hours will give you the most delicious results, allowing the ingredients to harmonize and the texture to set perfectly.
Tips To Maximize Your Basic Kitchen Staple’s Flavor
Variations To Try With Your Kitchen Staples
Serving Ideas For Any Basic Kitchen Staple Dish
Storing Basic Kitchen Staples For Maximum Freshness
FAQs
The secret is to add oil very slowly while continuously blending, which helps emulsify the ingredients and create a creamy, stable texture.
Yes, you can experiment with olive oil, avocado oil, or light vegetable oils. Just ensure the oil is neutral-tasting to maintain the classic mayonnaise flavor.
Chilling allows the flavors to blend and develop, and helps the mayonnaise thicken to the right consistency. It also improves the overall taste and texture.
Print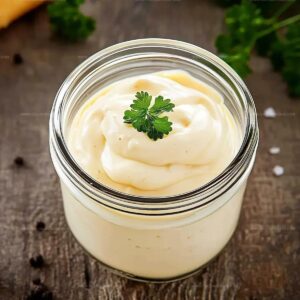
Homemade Mayonnaise Recipe
- Total Time: 4 hours 3 minutes
- Yield: 1 1x
Description
Silky smooth homemade mayonnaise elevates ordinary sandwiches into culinary masterpieces. Creamy, tangy, and impossibly fresh, this simple recipe ensures you’ll never settle for store-bought again.
Ingredients
Main Ingredients:
- 1 cup avocado or olive oil
- 1 large egg
Seasonings and Flavor Enhancers:
- 1 tablespoon (15 milliliters) fresh lemon juice
- 1 teaspoon (5 grams) salt
- 2 drops garlic juice (optional)
Instructions
- Crack egg into a blender or food processor, ensuring no shell fragments remain.
- Add salt, freshly squeezed lemon juice, and garlic juice if desired to the egg.
- Pulse the mixture for approximately 30 seconds until ingredients are thoroughly combined.
- With the blender running, begin introducing oil in a thin, steady stream, which allows the mixture to emulsify gradually.
- Continue pouring oil slowly for about 1.5 minutes, maintaining a consistent stream to create a smooth, creamy texture.
- Stop adding oil and scrape down the sides of the blender container using a flexible spatula.
- Process the mixture for an additional 30 seconds to ensure complete incorporation and achieve a thick, glossy consistency.
- Transfer the freshly prepared sauce to an airtight container, cover, and refrigerate for a minimum of 4 hours.
- Chilling allows the flavors to meld and develop, while also helping the sauce thicken to the desired consistency.
- Before serving, give the sauce a gentle stir to restore its smooth texture.
Notes
- Enhance the base blend with a dash of minced garlic for extra flavor depth and zesty undertones.
- Use room temperature oil to ensure smooth emulsification and prevent sauce separation.
- Drizzle oil extremely slowly to create a stable, creamy consistency that won’t break or curdle.
- Store homemade sauce in an airtight container for up to one week, allowing flavors to develop and intensify.
- Prep Time: 4 hours 3 minutes
- Cook Time: 0 minutes
- Category: Snacks, Appetizer
- Method: Blending
- Cuisine: French
Nutrition
- Serving Size: 1
- Calories: 239
- Sugar: 0 g
- Sodium: 2324 mg
- Fat: 27 g
- Saturated Fat: 3.7 g
- Unsaturated Fat: 23.3 g
- Trans Fat: 0 g
- Carbohydrates: 1 g
- Fiber: 0 g
- Protein: 6 g
- Cholesterol: 186 mg
Michael Reyes
Founder & Lead Recipe Developer
Expertise
Education
Santa Fe Community College
Michael’s love for cooking runs deep, rooted in the bold, colorful flavors of his New Mexico upbringing.
After earning his Culinary Arts Certificate from Santa Fe Community College, he spent years sharpening his skills in kitchens that celebrated traditional Southwestern and Latin American dishes.
He believes cooking should feel approachable and fun, never complicated. When he’s not stirring up new recipe ideas, Michael’s out hiking scenic trails, chatting with farmers at local markets, or chasing the perfect sunset shot for inspiration.