Dreamy Homemade Ice Cream Cake Recipe That Dazzles Guests
Celebrating birthdays or special moments calls for something extraordinary, and this decadent ice cream cake recipe delivers pure indulgence.
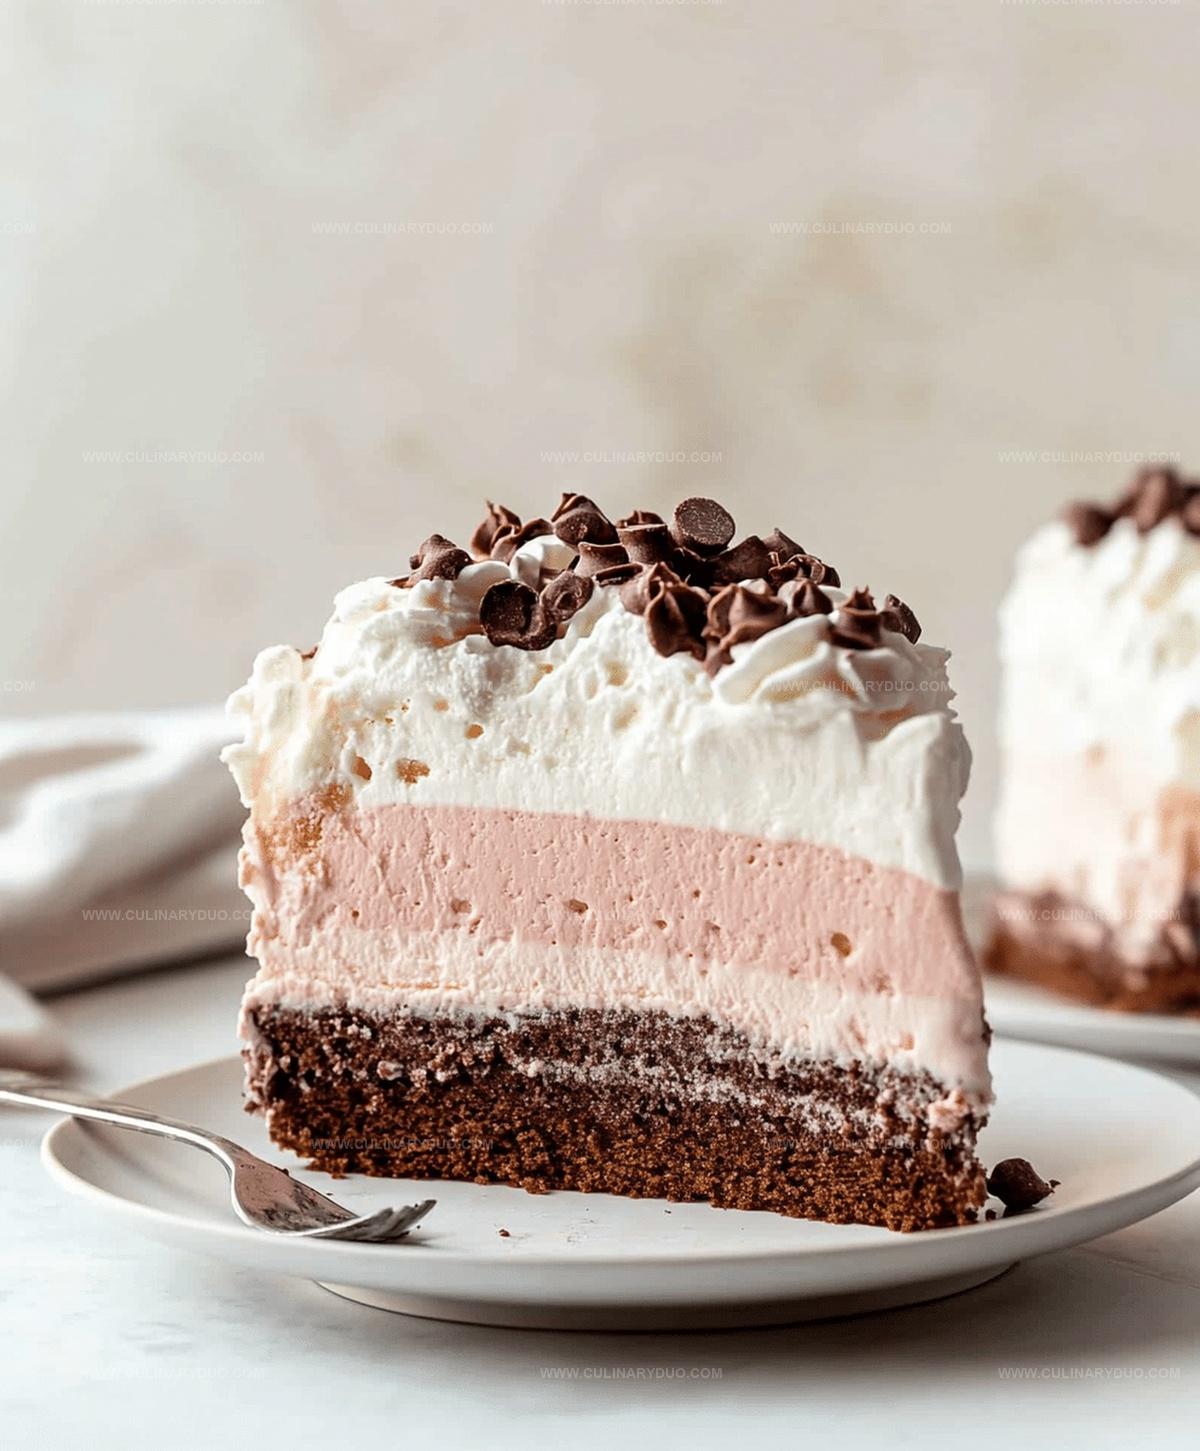
Layers of creamy, velvety ice cream nestled between rich cake create a dessert that melts hearts and tantalizes taste buds.
Chocolate lovers will swoon over the perfect balance of cool, smooth textures and deep, intense flavors.
Each slice promises a delightful symphony of sweet sensations that dance across your palate.
No bakery can match the personal touch of a homemade treat crafted with love and care.
This recipe transforms an ordinary dessert into an unforgettable experience that will have everyone asking for seconds.
Ice Cream Cake, the Coolest Treat on the Block
Ingredients for Homemade Ice Cream Cake
Cake Base:Ice Cream Layer:Topping and Sauce:Layer-by-Layer Ice Cream Cake Instructions
Step 1: Whip Up the Cake Base
Grab your favorite cake mix and follow the package directions to create a delightful cake in a 9-inch round pan.
Let the cake cool down completely until it’s nice and relaxed.
Step 2: Slice and Divide
Carefully slice the cooled cake horizontally, creating two beautiful layers that will become the foundation of your dreamy dessert.
Step 3: Layer the First Ice Cream Delights
Place the bottom cake layer on a serving plate.
Scoop out softened ice cream and spread it generously across the first layer, creating a smooth and creamy surface.
Step 4: Drizzle Chocolate Magic
Drench the ice cream layer with rich hot fudge sauce, letting it cascade over the creamy surface and add an extra burst of decadence.
Step 5: Stack the Second Cake Layer
Gently position the second cake layer on top of the ice cream and fudge, creating a delicious sandwich of flavors.
Step 6: Finish with Remaining Ice Cream
Spread the remaining softened ice cream over the top layer, using a spatula to create a smooth and even surface.
Step 7: Freeze and Set
Pop the cake into the freezer and let it chill for at least 4 hours.
This allows all the flavors to meld and the cake to become perfectly firm.
Step 8: Garnish and Serve
Before serving, crown your ice cream cake with fluffy whipped cream and any additional toppings that make your taste buds dance.
Slice, serve, and enjoy your spectacular creation!
Tips for Slicing the Perfect Ice Cream Cake
Ice Cream Cake Flavors to Try Next
Fun Ways to Serve Ice Cream Cake
Storing Ice Cream Cake Between Bites
FAQs
Yes, you can experiment with various cake mix flavors like chocolate, vanilla, or red velvet to create unique combinations with your favorite ice cream.
Work quickly and keep the ice cream slightly softened but not completely melted. If it starts to melt, return it to the freezer for a few minutes between layers.
Choose a flavor that complements your cake mix. Classic options like vanilla, chocolate, or strawberry work well, but feel free to get creative with more adventurous flavors.
Print
Ice Cream Cake Recipe
- Total Time: 2 hours 15 minutes
- Yield: 12 1x
Description
Creamy chocolate ice cream cake brings layers of indulgence to dessert lovers seeking pure bliss. Rich chocolate sponge and velvety ice cream create a delightful symphony of flavors you’ll savor with each delectable bite.
Ingredients
Cake Ingredients:
- 1 box cake mix
- 3 large eggs
- 1 cup (240 milliliters) water
- 0.5 cup (120 milliliters) vegetable oil
Ice Cream Ingredients:
- 1.5 quarts (1.4 liters) ice cream
- 0.5 cup (60 grams) crushed cookies or candies
Frosting and Decoration Ingredients:
- 2 cups (480 milliliters) heavy whipping cream
- 0.25 cup (30 grams) powdered sugar
- 1 teaspoon (5 milliliters) vanilla extract
- Sprinkles or chocolate shavings
Instructions
- Craft the cake foundation by following package guidelines, utilizing a 9-inch round pan. Bake at recommended temperature and allow complete cooling for approximately 45-60 minutes.
- Carefully slice the cooled cake horizontally into two equal layers using a serrated knife, ensuring smooth and even division.
- Position the first cake layer onto a designated serving plate, creating a stable base for the ice cream assembly.
- Generously spread softened ice cream across the initial cake layer, creating a uniform and thick coating that covers the entire surface.
- Elegantly drizzle half of the hot fudge sauce over the ice cream layer, allowing it to cascade and create delectable swirls.
- Delicately place the second cake layer atop the ice cream, pressing gently to secure proper positioning.
- Apply the remaining ice cream over the top layer, meticulously smoothing the surface for a polished appearance.
- Transfer the assembled cake to the freezer, allowing it to solidify for a minimum of 4 hours or until completely firm.
- Prior to serving, embellish with whipped cream and optional decorative toppings for an exquisite presentation.
Notes
- Cake mix selection matters, choose a flavor that complements your ice cream for maximum flavor harmony.
- Freezing time is crucial, ensure the cake is completely solid before decorating to prevent melting and maintain structural integrity.
- Let the cake sit at room temperature for 5-10 minutes before serving to soften slightly and make cutting easier.
- Try different ice cream flavors like chocolate, vanilla, or strawberry to create unique combinations that suit various taste preferences.
- Prep Time: 30 minutes
- Cook Time: 1 hour 45 minutes
- Category: Desserts
- Method: Baking
- Cuisine: American
Nutrition
- Serving Size: 12
- Calories: 381 kcal
- Sugar: 27 g
- Sodium: 220 mg
- Fat: 24 g
- Saturated Fat: 13 g
- Unsaturated Fat: 10 g
- Trans Fat: 0.5 g
- Carbohydrates: 35 g
- Fiber: 1 g
- Protein: 5 g
- Cholesterol: 70 mg
Michael Reyes
Founder & Lead Recipe Developer
Expertise
Education
Santa Fe Community College
Michael’s love for cooking runs deep, rooted in the bold, colorful flavors of his New Mexico upbringing.
After earning his Culinary Arts Certificate from Santa Fe Community College, he spent years sharpening his skills in kitchens that celebrated traditional Southwestern and Latin American dishes.
He believes cooking should feel approachable and fun, never complicated. When he’s not stirring up new recipe ideas, Michael’s out hiking scenic trails, chatting with farmers at local markets, or chasing the perfect sunset shot for inspiration.