
Dreamy Ice Cream Loaf Cake Recipe for Sweet Summer Days
Creamy and decadent, this irresistible ice cream loaf cake recipe blends rich flavors into a delightful dessert that melts hearts.
Summer afternoons call for something cool and indulgent.
Sweet layers of soft cake merge perfectly with smooth, frozen goodness.
Each slice promises a delectable journey through luxurious textures and taste sensations.
The simple ingredients come together effortlessly, creating a stunning treat that looks complicated but requires minimal effort.
Chocolate lovers and dessert enthusiasts will adore this elegant, no-fuss confection that’s sure to impress.
Serve chilled and watch smiles spread across everyone’s faces.
Ice Cream Loaf Cake for Effortless Parties
Ingredients for Ice Cream Loaf Cake Delight
Cake Base:Ice Cream Layers:Toppings and Decorations:Steps to Assemble Ice Cream Loaf Cake
Step 1: Prep the Cake Base
Using a sharp knife, carefully slice the loaf cake into three equally thick layers.
Ensure each slice is smooth and even to create a beautiful layered dessert.
Step 2: Set Up the Freezing Station
Grab a loaf pan and line it completely with plastic wrap.
Make sure the wrap hangs over the sides, which will help you lift the cake out easily later.
Step 3: Create the First Ice Cream Layer
Gently place the bottom cake slice into the lined pan.
Grab softened ice cream and spread a generous, creamy layer across the entire surface of the cake.
Press gently to ensure even coverage.
Step 4: Build the Second Layer
Add the middle cake slice on top of the first ice cream layer.
Again, spread another thick, smooth layer of softened ice cream over this cake slice.
Ensure the ice cream covers the entire surface.
Step 5: Top With Final Cake Layer
Position the final cake slice on top of the second ice cream layer.
Press down lightly to secure the layers.
Step 6: Freeze and Solidify
Wrap the entire pan tightly with plastic wrap.
Place in the freezer for at least 4 hours or until the cake is completely firm and set.
Step 7: Decorate and Serve
Carefully lift the cake out of the pan using the overhanging plastic wrap.
Cover with fluffy whipped cream.
Drizzle chocolate syrup across the top and sprinkle colorful sprinkles for a festive touch.
Step 8: Slice and Enjoy
Cut the cake into beautiful slices and serve immediately while still frozen and delightfully cold.
Tips for the Smoothest Loaf Cake Layers
Ice Cream Loaf Cake Flavors to Explore
Ways to Present Ice Cream Loaf Cake
How to Store Ice Cream Cake Slices
FAQs
Yes, you can use any flavor of ice cream you like. Choose your favorite or get creative with combinations.
No, you just need a standard loaf pan, plastic wrap, and basic kitchen tools like a knife and spatula.
You can store the assembled cake in the freezer for up to 3-5 days before serving, wrapped tightly in plastic wrap.
Absolutely! This dessert is perfect for preparing in advance. You can assemble it completely and keep it frozen until you’re ready to serve.
Print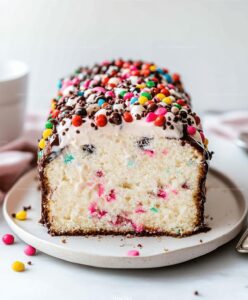
Ice Cream Loaf Cake Recipe
- Total Time: 4 hours 20 minutes
- Yield: 8 1x
Description
Creamy layers of homemade ice cream sandwich cake bring nostalgic summer memories to life. Smooth vanilla and chocolate ice cream nestled between graham cracker crumbs create a delightful dessert you’ll crave long after the first refreshing bite.
Ingredients
Main Ingredients (Ice Cream):
- 1 pint (473 milliliters) vanilla ice cream
- 1 pint (473 milliliters) chocolate ice cream
- 1 pint (473 milliliters) strawberry ice cream
Base and Binding Ingredients:
- 1 cup (240 grams) graham cracker crumbs
- 1/4 cup (57 grams) melted butter
Optional Toppings and Garnishes:
- 1 cup (240 milliliters) chocolate syrup
- 1/2 cup (60 grams) chopped nuts
- Fresh berries
- Sprinkles
- Whipped cream
- Chopped chocolate
- Chocolate chips
- Caramel sauce
- Chocolate ganache
Instructions
- Carefully slice the loaf cake into three uniform horizontal layers using a sharp serrated knife.
- Prepare a loaf pan by lining it completely with plastic wrap, ensuring excess wrap hangs over the sides for effortless removal later.
- Position the bottom cake layer into the prepared pan, creating a smooth base for the first ice cream layer.
- Generously spread softened ice cream across the first cake layer, creating an even, thick coating that covers the entire surface.
- Gently place the second cake layer atop the ice cream, pressing lightly to ensure proper adhesion.
- Apply another smooth layer of softened ice cream over the second cake layer, maintaining consistent thickness.
- Crown the dessert with the final cake layer, pressing delicately to secure its position.
- Tightly encase the entire loaf with the overhanging plastic wrap, sealing in the layers completely.
- Transfer to the freezer and allow to set for a minimum of 4 hours, or until the ice cream becomes completely firm.
- Carefully extract the frozen loaf from the pan using the plastic wrap as handles.
- Adorn the exterior with billowy whipped cream, creating elegant swirls and peaks.
- Enhance the presentation by drizzling rich chocolate syrup across the surface.
- Sprinkle decorative confetti-like sprinkles over the top for a festive touch.
- Slice immediately and serve while the texture remains perfect.
Notes
- Ensure cake layers are completely cooled before assembling to prevent ice cream from melting quickly and losing structural integrity.
- Use high-quality, premium ice cream with minimal air incorporated for a denser, smoother texture and cleaner slice.
- Select complementary ice cream flavors that pair well with cake base, such as vanilla with chocolate cake or strawberry with lemon cake for enhanced taste experience.
- Soften ice cream at room temperature for 5-10 minutes before spreading to achieve smooth, even layers without tearing cake.
- Prep Time: 20 minutes
- Cook Time: 4 hours
- Category: Desserts
- Method: Freezing
- Cuisine: American
Nutrition
- Serving Size: 8
- Calories: 334 kcal
- Sugar: 32 g
- Sodium: 84 mg
- Fat: 20 g
- Saturated Fat: 12 g
- Unsaturated Fat: 7 g
- Trans Fat: 0.3 g
- Carbohydrates: 31 g
- Fiber: 1.5 g
- Protein: 4 g
- Cholesterol: 55 mg
Michael Reyes
Founder & Lead Recipe Developer
Expertise
Education
Santa Fe Community College
Michael’s love for cooking runs deep, rooted in the bold, colorful flavors of his New Mexico upbringing.
After earning his Culinary Arts Certificate from Santa Fe Community College, he spent years sharpening his skills in kitchens that celebrated traditional Southwestern and Latin American dishes.
He believes cooking should feel approachable and fun, never complicated. When he’s not stirring up new recipe ideas, Michael’s out hiking scenic trails, chatting with farmers at local markets, or chasing the perfect sunset shot for inspiration.