The Best Italian Arancini Recipe: Golden Crispy Rice Balls
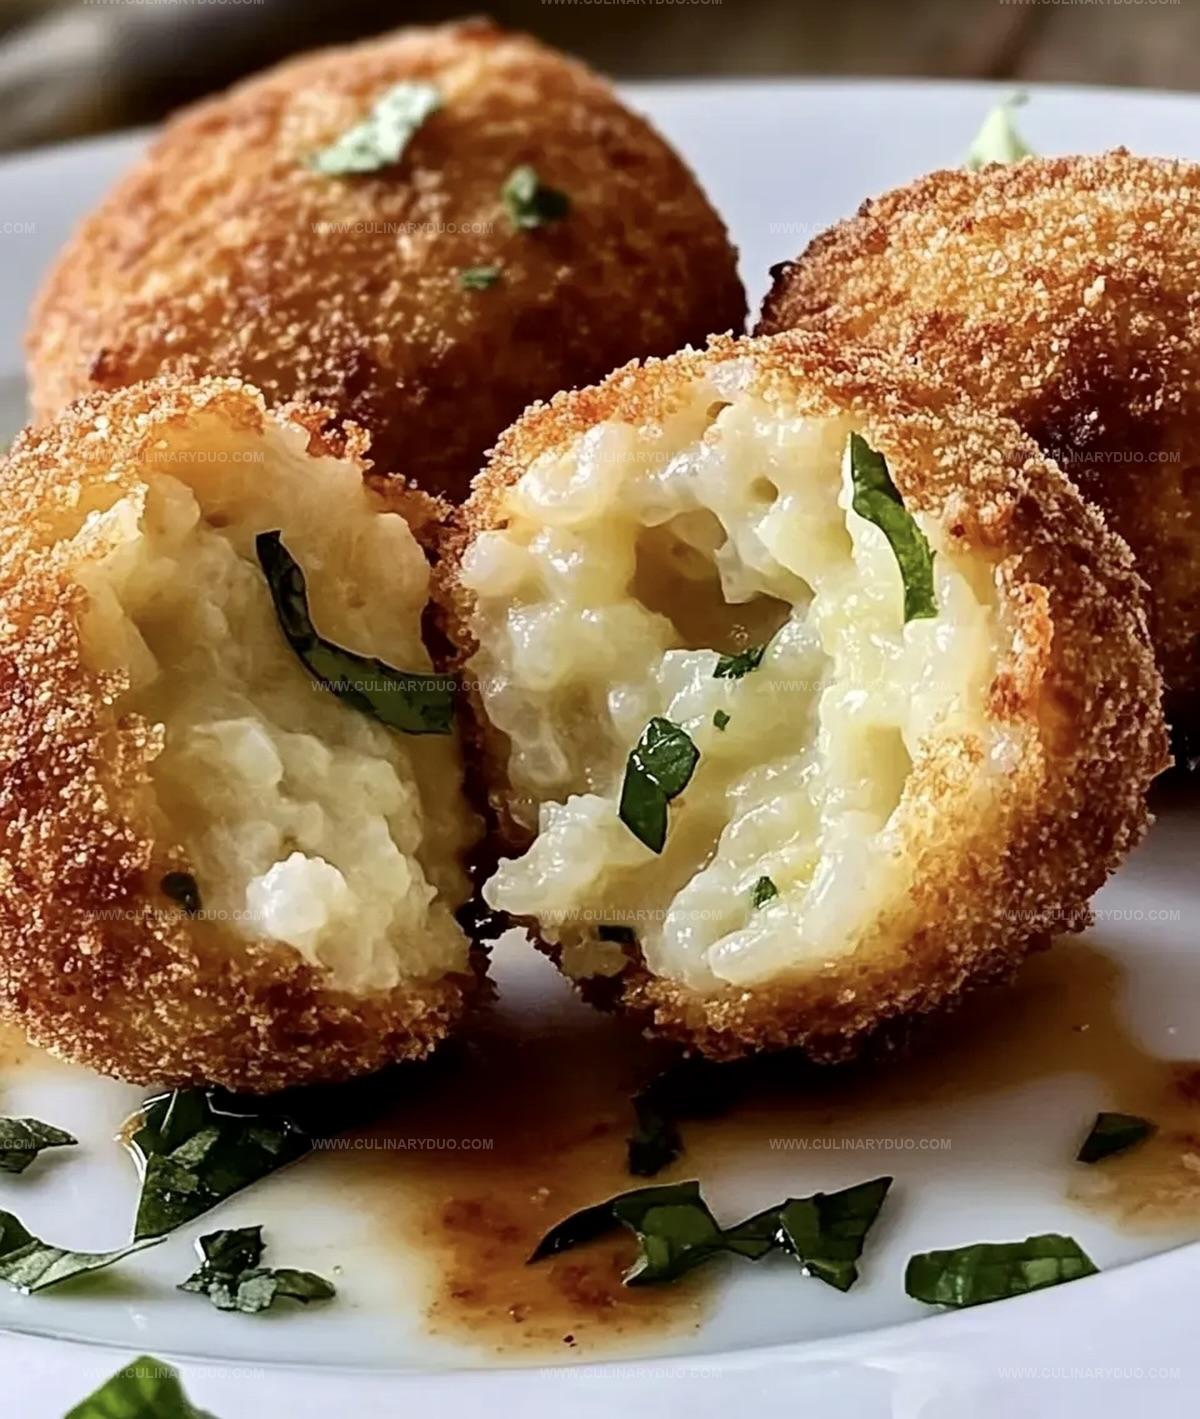
Crispy golden risotto balls sparkle with an irresistible Mediterranean charm that captures Italy’s culinary magic.
Sicilian street vendors first crafted these delectable rice spheres centuries ago.
Small kitchens across Naples perfected their unique technique, blending creamy rice with savory fillings.
Cheese and meat peek through golden crusts, promising rich flavor in every bite.
Compact and portable, these delightful snacks work perfectly as appetizers or light meals.
Skilled cooks learn to balance textures and ingredients with careful precision.
You’ll want to gather friends and share these delicious morsels right away.
Italian Arancini Worth Savoring Every Single Time
What’s Needed For Golden Italian Arancini At Home
Main Ingredients:Coating Ingredients:Cooking Ingredients:Optional Serving:How To Shape Crispy, Cheesy Italian Arancini Balls
Step 1: Create Cheesy Risotto Base
Combine cooked risotto with mozzarella and Parmesan cheese.
Mix thoroughly until the cheese is evenly distributed throughout the risotto.
Season with salt and pepper to enhance the flavor profile.
Step 2: Shape Delightful Balls
Scoop out portions of the cheesy risotto mixture and roll them into compact, round spheres.
Ensure each ball has a consistent size and contains a nice pocket of melty cheese in the center.
Step 3: Prepare Crispy Coating
Set up a three-stage breading station:Carefully roll each risotto ball through each station, creating a complete, even coating that will deliver a satisfying crunch.
Step 4: Heat Cooking Oil
Select a deep skillet or heavy-bottomed pan.
Pour vegetable or canola oil to a depth that will allow the arancini to be fully submerged.
Heat the oil to 350°F, which provides the perfect golden-brown exterior.
Step 5: Fry to Golden Perfection
Gently lower the breaded risotto balls into the hot oil.
Fry in small batches to maintain oil temperature.
Rotate the balls periodically to ensure uniform browning.
Cook until they develop a rich, golden-brown exterior with a crispy texture.
Step 6: Finish And Serve
Transfer the fried arancini to a wire rack or paper towel-lined plate to drain excess oil.
Allow them to rest briefly.
Plate immediately while hot and serve alongside marinara sauce for dipping.
Garnish with fresh basil or grated Parmesan if desired.
Tips For Perfect Arancini Coating And Filling
Arancini Flavor Options For A True Italian Feast
Ways To Serve Italian Arancini With Style
How To Store Italian Arancini For Later Enjoyment
FAQs
Arancini are traditional Italian rice balls originating from Sicily, made with risotto, filled with cheese, coated in breadcrumbs, and deep-fried until golden and crispy.
Arancini are a popular street food and way to use leftover risotto, transforming day-old rice into a delicious snack or appetizer that’s crispy on the outside and creamy on the inside.
Mozzarella and Parmesan are ideal because they melt beautifully and provide a rich, savory flavor that complements the risotto’s creamy texture.
Print
Italian Arancini Recipe
- Total Time: 25 minutes
- Yield: 4 1x
Description
Irresistible Italian arancini bring Sicily’s street food magic right to your kitchen, with golden crispy rice balls stuffed with melted cheese and savory meat. Creamy risotto, fragrant herbs, and a delightful crunch make these little treasures perfect for sharing with friends who crave authentic Mediterranean flavors.
Ingredients
Main Ingredients:
- 2 cups cooked risotto (chilled)
- 1/2 cup shredded mozzarella cheese
- 1/4 cup grated Parmesan cheese
Coating Ingredients:
- 1 cup all-purpose flour
- 2 large eggs, beaten
- 1 1/2 cups Italian-style breadcrumbs
Seasoning and Cooking Ingredients:
- Vegetable oil (for frying)
- Salt to taste
- Pepper to taste
- Marinara sauce (optional, for serving)
Instructions
- Craft a rich filling by folding mozzarella and Parmesan into chilled risotto, ensuring even distribution of cheese throughout the mixture.
- Gently form compact spheres approximately 1 inch in diameter, carefully embedding cheese within each ball’s core.
- Create a crispy exterior by systematically coating each sphere: first dredge in flour, then immerse in whisked eggs, and finally roll thoroughly in breadcrumbs.
- Warm vegetable oil in a deep skillet to 350°F, maintaining a consistent medium heat for optimal frying conditions.
- Carefully lower breaded risotto balls into hot oil, working in small batches to prevent overcrowding and ensure even golden-brown coloration.
- Rotate arancini periodically during 3-4 minute cooking process, watching for a uniform, crisp exterior with a delicate golden hue.
- Transfer fried arancini onto absorbent paper towels to eliminate excess oil, allowing them to rest briefly and maintain crispness.
- Plate immediately while hot, accompanied by zesty marinara sauce for enhanced flavor and traditional presentation.
Notes
- Cheese Selection matters greatly, so choose high-quality mozzarella and authentic Parmesan for maximum flavor depth.
- Chilling risotto beforehand helps maintain structural integrity when forming balls, preventing them from falling apart during frying.
- Gluten-free adaptation works perfectly by substituting regular breadcrumbs with almond flour or gluten-free breadcrumb alternatives.
- Temperature control is crucial when deep-frying; maintain consistent oil heat around 350-375°F to ensure crispy exterior and evenly cooked interior without burning.
- Prep Time: 20 minutes
- Cook Time: 5 minutes
- Category: Appetizer, Snacks
- Method: Frying
- Cuisine: Italian
Nutrition
- Serving Size: 4
- Calories: 485 kcal
- Sugar: 2 g
- Sodium: 520 mg
- Fat: 20 g
- Saturated Fat: 9 g
- Unsaturated Fat: 9 g
- Trans Fat: 0.5 g
- Carbohydrates: 50 g
- Fiber: 2 g
- Protein: 21 g
- Cholesterol: 110 mg
Michael Reyes
Founder & Lead Recipe Developer
Expertise
Education
Santa Fe Community College
Michael’s love for cooking runs deep, rooted in the bold, colorful flavors of his New Mexico upbringing.
After earning his Culinary Arts Certificate from Santa Fe Community College, he spent years sharpening his skills in kitchens that celebrated traditional Southwestern and Latin American dishes.
He believes cooking should feel approachable and fun, never complicated. When he’s not stirring up new recipe ideas, Michael’s out hiking scenic trails, chatting with farmers at local markets, or chasing the perfect sunset shot for inspiration.