
Zesty Italian Grinder Sub Recipe: A Classic Handheld Delight
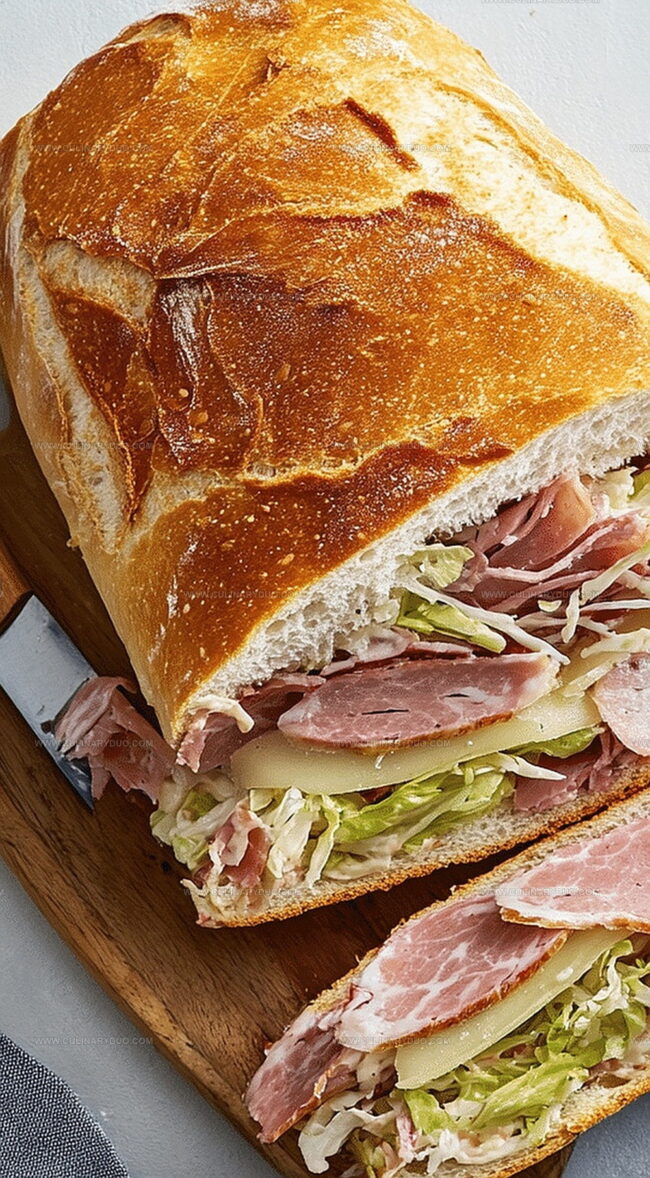
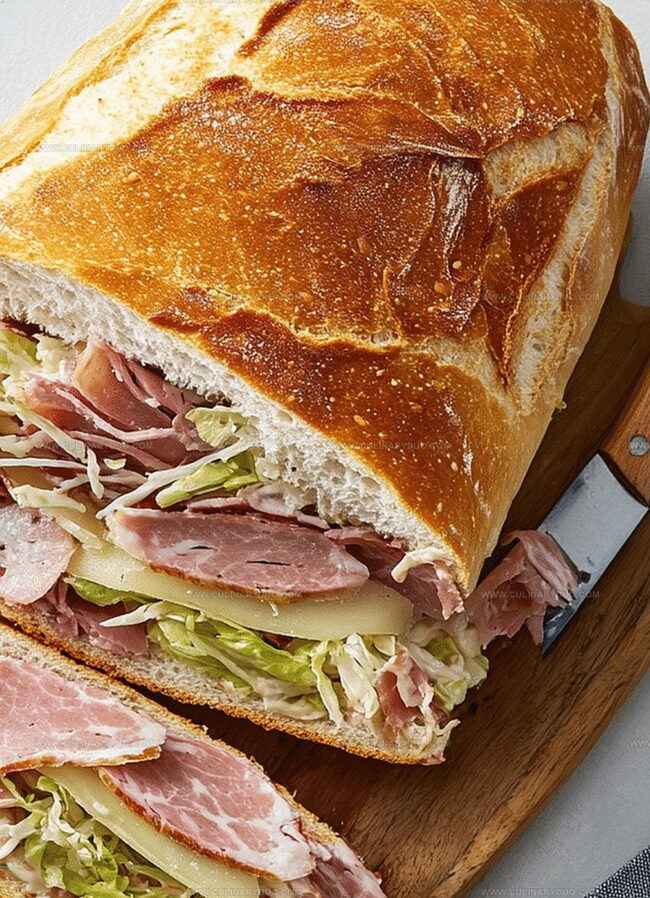
Packed with robust flavors and hearty italian grinder sub ingredients, this sandwich delivers a punch of deliciousness that will satisfy any hunger.
Layers of premium deli meats and zesty seasonings create a mouthwatering experience.
Each bite promises a perfect blend of crisp vegetables and savory proteins.
The classic Italian-style combination brings restaurant-quality taste right to your kitchen.
Crusty bread cradles the incredible fillings, making every sandwich a celebration of bold, rustic flavors.
You’ll love how simple it is to assemble this crowd-pleasing meal in minutes.
Grab a napkin and get ready to savor an authentic taste of Italian-inspired comfort food.
Italian Grinder Sub Tasty Details
What You Need for Grinder Subs
Bread:Meats:Cheese:Vegetables and Toppings:Condiments and Seasonings:Grinder Sub Assembly Instructions
Step 1: Slice The Bread
Grab your Italian sub roll and slice it cleanly in half lengthwise using a sharp knife.
Make sure the cut is even to create a perfect base for layering delicious ingredients.
Step 2: Spread The Creamy Base
Generously coat both halves of the bread with smooth mayonnaise, ensuring complete coverage from edge to edge for a rich, tangy foundation.
Step 3: Build The Meat and Cheese Layer
Carefully arrange your protein and cheese foundation by placing:Distribute these ingredients evenly across the bottom half of the bread to create a hearty base.
Step 4: Add Fresh Vegetable Toppings
Pile on the crisp and vibrant vegetable layers:Scatter these ingredients generously for maximum flavor and texture.
Step 5: Enhance With Dressing and Seasonings
Drizzle the sub with:Sprinkle with Italian seasoning, salt, and pepper to elevate the taste profile.
Step 6: Close and Compress The Sub
Gently place the top half of the bread onto the layered ingredients.
Softly press down to ensure all components are snugly held together.
Step 7: Serve or Store
Enjoy your sub immediately or wrap it tightly and refrigerate for up to 4 hours, maintaining its delicious integrity until serving time.
Grinder Sub Tips for Success
Fun Grinder Sub Variations
Serve Italian Grinder Sub Hot
Storage Advice for Grinder Subs
FAQs
This Italian grinder sub combines classic Italian deli meats like salami, ham, and mortadella with tangy vinegar and flavorful seasonings, creating a more authentic and robust sandwich experience.
Yes, you can prepare the sandwich and wrap it tightly, storing it in the refrigerator for up to 4 hours before serving, which actually allows the flavors to meld together nicely.
While delicious, this sub is relatively high in calories and fats due to the combination of cured meats and cheese. It’s best enjoyed as an occasional treat rather than a daily meal.
Print
Italian Grinder Sub Recipe
- Total Time: 10 minutes
- Yield: 1 1x
Description
Hearty Italian Grinder Sub brings bold Mediterranean flavors together in one mouthwatering sandwich loaded with premium meats, zesty peppers, and melted cheese. Classic ingredients dance between crusty bread, promising a satisfying meal that delivers robust taste and authentic Italian spirit.
Ingredients
Meats:
- 3 slices salami
- 3 slices ham
- 3 slices mortadella
Bread and Cheese:
- 1 Italian sub roll or hoagie bun
- 3 slices provolone cheese
Fresh Ingredients and Condiments:
- 1/2 cup (120 milliliters) shredded lettuce
- 2 slices tomato
- 2 slices red onion
- 3–4 banana pepper rings
- 2 tablespoons (30 milliliters) mayonnaise
- 1 tablespoon (15 milliliters) red wine vinegar
- 1 tablespoon (15 milliliters) olive oil
- 1 teaspoon (5 milliliters) Italian seasoning
- Salt to taste
- Pepper to taste
Instructions
- Carefully split the Italian sub roll horizontally, creating two even halves for maximum ingredient coverage.
- Generously coat both interior bread surfaces with a smooth layer of mayonnaise, ensuring complete and even distribution.
- Arrange cured meat selections – salami, ham, and mortadella – across the bottom bread half in overlapping layers for rich flavor intensity.
- Position provolone cheese atop the meat layer, allowing slight overhang for visual appeal and complete coverage.
- Distribute fresh crisp lettuce evenly, followed by ripe tomato slices positioned for balanced texture and color.
- Scatter thinly sliced red onion rings and tangy banana pepper rings across the vegetable layer for sharp, zesty notes.
- Drizzle high-quality olive oil and robust red wine vinegar over the vegetables to enhance overall taste profile.
- Sprinkle Italian seasoning blend, kosher salt, and freshly cracked black pepper to elevate the sandwich’s aromatic complexity.
- Gently press the top bread half downward, compressing ingredients and creating a cohesive, compact sandwich structure.
- Serve immediately for optimal freshness, or securely wrap and refrigerate for up to 4 hours to maintain ingredient integrity.
Notes
- Maximize flavor by toasting the sub roll lightly before assembling to enhance its texture and create a crispier base.
- Slice vegetables thinly and uniformly to ensure balanced distribution and easier eating experience.
- Customize protein options by substituting meats with turkey, roast beef, or plant-based alternatives for dietary preferences.
- Elevate the sandwich’s taste by letting it rest for 10-15 minutes after assembly, allowing flavors to meld together and ingredients to slightly marinate.
- Prep Time: 10 minutes
- Cook Time: 0 minutes
- Category: Lunch, Dinner, Snacks, Appetizer
- Method: None
- Cuisine: Italian
Nutrition
- Serving Size: 1
- Calories: 760 kcal
- Sugar: 4 g
- Sodium: 1800 mg
- Fat: 60 g
- Saturated Fat: 20 g
- Unsaturated Fat: 35 g
- Trans Fat: 1 g
- Carbohydrates: 40 g
- Fiber: 3 g
- Protein: 35 g
- Cholesterol: 110 mg
Michael Reyes
Founder & Lead Recipe Developer
Expertise
Education
Santa Fe Community College
Michael’s love for cooking runs deep, rooted in the bold, colorful flavors of his New Mexico upbringing.
After earning his Culinary Arts Certificate from Santa Fe Community College, he spent years sharpening his skills in kitchens that celebrated traditional Southwestern and Latin American dishes.
He believes cooking should feel approachable and fun, never complicated. When he’s not stirring up new recipe ideas, Michael’s out hiking scenic trails, chatting with farmers at local markets, or chasing the perfect sunset shot for inspiration.