Irresistible Italian Sliders Recipe: Zesty Handheld Joy
Bursting with flavor, these mouthwatering italian sliders dance between crispy bread and savory fillings that’ll make your taste buds sing.
Packed with zesty ingredients and robust seasonings, each slider becomes a miniature culinary adventure.
The combination of melted cheese, aromatic herbs, and tender meat creates an irresistible bite-sized treat.
Simple yet sophisticated, these sliders work perfectly for game day gatherings or casual weekend meals.
Every slider tells a story of comfort and deliciousness, promising to satisfy even the most discerning palate.
You’ll find these little handheld delights disappearing faster than you can plate them.
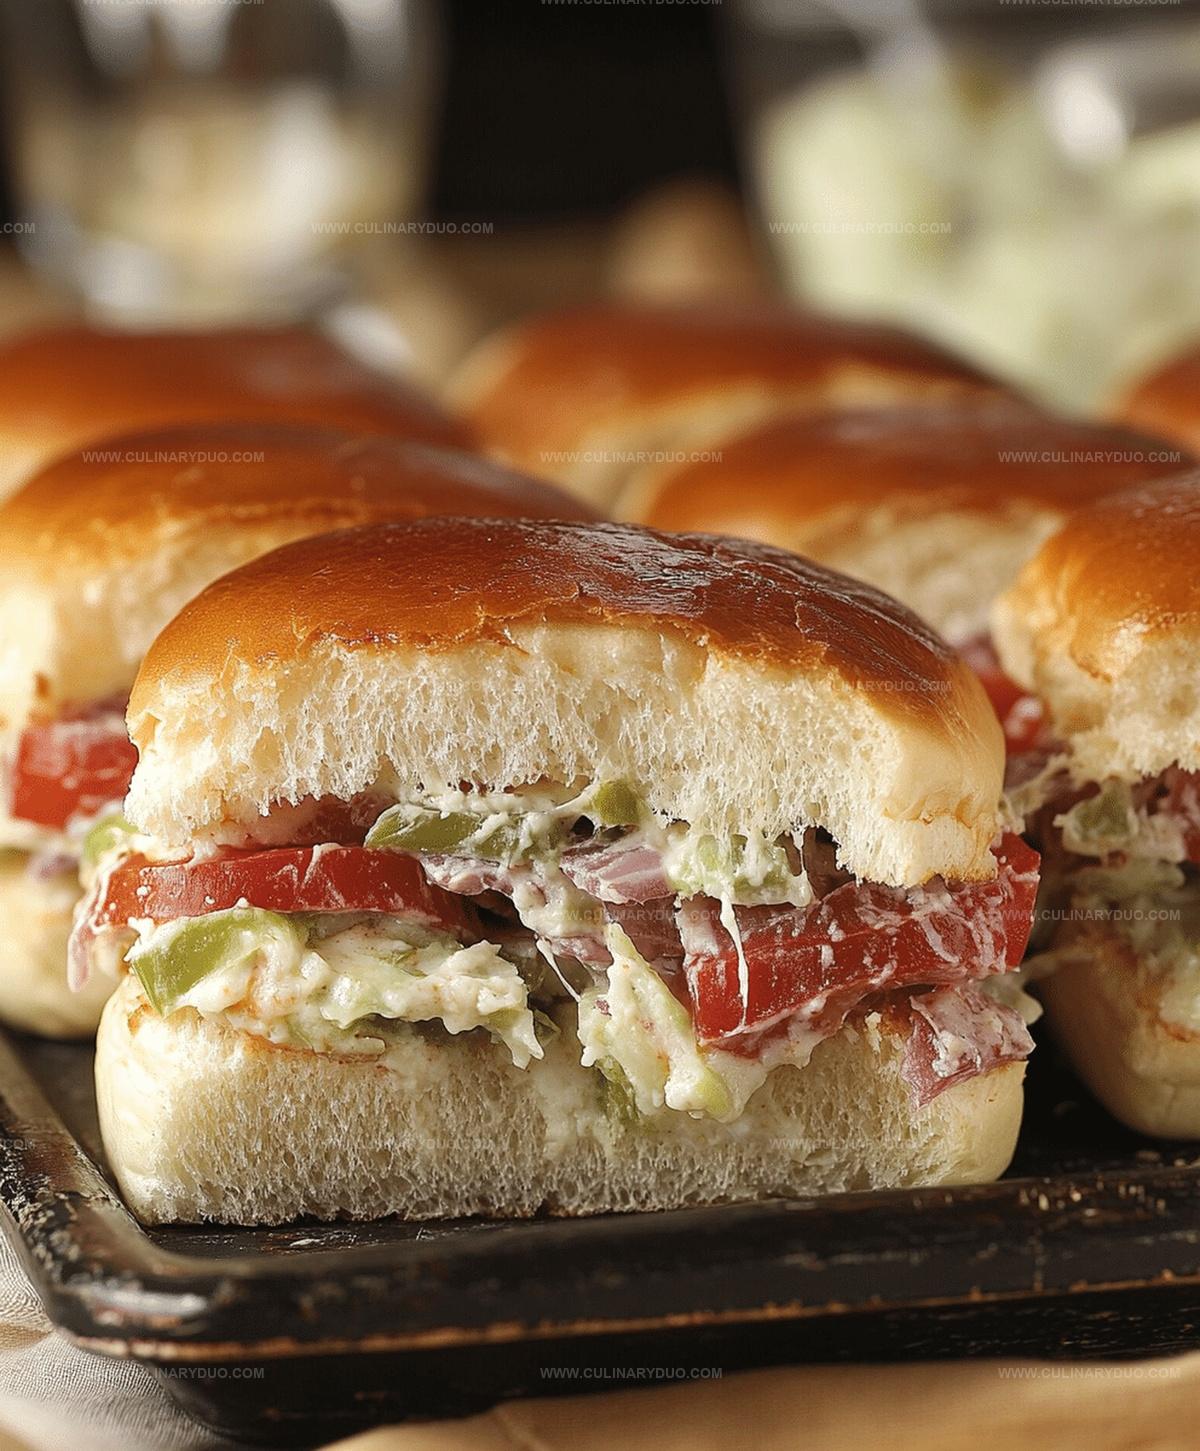
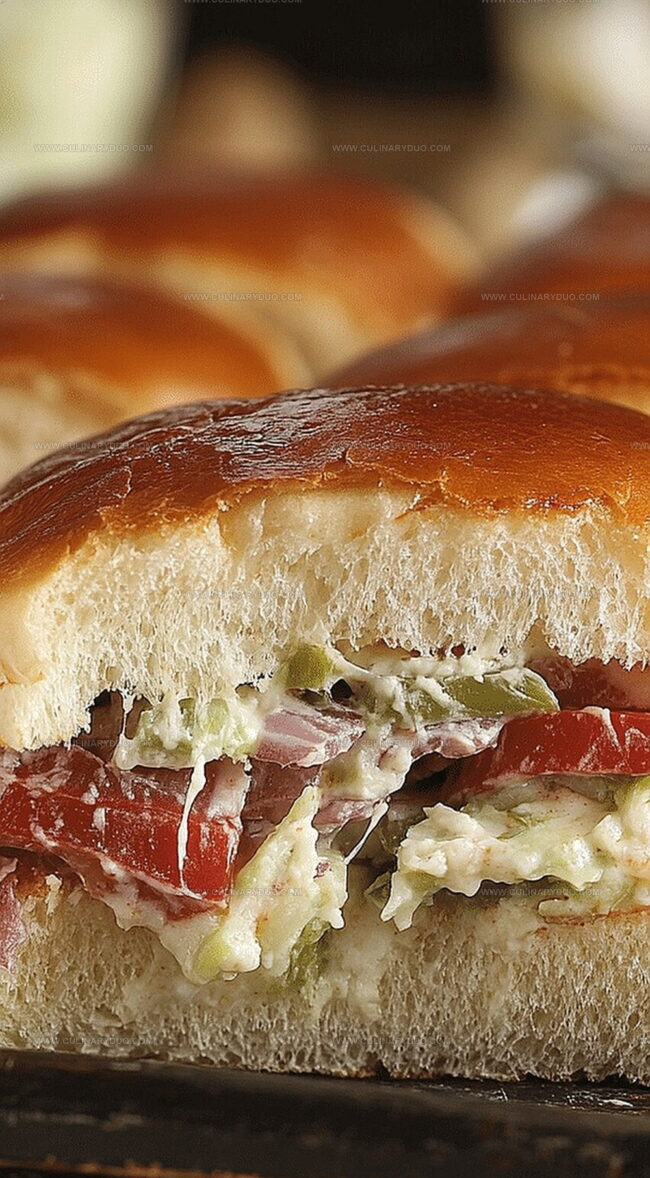
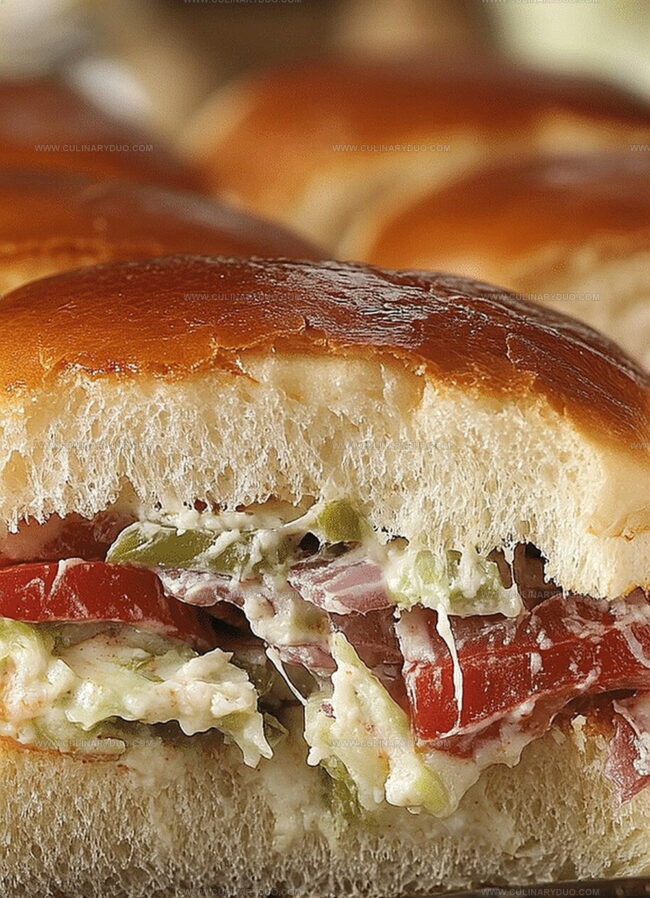
Italian Sliders That Are Full of Flavor
Italian Slider Ingredient Guide
Bread Base:Protein and Cheese:Fresh and Flavor Enhancers:Seasoning and Finishing:Making Italian Sliders at Home
Step 1: Warm Up The Oven
Crank the oven to a toasty 350°F (175°C) to get ready for these mouthwatering sliders.
Step 2: Slice And Prepare Buns
Carefully slice the slider buns right down the middle, creating top and bottom halves.
Arrange the bottom halves on a baking tray, creating a perfect base for your flavor-packed mini sandwiches.
Step 3: Build Delicious Layers
Create a tasty foundation by adding these delectable ingredients:Layer these ingredients generously across the bottom bun halves.
Step 4: Add Flavor Boosters
Drizzle some olive oil and balsamic glaze over the layers.
Sprinkle Italian seasoning to give your sliders an extra punch of Mediterranean flavor.
Step 5: Top And Seal
Gently place the top bun halves over the loaded bottom halves, creating little flavor-packed sandwiches.
Step 6: Butter And Season
Brush the top of each slider with rich garlic butter.
Dust with an additional sprinkle of Italian seasoning for maximum taste.
Step 7: Bake To Perfection
Cover the sliders with aluminum foil and bake for 10 minutes.
Remove the foil and continue baking for another 5 minutes until the tops turn golden and the cheese melts beautifully.
Step 8: Serve And Enjoy
Slice the sliders and serve them warm, ready to delight everyone at the table.
Tips for Cheesy Italian Sliders
Italian Slider Variations to Explore
Serving Italian Sliders Like a Pro
Storage for Italian Sliders
FAQs
These are mini sandwiches with classic Italian-inspired ingredients like deli meats, provolone cheese, basil, and roasted red peppers, served on small buns with flavorful seasonings.
Yes, you can swap deli meats with prosciutto, salami, or ham based on your preference or what’s available in your kitchen.
Prepare the sliders completely, cover them with foil, and refrigerate. When ready to serve, bake them straight from the refrigerator, adding a few extra minutes to the cooking time.
Absolutely! They’re perfect for gatherings because they’re easy to make, can be prepared in advance, and are bite-sized, making them great finger food for events.
Print
Italian Sliders Recipe
- Total Time: 30 minutes
- Yield: 6 1x
Description
Succulent Italian sliders bring Mediterranean flavors to miniature sandwich perfection, blending zesty marinara, melted provolone, and herbed ground beef. Crispy edges and juicy centers make these little bites irresistible companions for your next gathering or casual dinner.
Ingredients
Main Proteins:
- 8 slider buns
- 4 ounces (113 grams) salami
- 4 ounces (113 grams) pepperoni
- 4 ounces (113 grams) ham
Cheese and Herbs:
- 4 ounces (113 grams) provolone cheese
- 1/4 cup fresh basil leaves
- 1 tablespoon Italian seasoning
Condiments and Extras:
- 1/4 cup olive oil
- 2 tablespoons balsamic glaze
- 1/4 cup roasted red peppers
- 2 tablespoons garlic butter
Instructions
- Warm the oven to 350°F, preparing a baking tray with parchment paper for easy cleanup.
- Carefully split slider buns into top and bottom halves, arranging bottom pieces on the prepared tray.
- Create flavor-packed layers by placing deli meats, ensuring even coverage across each bun base.
- Add provolone cheese slices directly on top of the meats, allowing for optimal melting potential.
- Distribute fresh basil leaves and roasted red peppers strategically for balanced taste and visual appeal.
- Enhance the flavor profile by delicately drizzling olive oil and balsamic glaze over the assembled ingredients.
- Generously sprinkle Italian seasoning across the prepared sliders, ensuring comprehensive flavor distribution.
- Cap each slider with the corresponding top bun halves, pressing gently to secure the layers.
- Brush bun tops with garlic butter, creating a golden, aromatic exterior during baking.
- Dust additional Italian seasoning over the buttered bun surfaces for extra zest.
- Cover the tray loosely with aluminum foil and bake for 10 minutes to initiate melting.
- Remove foil and continue baking for 5 more minutes until edges turn crispy and golden brown.
- Allow sliders to rest for 2-3 minutes after removing from oven to set the melted cheese.
- Slice diagonally and serve immediately while warm and at peak flavor intensity.
Notes
- Customize the sliders by swapping deli meats for vegetarian alternatives like grilled portobello mushrooms or marinated tofu for a plant-based version.
- Enhance flavor complexity by using aged provolone or mixing different cheese types like mozzarella and parmesan for deeper taste dimensions.
- Prep ingredients ahead of time to streamline assembly, making these sliders perfect for quick entertaining or meal prep during busy weekdays.
- For gluten-sensitive guests, use gluten-free slider buns or large lettuce leaves as a low-carb wrapper option while maintaining authentic Italian flavor profile.
- Prep Time: 15 minutes
- Cook Time: 15 minutes
- Category: Lunch, Dinner, Appetizer, Snacks
- Method: Baking
- Cuisine: Italian
Nutrition
- Serving Size: 6
- Calories: 280 kcal
- Sugar: 3 g
- Sodium: 650 mg
- Fat: 18 g
- Saturated Fat: 7 g
- Unsaturated Fat: 9 g
- Trans Fat: 0.2 g
- Carbohydrates: 22 g
- Fiber: 1.5 g
- Protein: 14 g
- Cholesterol: 40 mg
Michael Reyes
Founder & Lead Recipe Developer
Expertise
Education
Santa Fe Community College
Michael’s love for cooking runs deep, rooted in the bold, colorful flavors of his New Mexico upbringing.
After earning his Culinary Arts Certificate from Santa Fe Community College, he spent years sharpening his skills in kitchens that celebrated traditional Southwestern and Latin American dishes.
He believes cooking should feel approachable and fun, never complicated. When he’s not stirring up new recipe ideas, Michael’s out hiking scenic trails, chatting with farmers at local markets, or chasing the perfect sunset shot for inspiration.