The Perfect Mint Chocolate Chip Mousse Brownies Recipe
Creamy mint chocolate chip mousse blends perfectly with rich, fudgy brownies for an irresistible dessert experience.
decadent layers promise pure indulgence in every single bite.
chocolate lovers will swoon over this delightful combination of smooth textures and intense flavors.
Sweet and refreshing notes dance across your palate with each mouthful.
Cool mint cuts through the intense chocolate, creating a balanced and sophisticated treat.
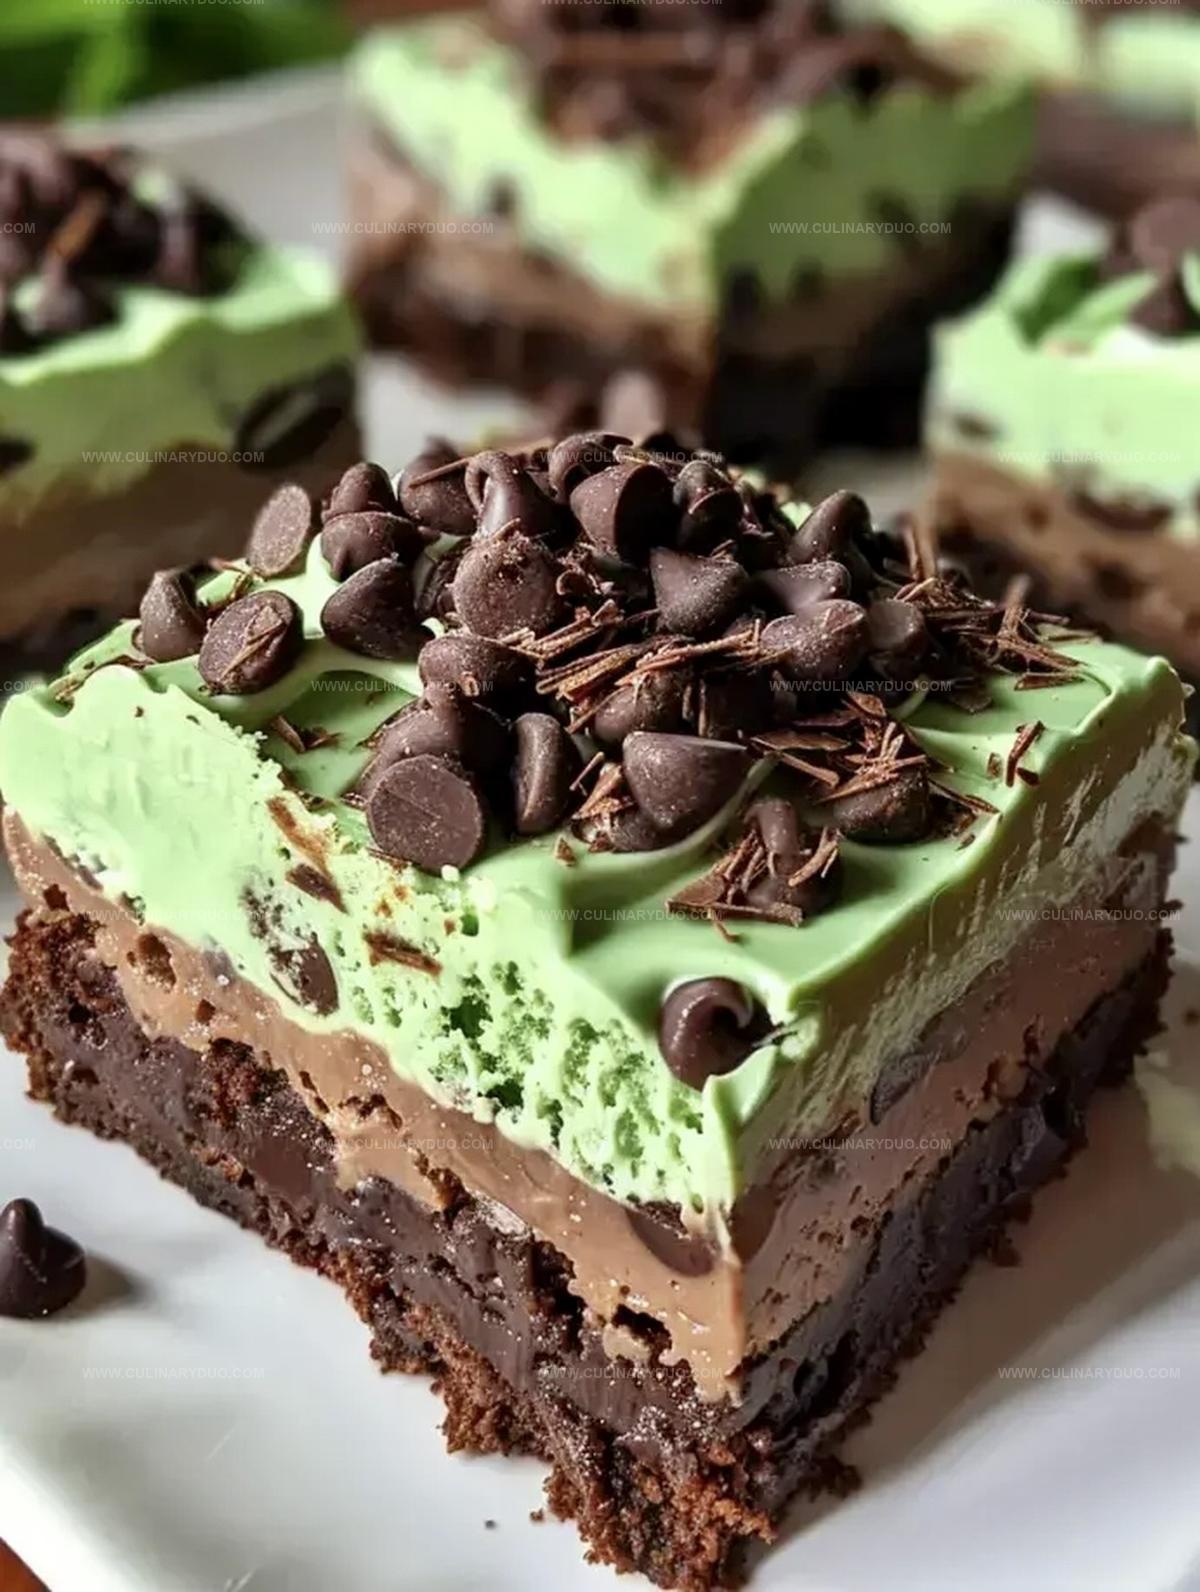
Dark chocolate brownies serve as the ultimate foundation for this show-stopping dessert.
You won’t be able to resist another slice of this dreamy, creamy masterpiece.
Mint Chocolate Mousse Brownie Perks
What’s In Mint Brownie Mousse
Base Ingredients:Flavoring Ingredients:Chocolate and Cream Components:Decorative and Coloring Ingredients:Steps To Dreamy Mint Brownies
Step 1: Warm Up the Oven
Grab your baking pan and get ready to create magic.
Line the 9×13-inch pan with parchment paper and give it a light spray of cooking oil.
Set your oven to a toasty 350F (177C).
Step 2: Craft the Brownie Base
Melt these ingredients together in a saucepan over gentle heat:Stir until everything becomes a silky smooth mixture.
Let it cool down slightly, then add a splash of vanilla and mint extracts for an extra flavor punch.
Step 3: Mix in the Binding Ingredients
Crack eggs into the chocolate mixture one at a time.
Whisk each egg thoroughly before adding the next.
Sprinkle in flour and fold gently until just combined.
Don’t overmix – we want fudgy brownies!
Step 4: Bake to Perfection
Pour the batter into your prepared pan.
Slide it into the preheated oven and bake for 25-28 minutes.
The brownies are done when a toothpick comes out with a few moist crumbs.
Let the brownies cool completely.
Step 5: Whip Up the Mint Mousse
Create a dreamy white chocolate base by melting:Stir until smooth and let it cool down.
Step 6: Add Minty Magic
Whip the remaining heavy cream until soft peaks form.
Gently fold in:Stir these into the cooled white chocolate mixture.
Step 7: Layer the Mousse
Fold in some finely chopped chocolate into the mousse.
Spread this minty layer evenly over the cooled brownie base.
Step 8: Create a Glossy Chocolate Glaze
Heat heavy cream until it’s just simmering.
Pour over chopped semi-sweet chocolate.
Let it sit for a minute, then stir until you have a smooth, shiny glaze.
Pour and spread evenly over the mousse.
Step 9: Chill and Serve
Refrigerate the brownies for at least 3 hours until the mousse sets completely.
Slice into squares and sprinkle with green candies for a festive touch if you like.
Pro Tips For Chocolate Mint Brownies
Mint Brownie Flavor Swaps
How To Serve Mint Brownies
Storing Mousse Brownies Well
FAQs
They look complicated, but the recipe is surprisingly straightforward. Each step is simple, and you can easily follow the instructions even if you’re not an experienced baker.
Yes, you can use other flavor extracts like almond or vanilla. However, the mint flavor is what gives these brownies their unique taste, so try to stick with peppermint extract if possible.
Look for a few moist crumbs on your toothpick when you test it. The edges should be slightly pulled away from the pan, and the center should look set but not completely dry.
Print
Mint Chocolate Chip Mousse Brownies Recipe
- Total Time: 1 hour 13 minutes
- Yield: 12 1x
Description
Chocolate and mint unite in these indulgent mint chocolate chip mousse brownies, creating a luxurious dessert that blends rich fudgy layers with cool, creamy topping. Cool chocolate lovers will savor each silky bite of this irresistible sweet treat.
Ingredients
Brownie Base:
- 10 ounces (283 grams) unsalted butter
- 2 1/2 cups granulated sugar
- 1 3/4 cups unsweetened cocoa powder
- 1 cup all-purpose flour
- 4 large eggs
- 1 teaspoon salt
- 1 teaspoon vanilla extract
- 1/2 teaspoon mint extract
Mousse Layer:
- 2 cups heavy cream
- 1/2 cup white chocolate chips
- 1/2 cup finely chopped semi-sweet chocolate
- Pinch of salt
- Peppermint extract
- Green and yellow food coloring
Glaze Topping:
- Chopped semi-sweet chocolate
- Heavy cream
Instructions
- Prepare the baking vessel by lining a 9×13-inch pan with parchment paper and lightly greasing the surface at 350°F (177°C).
- Create the brownie foundation by melting butter, sugar, cocoa, and salt in a saucepan over low heat, stirring until achieving a uniform consistency. Allow the mixture to cool slightly before incorporating vanilla and mint extracts.
- Integrate eggs into the chocolate base one at a time, ensuring complete blending after each addition. Gently fold flour into the mixture until just incorporated, avoiding overmixing.
- Transfer the brownie batter to the prepared pan, spreading evenly. Bake for 25-28 minutes until a toothpick reveals a few moist crumbs when inserted. Remove and allow to cool completely at room temperature.
- Craft the mint mousse by gently melting white chocolate with heavy cream over low heat, stirring until achieving a smooth texture. Set aside to cool.
- Whip the remaining heavy cream to soft, billowy peaks. Enhance the white chocolate mixture with a pinch of salt, peppermint extract, and a subtle blend of green and yellow food coloring for a delicate mint hue.
- Carefully fold the whipped cream and finely chopped chocolate into the white chocolate base, maintaining a light, airy consistency. Distribute the mousse evenly across the cooled brownie layer.
- Prepare the glossy chocolate glaze by heating heavy cream until it reaches a gentle simmer. Pour over chopped semi-sweet chocolate, allowing it to rest momentarily before stirring to create a smooth, reflective surface. Spread uniformly over the mousse layer.
- Refrigerate the dessert for a minimum of 3 hours to ensure the mousse sets completely. Slice into elegant squares and optionally embellish with festive green candies for a decorative touch.
Notes
- Chocolate Selection Choose high-quality dark or semi-sweet chocolate for deeper, richer flavor that complements the mint’s brightness.
- Temperature Matters Allow brownies to cool completely before adding mousse to prevent melting and maintain distinct layers.
- Extract Intensity Adjust peppermint extract gradually, tasting as you go to achieve perfect mint flavor without overwhelming sweetness.
- Dietary Adaptations Swap butter for coconut oil and use gluten-free flour to create a delicious alternative for those with dietary restrictions.
- Prep Time: 45 minutes
- Cook Time: 28 minutes
- Category: Desserts, Snacks
- Method: Baking
- Cuisine: American
Nutrition
- Serving Size: 12
- Calories: 311 kcal
- Sugar: 29 g
- Sodium: 146 mg
- Fat: 23 g
- Saturated Fat: 14 g
- Unsaturated Fat: 8 g
- Trans Fat: 0.5 g
- Carbohydrates: 29 g
- Fiber: 4 g
- Protein: 4 g
- Cholesterol: 63 mg
Michael Reyes
Founder & Lead Recipe Developer
Expertise
Education
Santa Fe Community College
Michael’s love for cooking runs deep, rooted in the bold, colorful flavors of his New Mexico upbringing.
After earning his Culinary Arts Certificate from Santa Fe Community College, he spent years sharpening his skills in kitchens that celebrated traditional Southwestern and Latin American dishes.
He believes cooking should feel approachable and fun, never complicated. When he’s not stirring up new recipe ideas, Michael’s out hiking scenic trails, chatting with farmers at local markets, or chasing the perfect sunset shot for inspiration.