The Dreamiest No Bake Oreo Cheesecake Recipe Ever Made
Creamy, decadent desserts always win hearts, and this no bake oreo cheesecake recipe delivers pure indulgence.
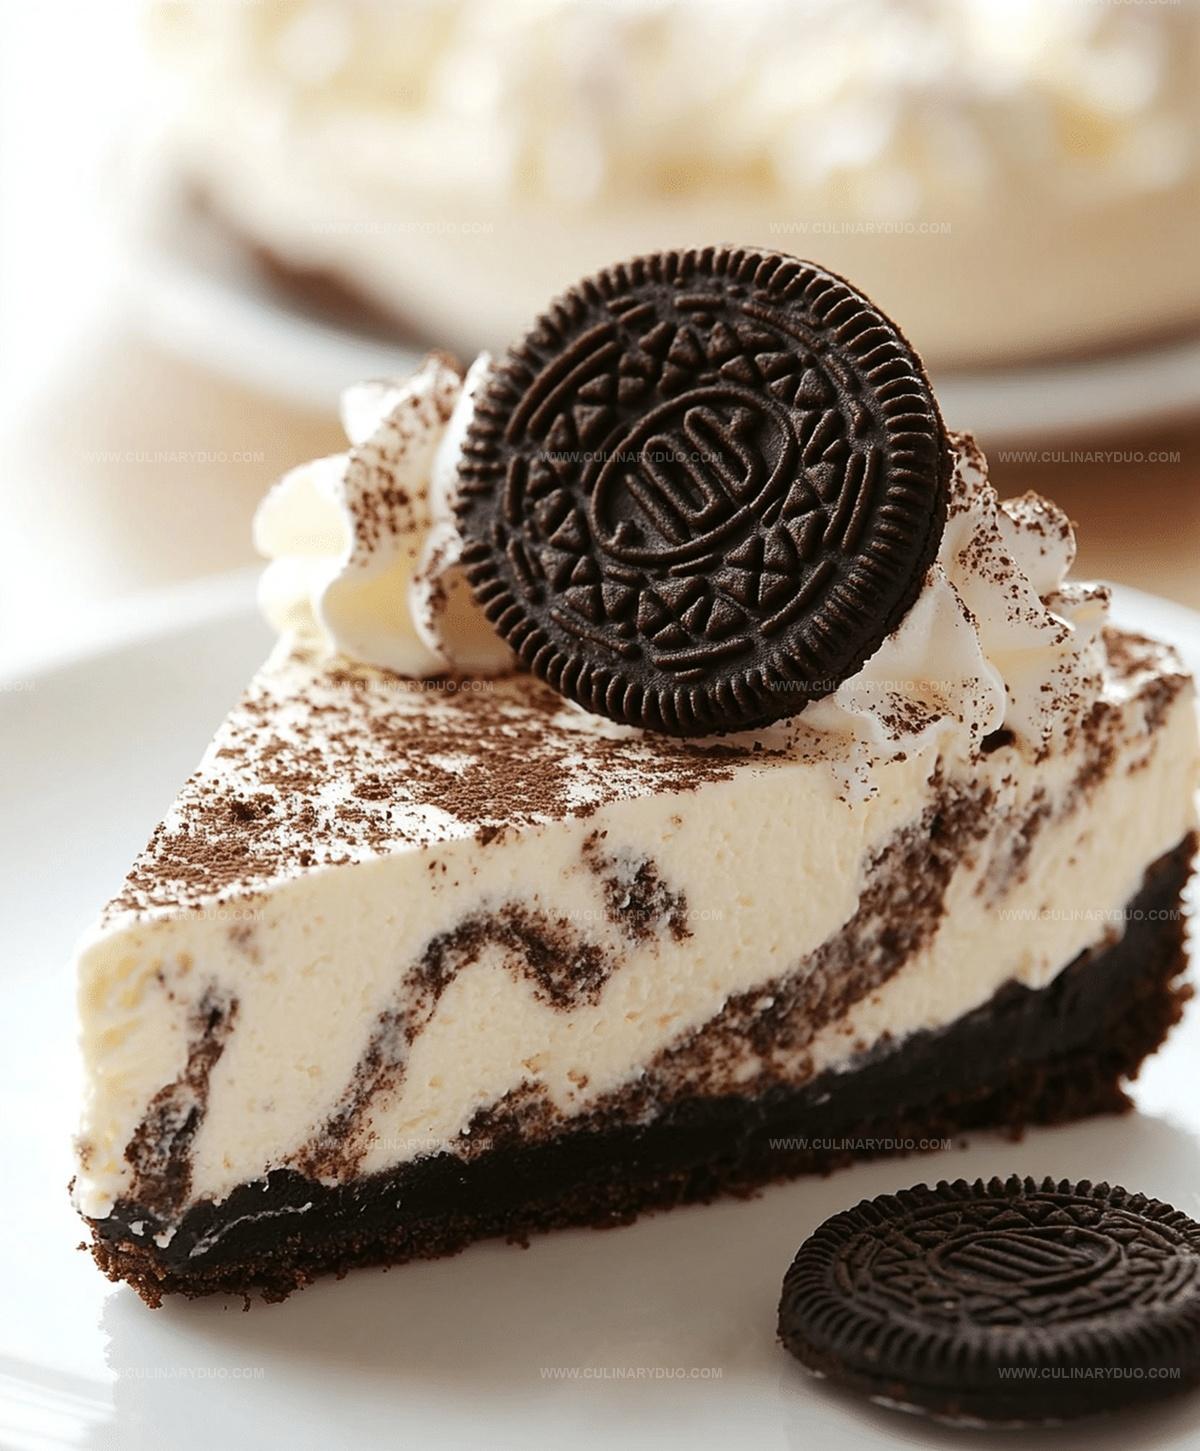
Chocolate cookie crusts create the perfect foundation for a silky smooth filling.
Crushed oreo cookies fold seamlessly into a rich cream cheese mixture that melts in your mouth.
Each spoonful promises a delightful blend of sweet and tangy flavors.
The dessert comes together effortlessly without requiring any baking skills.
No complicated techniques or fancy equipment stand between you and this delectable treat.
This cheesecake will become your new go-to dessert for every celebration or casual weekend craving.
No Bake Oreo Cheesecake That Steals the Show
Everything You Need for Oreo Cheesecake
Cookie Base:Cheesecake Filling:Garnish:Step-by-Step Oreo Cheesecake Instructions
Step 1: Crush Oreo Cookies
Break apart the Oreo cookies and place them in a food processor.
Pulse until the cookies transform into fine, sandy crumbs.
If you don’t have a food processor, place cookies in a sealed plastic bag and crush them using a rolling pin until they become a uniform texture.
Step 2: Create Crunchy Crust Base
Melt butter in a microwave-safe bowl until completely liquid.
Pour melted butter into the Oreo crumbs and mix thoroughly until the crumbs become moistened and slightly clumpy.
Transfer the mixture into a springform pan, pressing firmly and evenly across the bottom to create a solid foundation.
Use the back of a spoon or flat-bottomed measuring cup to compact the crust.
Pop the pan into the refrigerator to firm up for about 10 minutes.
Step 3: Whip Creamy Filling
In a large mixing bowl, beat cream cheese using an electric mixer until it becomes silky and free of lumps.
Gradually add powdered sugar and vanilla extract, continuing to mix until the ingredients are fully incorporated and smooth.
In a separate bowl, whip cream until stiff peaks form.
Gently fold the whipped cream into the cream cheese mixture, creating a light and airy texture.
Sprinkle in reserved Oreo crumbs and fold carefully to distribute evenly.
Step 4: Layer and Chill Cheesecake
Pour the creamy filling over the chilled Oreo crust, using a spatula to spread it evenly and create a smooth surface.
Cover the pan with plastic wrap and refrigerate for a minimum of 4 hours, or ideally overnight, to allow the cheesecake to set completely.
Step 5: Garnish and Serve
Before serving, sprinkle additional crushed Oreo cookies on top for extra crunch and visual appeal.
Carefully remove the springform pan sides, slice the cheesecake into wedges, and serve chilled.
Enjoy this decadent, no-bake dessert that’s sure to impress!
Tips for a Creamy No-Bake Cheesecake
Fun Cheesecake Variations to Explore
Ways to Serve No-Bake Oreo Cheesecake
Keeping Cheesecake Fresh for Days
FAQs
Yes, you can substitute regular cream cheese with reduced-fat cream cheese without significantly changing the texture or taste of the cheesecake.
While a springform pan makes removing the cheesecake easier, you can use a regular cake pan lined with parchment paper as an alternative.
The No Bake Oreo Cheesecake will stay fresh for up to 5 days when stored in an airtight container in the refrigerator.
Absolutely! Wrap the cheesecake tightly in plastic wrap and aluminum foil, and it can be frozen for up to 2 months. Thaw overnight in the refrigerator before serving.
Print
No Bake Oreo Cheesecake Recipe
- Total Time: 4 hours 30 minutes
- Yield: 8 1x
Description
Creamy Oreo cheesecake delights dessert enthusiasts with its irresistible no-bake magic. Rich chocolate cookie crust and silky cream cheese filling create a heavenly treat you’ll crave again and again.
Ingredients
Main Ingredients:
- 16 ounces (454 grams) cream cheese, softened
- 24 Oreo cookies, divided
- 1 1/4 cups (296 milliliters) heavy cream, whipped
Crust Ingredients:
- 1/4 cup (57 grams) melted butter
Sweetening and Flavoring Ingredients:
- 1 cup (120 grams) powdered sugar
- 1 teaspoon vanilla extract
Instructions
- Create a fine, uniform texture by pulverizing Oreo cookies in a food processor until they resemble delicate crumbs.
- Integrate melted butter with the cookie crumbs, ensuring thorough and even mixture.
- Transfer the crumb blend into a springform pan, firmly pressing down to establish a compact, uniform base.
- Chill the crust in the refrigerator for approximately 10 minutes to solidify its structure.
- Whip cream cheese in a large mixing bowl until achieving a silky, lump-free consistency.
- Gradually incorporate powdered sugar and vanilla extract, blending until the mixture becomes smooth and homogeneous.
- Gently fold whipped cream into the cream cheese mixture, maintaining a light, airy texture.
- Sprinkle remaining Oreo crumbs throughout the filling, distributing them evenly for consistent flavor.
- Transfer the creamy filling onto the chilled crust, using a spatula to create a perfectly level surface.
- Refrigerate the cheesecake for a minimum of 4 hours, allowing it to set completely and develop a firm texture.
- Before serving, optionally garnish with additional crushed Oreo cookies for enhanced visual appeal and crunch.
- Slice with a clean, sharp knife and serve chilled for optimal taste and texture.
Notes
- Use a food processor or rolling pin to crush Oreos into fine, even crumbs for a perfectly compact and sturdy crust.
- Ensure cream cheese is at room temperature to achieve a silky-smooth filling without lumps.
- Gently fold whipped cream into the cream cheese mixture to maintain its light, airy texture and prevent deflating.
- This dessert can be prepared a day in advance, making it ideal for stress-free entertaining and allowing flavors to meld.
- Prep Time: 30 minutes
- Cook Time: 4 hours
- Category: Desserts
- Method: Chilling
- Cuisine: American
Nutrition
- Serving Size: 8
- Calories: 503 kcal
- Sugar: 38 g
- Sodium: 210 mg
- Fat: 36 g
- Saturated Fat: 21 g
- Unsaturated Fat: 12 g
- Trans Fat: 1 g
- Carbohydrates: 40 g
- Fiber: 1 g
- Protein: 6 g
- Cholesterol: 95 mg
Michael Reyes
Founder & Lead Recipe Developer
Expertise
Education
Santa Fe Community College
Michael’s love for cooking runs deep, rooted in the bold, colorful flavors of his New Mexico upbringing.
After earning his Culinary Arts Certificate from Santa Fe Community College, he spent years sharpening his skills in kitchens that celebrated traditional Southwestern and Latin American dishes.
He believes cooking should feel approachable and fun, never complicated. When he’s not stirring up new recipe ideas, Michael’s out hiking scenic trails, chatting with farmers at local markets, or chasing the perfect sunset shot for inspiration.