
Dreamy No-Bake Cheesecake Recipe: Effortless Sweet Delight
Creamy and decadent, this no-bake cheesecake recipe delivers pure dessert bliss without ever touching an oven.
Rich cream cheese melts seamlessly into a silky smooth mixture that promises indulgence in every bite.
Graham cracker crusts provide the perfect crisp foundation for this luscious treat.
The simple technique requires minimal effort but produces maximum flavor and texture.
No complicated baking steps stand between you and this dreamy dessert.
With just a few basic ingredients, anyone can craft this elegant sweet that looks like it came from a professional bakery.
Chill, slice, and savor this delightful cheesecake that will become your new favorite no-fuss dessert.
No-Bake Cheesecake: Chill and Enjoy
What Goes Into No-Bake Cheesecake
Crust Ingredients:Filling Ingredients:Optional Toppings:Instructions for No-Bake Cheesecake Perfection
Step 1: Craft The Crunchy Base
Grab graham crackers and crush them into fine crumbs.
Melt butter and mix with the crumbs and sugar until the mixture feels like wet sand.
Press this delightful blend firmly into the bottom of a springform pan, creating a solid foundation.
Pop the pan into the refrigerator and let it chill and set for half an hour.
Step 2: Whip Up The Creamy Filling
Take cream cheese and beat it until silky smooth in a large mixing bowl.
Sprinkle in powdered sugar and splash some vanilla extract.
Blend everything together until the mixture looks dreamy and consistent.
Step 3: Fold In Fluffy Clouds
Gently incorporate whipped cream into the cream cheese mixture.
Use a soft folding motion to keep the airiness intact.
The goal is a light, cloud-like texture that will make your cheesecake irresistibly smooth.
Step 4: Create The Perfect Layer
Spread the creamy filling evenly across the chilled crust.
Make sure the surface looks smooth and inviting, with no lumps or uneven spots.
Step 5: Let It Rest And Set
Slide the cheesecake into the refrigerator.
Allow it to rest and firm up for at least 4 hours, though overnight is even better.
This waiting time helps the flavors meld and the texture become perfectly creamy.
Step 6: Dress Up Your Dessert
Before serving, get creative with toppings.
Scatter fresh berries, drizzle chocolate, or sprinkle nuts to add your personal touch.
Slice and enjoy your magnificent no-bake masterpiece!
Tips for Setting the Creamiest No-Bake Cheesecake
Fun Variations for No-Bake Cheesecake Fans
Serving Suggestions for No-Bake Cheesecake
Storing No-Bake Cheesecake for Later
FAQs
Yes, you can substitute graham crackers with digestive biscuits, Oreo cookies, or shortbread for a unique flavor and texture.
Ensure all ingredients are at room temperature and avoid overmixing the cream cheese to prevent air bubbles that can cause cracking.
Absolutely! This no-bake cheesecake can be prepared up to 2-3 days in advance and stored in the refrigerator until ready to serve.
Yes, you can freeze the cheesecake for up to 1 month. Wrap it tightly in plastic wrap and aluminum foil before freezing.
Print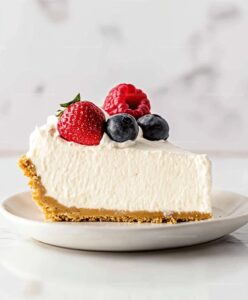
No-Bake Cheesecake Recipe
- Total Time: 4 hours 25 minutes
- Yield: 8 1x
Description
Creamy, dreamy no-bake cheesecake delights dessert enthusiasts with its silky smooth texture and irresistible flavor profile. Minimal effort delivers maximum indulgence, promising a delectable treat that will impress you and your guests without turning on the oven.
Ingredients
Cheesecake Base:
- 16 ounces (454 grams) cream cheese, softened
- 1 cup (240 milliliters) heavy whipping cream
- 1 cup (120 grams) powdered sugar
Crust Ingredients:
- 1.5 cups (180 grams) graham cracker crumbs
- 0.5 cup (113 grams) unsalted butter, melted
- 0.25 cup (50 grams) granulated sugar
Flavor Enhancers and Optional Toppings:
- 1 teaspoon vanilla extract
- 2 teaspoons lemon juice
- Fresh berries (strawberries, blueberries, raspberries)
- Chocolate shavings or chips
- Caramel or chocolate sauce
- Whipped cream
Instructions
- Crush graham crackers into fine crumbs and combine with melted butter and sugar, creating a compact base mixture.
- Press the cracker mixture firmly into the bottom of a springform pan, ensuring an even and smooth surface.
- Chill the crust in the refrigerator for approximately 30 minutes to allow it to firm up and set.
- Using an electric mixer, whip cream cheese until it becomes smooth and creamy with no lumps.
- Incorporate powdered sugar and vanilla extract into the cream cheese, blending until the mixture is uniform and silky.
- Separately whip cream until it forms stiff, fluffy peaks that hold their shape.
- Delicately fold the whipped cream into the cream cheese mixture, maintaining the airiness and creating a light, decadent filling.
- Carefully spread the cheesecake filling across the chilled crust, ensuring an even distribution and smooth top.
- Refrigerate the cheesecake for a minimum of 4 hours, preferably overnight, to allow complete setting and flavor development.
- Prior to serving, garnish with fresh berries, chocolate shavings, or a drizzle of fruit compote for added visual appeal and taste.
Notes
- Ensure cream cheese is at room temperature to achieve a smooth, lump-free filling that blends perfectly.
- Use heavy whipping cream for the fluffiest texture and most stable whipped cream component.
- Crush graham crackers finely for a uniform, compact crust that holds together beautifully without crumbling.
- Allow cheesecake to set completely in the refrigerator for the most stable and sliceable dessert possible.
- Prep Time: 25 minutes
- Cook Time: 4 hours
- Category: Desserts
- Method: Chilling
- Cuisine: American
Nutrition
- Serving Size: 8
- Calories: 350 kcal
- Sugar: 26 g
- Sodium: 180 mg
- Fat: 27 g
- Saturated Fat: 16 g
- Unsaturated Fat: 10 g
- Trans Fat: 0.5 g
- Carbohydrates: 22 g
- Fiber: 1 g
- Protein: 5 g
- Cholesterol: 75 mg
Michael Reyes
Founder & Lead Recipe Developer
Expertise
Education
Santa Fe Community College
Michael’s love for cooking runs deep, rooted in the bold, colorful flavors of his New Mexico upbringing.
After earning his Culinary Arts Certificate from Santa Fe Community College, he spent years sharpening his skills in kitchens that celebrated traditional Southwestern and Latin American dishes.
He believes cooking should feel approachable and fun, never complicated. When he’s not stirring up new recipe ideas, Michael’s out hiking scenic trails, chatting with farmers at local markets, or chasing the perfect sunset shot for inspiration.