The Ultimate No-Bake Chocolate Peanut Butter Bars Recipe
Dessert enthusiasts can’t resist these creamy no-bake chocolate peanut butter bars that combine sweet indulgence with effortless preparation.
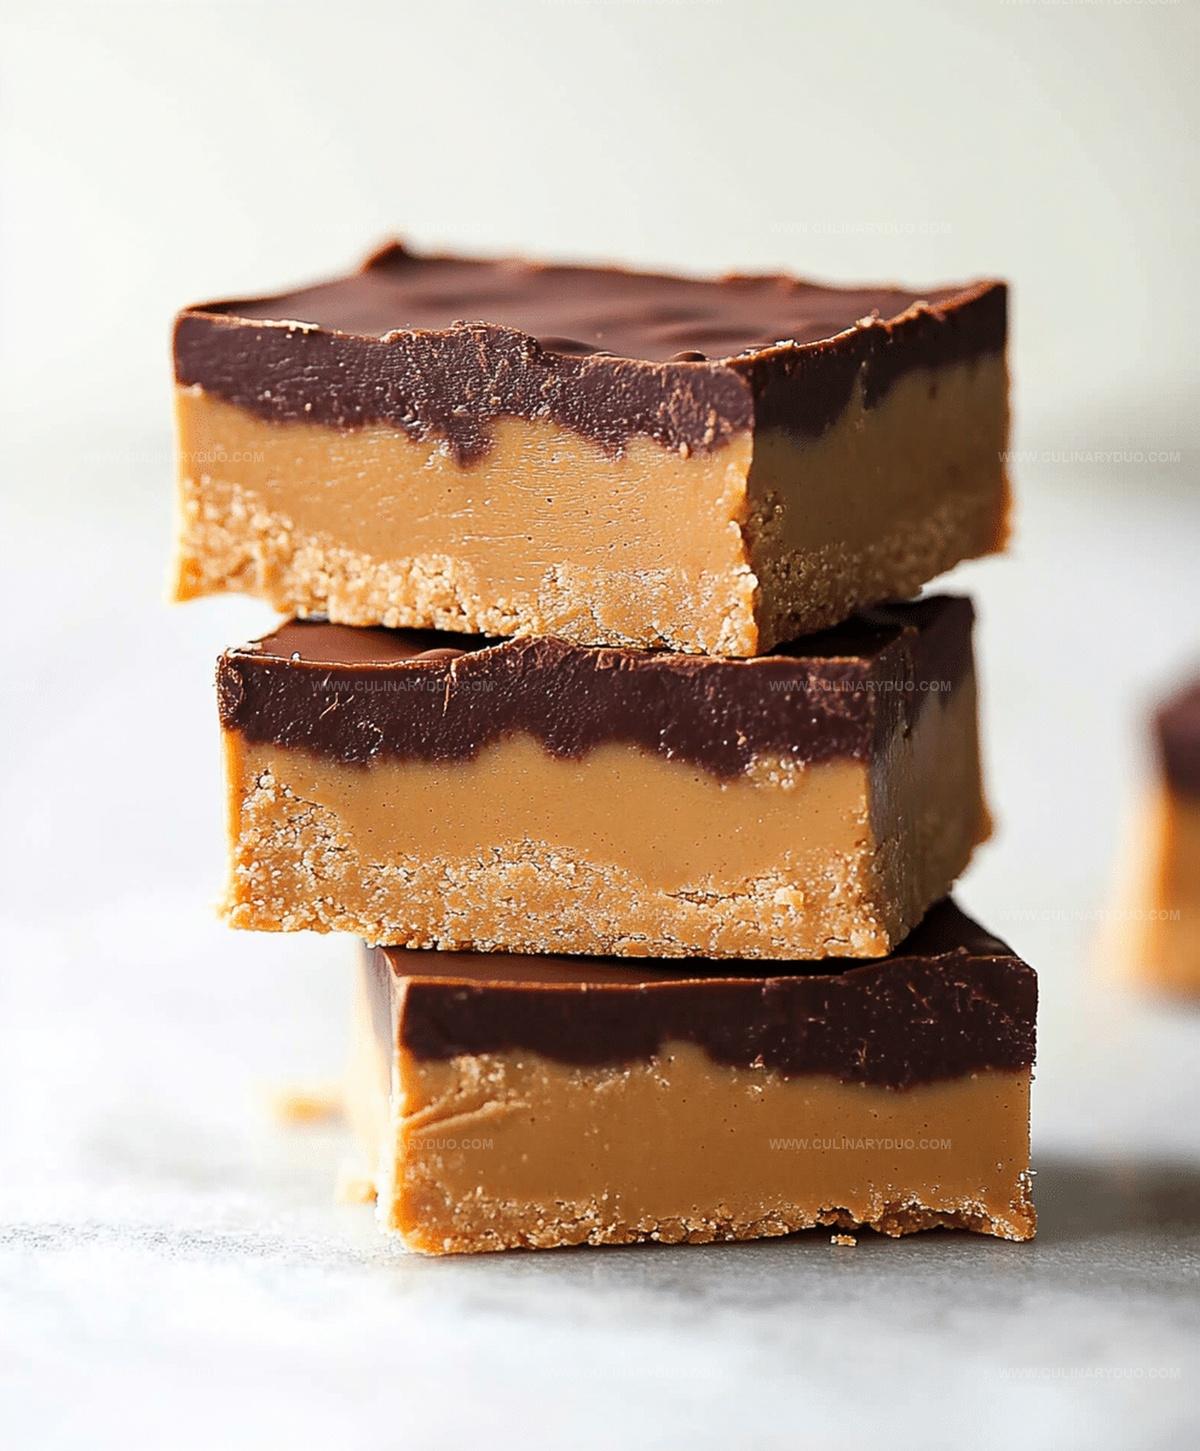
Rich chocolate and smooth peanut butter create a decadent symphony of flavors in every bite.
The recipe requires minimal kitchen skills and just a few simple ingredients.
Forget complicated baking techniques and complicated steps.
These bars offer the perfect balance of chocolate and peanut butter that melts in your mouth.
Quick to assemble and impossible to resist, they’re a guaranteed crowd-pleaser for any occasion.
Treat yourself to this delightful dessert that promises pure chocolate-peanut butter bliss.
No-Bake, All Flavor: Chocolate Peanut Butter Bars
Chocolate Peanut Butter Bar Ingredient Essentials
Base Ingredients:Dry Ingredients:Flavor Enhancers and Extras:How to Build No-Bake Bars with Ease
Step 1: Whip Up the Creamy Base
In a medium mixing bowl, blend peanut butter and honey together until you achieve a silky, smooth consistency.
The mixture should look glossy and well-combined.
Step 2: Incorporate Dry Ingredients
Gradually add the following ingredients to your peanut butter mixture:Stir everything thoroughly until all components are perfectly integrated and form a cohesive mixture.
Step 3: Sprinkle in Chocolate Goodness
Gently fold chocolate chips into the mixture, ensuring they are evenly distributed throughout the dough.
The chips will add delightful bursts of chocolatey flavor in every bite.
Step 4: Create the Perfect Bar Base
Transfer the mixture into a lined 8×8 inch pan.
Use a spatula or the back of a spoon to press and smooth the mixture evenly across the pan, creating a compact and uniform layer.
Step 5: Chill and Set
Place the pan in the refrigerator and let the bars set for at least one hour.
This cooling time allows the bars to firm up and develop a deliciously dense texture.
Step 6: Slice and Serve
After chilling, remove the pan from the refrigerator.
Cut the mixture into individual bars using a sharp knife.
Serve and enjoy your no-bake chocolate peanut butter treat!
Tips for No-Bake Bar Perfection
Fun Twists for Chocolate Peanut Butter Bars
Ways to Serve Peanut Butter Bars for Parties
Storing No-Bake Bars for Best Results
FAQs
They’re packed with nutritious ingredients like oats and peanut butter, offering a good balance of protein and complex carbohydrates. Perfect for a quick energy boost.
Absolutely! Almond butter or sunflower seed butter work great as substitutes if you have allergies or prefer different flavors.
No special tools required. Just a mixing bowl, spatula, and 8×8 inch pan are all you need to create these delicious no-bake treats.
Store them in an airtight container in the refrigerator for up to one week, making them a convenient make-ahead snack or dessert.
Print
No-Bake Chocolate Peanut Butter Bars Recipe
- Total Time: 15 minutes
- Yield: 16 1x
Description
Irresistible no-bake chocolate peanut butter bars blend creamy peanut butter with rich chocolate for a quick, indulgent dessert. Silky layers of sweet and salty goodness promise pure bliss that will leave you craving another delightful bite.
Ingredients
Chocolate Base:
- 1 cup graham cracker crumbs
- 1/2 cup unsalted butter, melted
Peanut Butter Layer:
- 1 cup creamy peanut butter
- 1 cup powdered sugar
Chocolate Topping:
- 1 cup semi-sweet chocolate chips
- 1 tablespoon coconut oil
Instructions
- Whisk peanut butter and honey in a mixing bowl until achieving a silky, uniform consistency.
- Incorporate oats, cocoa powder, and salt, stirring thoroughly to ensure all dry ingredients are evenly distributed.
- Gently fold chocolate chips into the mixture, allowing them to be dispersed throughout the blend.
- Transfer the prepared mixture into a parchment-lined 8×8 inch pan, using a spatula to spread and compact the contents evenly.
- Chill in the refrigerator for 60-90 minutes until the bars firm up and become solid.
- Remove from refrigerator and slice into uniform rectangles using a sharp knife.
- Store bars in an airtight container in the refrigerator for optimal texture and freshness.
Notes
- Customize sweetness by adjusting honey amount for personal taste preferences.
- Use gluten-free oats to make the recipe suitable for those with gluten sensitivities.
- Swap chocolate chips with dark chocolate for a richer, less sweet version.
- Try alternative nut butters like almond or cashew for unique flavor profiles.
- Prep Time: 15 minutes
- Cook Time: 0 minutes
- Category: Snacks, Desserts
- Method: Refrigerating
- Cuisine: American
Nutrition
- Serving Size: 16
- Calories: 229 kcal
- Sugar: 14 g
- Sodium: 54 mg
- Fat: 17 g
- Saturated Fat: 5 g
- Unsaturated Fat: 11 g
- Trans Fat: 0 g
- Carbohydrates: 18 g
- Fiber: 1 g
- Protein: 5 g
- Cholesterol: 13 mg
Michael Reyes
Founder & Lead Recipe Developer
Expertise
Education
Santa Fe Community College
Michael’s love for cooking runs deep, rooted in the bold, colorful flavors of his New Mexico upbringing.
After earning his Culinary Arts Certificate from Santa Fe Community College, he spent years sharpening his skills in kitchens that celebrated traditional Southwestern and Latin American dishes.
He believes cooking should feel approachable and fun, never complicated. When he’s not stirring up new recipe ideas, Michael’s out hiking scenic trails, chatting with farmers at local markets, or chasing the perfect sunset shot for inspiration.