The Irresistible Oreo Balls Recipe Everyone Will Love
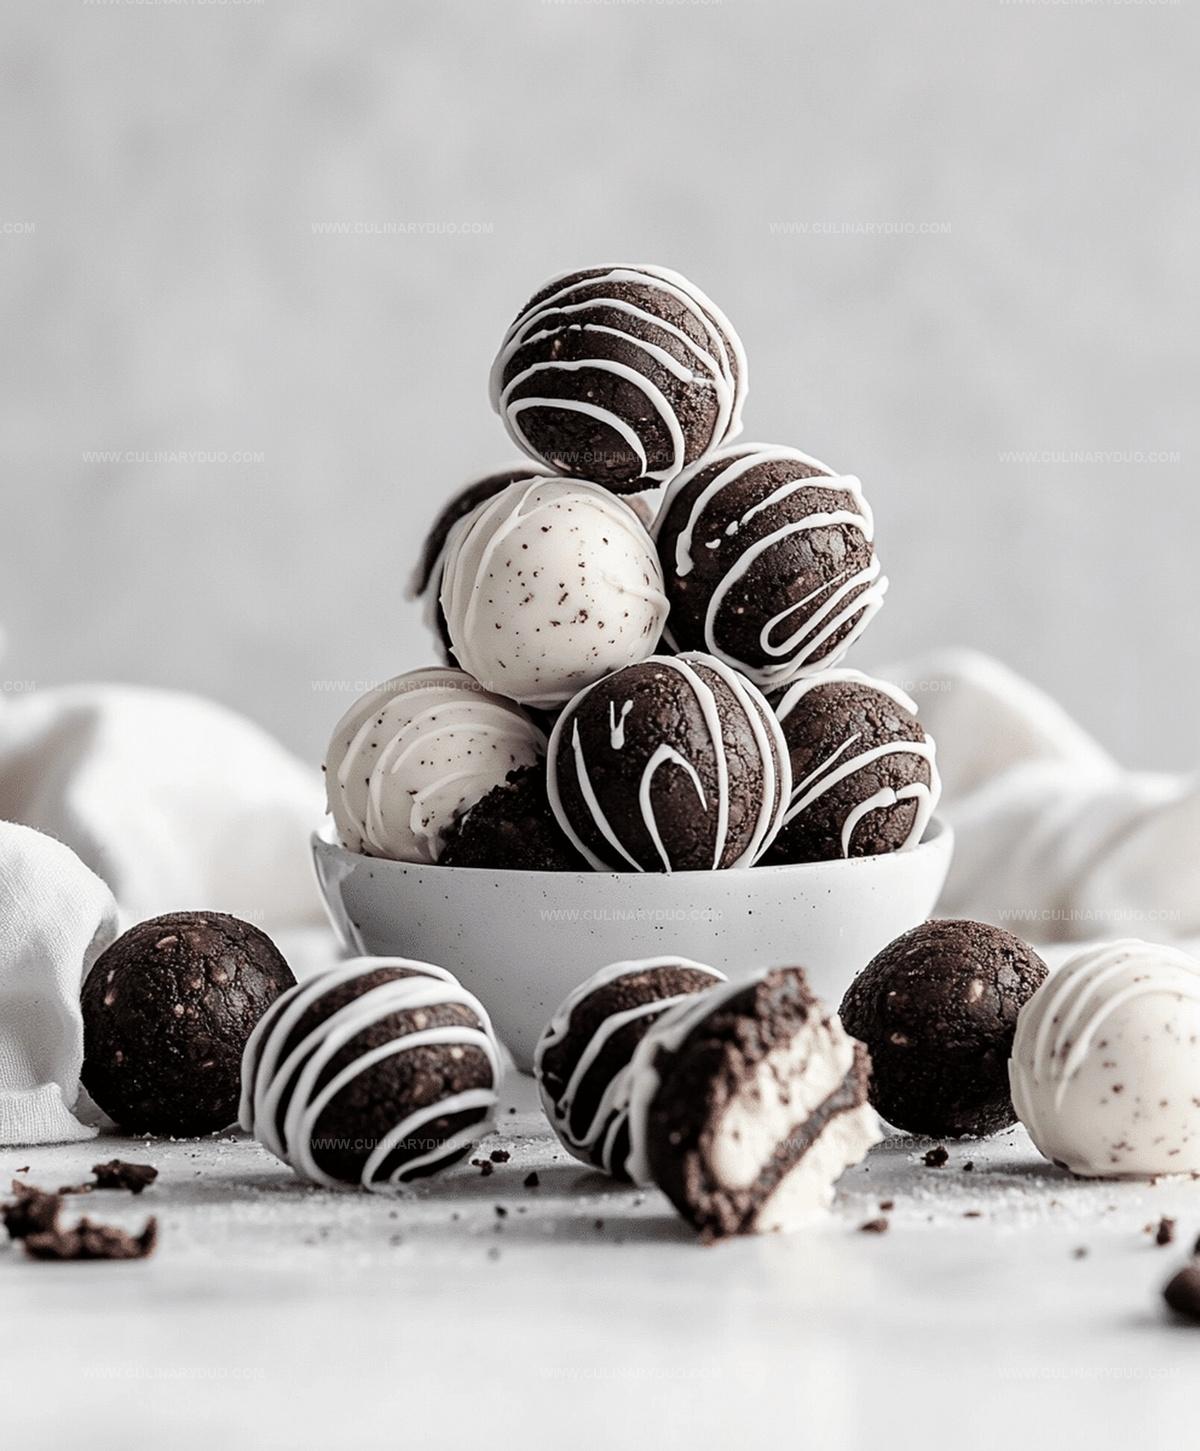
Decadent chocolate-coated oreo balls tantalize taste buds with their irresistible blend of creamy and crunchy textures.
Sweet treats like these oreo balls recipe bring pure joy to dessert lovers everywhere.
No baking required means anyone can whip up these delightful bites in minutes.
Crushing cookies and mixing with cream cheese creates a smooth, rich base that melts in your mouth.
Each bite delivers a perfect balance of chocolate and oreo goodness.
Rolled into bite-sized spheres and dunked in melted chocolate, these balls are a guaranteed crowd-pleaser.
You’ll become the dessert hero at any gathering with this simple yet impressive treat.
Oreo Balls You’ll Be Making All Year
Ingredients for Easy Oreo Balls
Main Ingredients:Chocolate Coating:Optional Decorative Ingredients:Simple Steps to No-Bake Oreo Balls
Step 1: Crush Oreo Cookies
Grab a food processor or place Oreo cookies in a sealed plastic bag.
Crush the cookies until they become fine, sandy crumbs.
If using a bag, use a rolling pin or heavy kitchen tool to break them down completely.
Step 2: Blend Creamy Mixture
In a large mixing bowl, combine the Oreo crumbs with softened cream cheese.
Mix thoroughly using a spatula or electric mixer until the mixture becomes smooth and holds together perfectly.
The consistency should be like a thick, moldable dough.
Step 3: Shape Delightful Balls
Use clean hands to roll the Oreo mixture into small, uniform balls.
Place each ball carefully on a parchment-lined baking sheet.
Aim for bite-sized spheres that are roughly the size of a whole walnut.
Step 4: Quick Chill Session
Transfer the baking sheet with Oreo balls to the freezer.
Let them firm up for about 15-20 minutes.
This cooling helps the balls maintain their shape during the chocolate coating process.
Step 5: Chocolate Dipping Adventure
Melt chocolate using a double boiler or microwave.
Remove the chilled Oreo balls from the freezer.
Using a fork or dipping tool, carefully lower each ball into the melted chocolate.
Gently tap to remove excess chocolate coating.
Step 6: Final Chocolate Set
Return the chocolate-covered Oreo balls to the parchment-lined baking sheet.
Allow them to set at room temperature or place in the refrigerator to speed up the chocolate hardening process.
Wait until the chocolate is completely firm before serving.
Tips for the Perfect Oreo Treats
Ways to Customize Oreo Balls
Serving Up Oreo Balls for Parties
Oreo Ball Storage
FAQs
No, they’re super easy! Even beginner bakers can make these with just three ingredients and simple steps.
Absolutely! You can use white, milk, or dark chocolate based on your preference. Just make sure to melt it smoothly.
When stored in an airtight container in the refrigerator, they’ll remain delicious for up to one week.
All you need is a food processor or a rolling pin to crush Oreos, and a baking sheet. Basic kitchen tools work perfectly fine.
Print
Oreo Balls Recipe
- Total Time: 40 minutes
- Yield: 36 1x
Description
Indulgent Oreo Balls bring creamy chocolate and cookie bliss into one irresistible bite-sized treat. Rich chocolate coating and crushed Oreo centers create a perfect dessert that melts in your mouth with pure deliciousness, ensuring pure delight for chocolate enthusiasts.
Ingredients
Main Ingredients:
- 36 Oreo cookies, finely crushed
- 8 ounces (226 grams) cream cheese, softened
Coating Ingredients:
- 12 ounces (340 grams) chocolate (milk, dark, or white), melted
Instructions
- Pulverize Oreo cookies into ultrafine powder using a food processor, ensuring no large chunks remain.
- Incorporate softened cream cheese with cookie crumbs, blending thoroughly until a uniform mixture forms with consistent texture.
- Craft uniform spherical shapes approximately one inch in diameter, delicately positioning each orb onto a parchment-lined baking tray.
- Transfer tray to freezer for 15-20 minutes, allowing treats to solidify and maintain structural integrity.
- Gently immerse each chilled sphere into melted chocolate, allowing excess coating to cascade back into chocolate vessel.
- Return chocolate-enrobed delicacies to parchment-lined surface, permitting chocolate shell to solidify at room temperature or briefly in refrigerator.
- Once chocolate completely sets and hardens, transfer truffles to serving platter or storage container for enjoying chilled.
Notes
- Use a food processor for ultra-fine, consistent Oreo crumbs that blend seamlessly with cream cheese.
- Ensure cream cheese is room temperature to create a smooth, lump-free mixture that binds perfectly.
- Chill balls before dipping to prevent crumbling and help chocolate coating adhere smoothly.
- Try different chocolate coatings like white, dark, or milk chocolate for varied flavor profiles and visual appeal.
- Prep Time: 20 minutes
- Cook Time: 20 minutes
- Category: Snacks, Desserts
- Method: Freezing
- Cuisine: American
Nutrition
- Serving Size: 36
- Calories: 110
- Sugar: 9 g
- Sodium: 55 mg
- Fat: 7 g
- Saturated Fat: 4 g
- Unsaturated Fat: 3 g
- Trans Fat: 0.1 g
- Carbohydrates: 13 g
- Fiber: 0.5 g
- Protein: 1 g
- Cholesterol: 10 mg
Michael Reyes
Founder & Lead Recipe Developer
Expertise
Education
Santa Fe Community College
Michael’s love for cooking runs deep, rooted in the bold, colorful flavors of his New Mexico upbringing.
After earning his Culinary Arts Certificate from Santa Fe Community College, he spent years sharpening his skills in kitchens that celebrated traditional Southwestern and Latin American dishes.
He believes cooking should feel approachable and fun, never complicated. When he’s not stirring up new recipe ideas, Michael’s out hiking scenic trails, chatting with farmers at local markets, or chasing the perfect sunset shot for inspiration.