Cozy Pumpkin Pie Crisp Recipe: Autumn’s Golden Dessert Magic
Autumn’s golden embrace brings a delightful pumpkin pie crisp recipe that promises pure comfort and warmth.
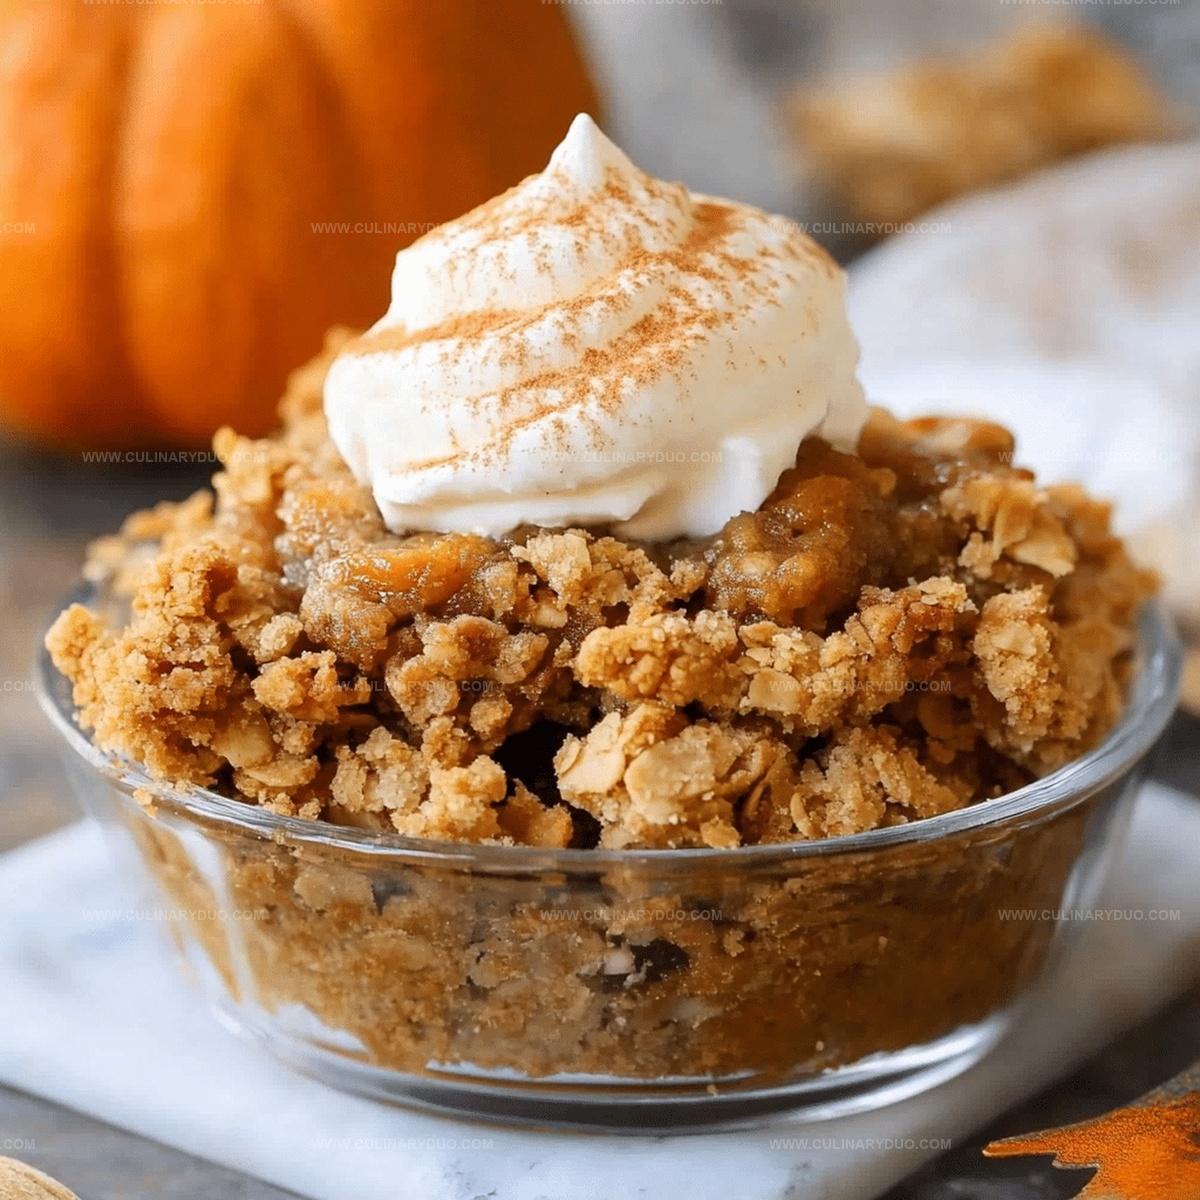
Layers of sweet, spiced pumpkin mingle with a crunchy, buttery topping that melts in your mouth.
This dessert captures the essence of cozy fall evenings with its rich, velvety texture and irresistible aroma.
Crisp seasonal ingredients blend perfectly to create a dessert that feels like a warm hug on a chilly day.
The contrast between the silky pumpkin filling and the crackling topping makes every bite a delectable experience.
Each serving tells a story of harvest traditions and culinary magic.
Every Bite of Pumpkin Pie Crisp Counts
Ingredient Essentials for Pumpkin Pie Crisp
Pie Base:Spice Blend:Crisp Topping:Step-by-Step Guide for Pumpkin Crisp Success
Step 1: Warm Up the Oven
Set your oven to a cozy 350°F and get ready for some baking magic.
Step 2: Create Pumpkin Filling Magic
In a large mixing bowl, whisk together:Blend until the mixture becomes silky smooth and beautifully combined.
Step 3: Prepare the Baking Dish
Generously grease a baking dish and pour the velvety pumpkin mixture inside, spreading it evenly.
Step 4: Craft the Crispy Topping
In a separate bowl, mix together:Stir until the ingredients form a delightful crumbly texture.
Step 5: Layer the Crisp Topping
Sprinkle the oat mixture generously over the pumpkin filling, creating a delectable golden blanket.
Step 6: Bake to Perfection
Slide the dish into the preheated oven and bake for 45-50 minutes.
You’ll know it’s ready when the topping turns a gorgeous golden brown and the filling sets beautifully.
Step 7: Cool and Serve
Let the pumpkin pie crisp cool slightly, allowing the flavors to mingle and intensify before serving.
Tips to Perfect Pumpkin Pie Crisp Texture
Fresh Takes for Pumpkin Pie Crisp Fans
How to Serve Pumpkin Pie Crisp with Style
Storing Pumpkin Pie Crisp After Baking
FAQs
Yes, you can! Roast and puree fresh pumpkin, ensuring it’s well-drained to prevent excess moisture in the dessert.
Not as written. To make it gluten-free, substitute the all-purpose flour with a gluten-free flour blend or almond flour.
The topping should be golden brown, and the center should be set with minimal jiggling when gently shaken.
Absolutely! Prepare the crisp up to a day in advance and refrigerate. Reheat in the oven before serving to restore the crispy topping.
Print
Pumpkin Pie Crisp Recipe
- Total Time: 1 hour 10 minutes
- Yield: 8 1x
Description
Delightful Pumpkin Pie Crisp brings classic autumn comfort straight from grandmother’s kitchen, blending creamy pumpkin custard with a crunchy pecan streusel topping. Warm spices and buttery layers invite sweet memories, promising pure seasonal happiness with each delectable bite.
Ingredients
Pumpkin Pie Filling:
- 1 (15 ounces / 425 grams) can pumpkin puree
- 2 large eggs
- 1 cup (240 milliliters) evaporated milk
- 3/4 cup (150 grams) granulated sugar
- 1/2 cup (100 grams) brown sugar
- 1 teaspoon ground cinnamon
- 1/2 teaspoon ground ginger
- 1/4 teaspoon ground cloves
- 1/4 teaspoon ground nutmeg
- 1/4 teaspoon salt
- 1 teaspoon vanilla extract
Crisp Topping:
- 1/2 cup (60 grams) all-purpose flour
- 1/2 cup (50 grams) old-fashioned oats
- 1/2 cup (100 grams) brown sugar
- 1/2 cup (113 grams) unsalted butter, melted
- 1/2 cup (60 grams) chopped pecans
- 1/2 teaspoon ground cinnamon
- 1/4 teaspoon ground nutmeg
- 1/4 teaspoon ground ginger
- 1/4 teaspoon salt
Instructions
- Prepare your oven by heating to 350°F, ensuring a perfectly calibrated cooking environment for the dessert.
- Create a silky-smooth pumpkin base by thoroughly whisking together pumpkin puree with spices, sugar, eggs, and evaporated milk until completely integrated and free of lumps.
- Transfer the luxurious pumpkin mixture into a generously greased baking dish, spreading it evenly across the surface.
- Craft the crisp topping by blending oats, brown sugar, flour, and melted butter into a crumbly, textured mixture that will provide a delightful crunchy contrast.
- Distribute the oat topping uniformly across the pumpkin filling, ensuring complete and consistent coverage.
- Place the prepared dish into the preheated oven and bake for 45-50 minutes, watching for a golden-brown topping and a firm, set filling that signals perfect doneness.
- Allow the dessert to rest and slightly cool for 10-15 minutes, which helps the filling stabilize and makes serving easier.
Notes
- Swap evaporated milk with coconut milk for a dairy-free version that maintains creamy texture and adds subtle tropical flavor.
- Toast oats before mixing crisp topping to enhance nutty undertones and create deeper, more complex taste profile.
- Reduce sugar content by using half regular sugar and half monk fruit sweetener for lower-calorie alternative without compromising deliciousness.
- Garnish with whipped coconut cream instead of traditional whipped cream to make dessert completely dairy-free and more diet-friendly.
- Prep Time: 20 minutes
- Cook Time: 50 minutes
- Category: Desserts
- Method: Baking
- Cuisine: American
Nutrition
- Serving Size: 8
- Calories: 235 kcal
- Sugar: 21 g
- Sodium: 165 mg
- Fat: 12 g
- Saturated Fat: 5 g
- Unsaturated Fat: 6 g
- Trans Fat: 0.2 g
- Carbohydrates: 32 g
- Fiber: 3 g
- Protein: 4 g
- Cholesterol: 55 mg
Michael Reyes
Founder & Lead Recipe Developer
Expertise
Education
Santa Fe Community College
Michael’s love for cooking runs deep, rooted in the bold, colorful flavors of his New Mexico upbringing.
After earning his Culinary Arts Certificate from Santa Fe Community College, he spent years sharpening his skills in kitchens that celebrated traditional Southwestern and Latin American dishes.
He believes cooking should feel approachable and fun, never complicated. When he’s not stirring up new recipe ideas, Michael’s out hiking scenic trails, chatting with farmers at local markets, or chasing the perfect sunset shot for inspiration.