
Dreamy Pumpkin Pie With Sweetened Condensed Milk Recipe
Warm spices and creamy pumpkin pie with sweetened condensed milk fill your kitchen with autumn’s most comforting aromas.
This classic dessert promises a delightful blend of rich flavors and smooth textures.
Each slice tells a story of tradition and comfort, connecting generations through a beloved recipe.
The secret ingredient – sweetened condensed milk – creates an incredibly silky filling that melts in your mouth.
Bakers from coast to coast cherish this simple yet extraordinary pie that transforms basic ingredients into a spectacular dessert.
Crisp pastry and velvety pumpkin custard come together in perfect harmony, making every bite a celebration of seasonal goodness.
Pumpkin Pie Made Silky with Condensed Milk
Must-Have Ingredients for Creamy Pumpkin Pie
Pie Base:Pumpkin Filling:Spices and Seasonings:Baking Pumpkin Pie in Easy Steps
Step 1: Warm Up the Oven
Fire up your oven to a toasty 425°F and get ready for some baking magic.
Position the rack in the center of the oven for perfect heat distribution.
Step 2: Create Silky Pumpkin Filling
Grab a spacious mixing bowl and whisk together these delightful ingredients:Blend everything until the mixture looks velvety and well-combined, with no lumpy surprises.
Step 3: Prepare the Pie Crust
Gently pour your luscious pumpkin mixture into a ready-made pie crust.
Spread it evenly to ensure a gorgeous, consistent filling.
Step 4: Bake to Perfection
Slide the pie into the preheated oven.
Start with 15 minutes at the high temperature, then lower the heat to 350°F.
Continue baking for another 35-40 minutes.
You’ll know it’s done when a knife inserted near the center comes out clean and the filling looks set.
Step 5: Let It Rest and Serve
Allow the pie to cool completely on a wire rack.
This helps the filling settle and makes slicing a breeze.
Serve at room temperature or slightly chilled for a heavenly dessert experience.
Pro Tips for the Best Pumpkin Pie Texture
Pumpkin Pie Twists to Try This Year
Serving Pumpkin Pie to Family and Friends
Storing Pumpkin Pie for Enjoyment Later
FAQs
Yes, you can! Simply roast and puree fresh pumpkin until smooth. Just ensure it’s well-drained to prevent excess moisture in the pie.
Sweetened condensed milk provides rich, creamy sweetness and helps create the signature smooth texture. Substituting might change the pie’s consistency and flavor profile.
Pre-bake the crust for 10 minutes before adding the filling, and place a pie shield or aluminum foil edges to prevent over-browning while ensuring a crisp bottom crust.
Print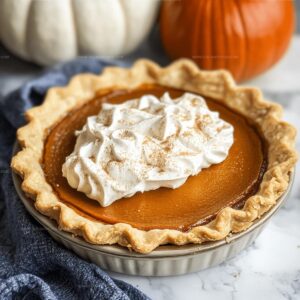
Pumpkin Pie With Sweetened Condensed Milk Recipe
- Total Time: 1 hour 10 minutes
- Yield: 8 1x
Description
Creamy pumpkin pie showcases autumn’s warmth with rich condensed milk and classic spices. Homemade comfort arrives on your plate, promising delightful memories of family gatherings and seasonal celebrations.
Ingredients
Pie Crust Ingredients:
- 1.25 cups all-purpose flour
- 0.5 teaspoons salt
- 0.5 cups (1 stick) unsalted butter
- 2 to 4 tablespoons ice water
Pumpkin Pie Filling Ingredients:
- 15 ounces (425 grams) pumpkin puree
- 14 ounces (397 grams) sweetened condensed milk
- 2 large eggs
- 1 teaspoon ground cinnamon
- 0.5 teaspoons ground ginger
- 0.25 teaspoons ground nutmeg
- 0.25 teaspoons ground cloves
- 0.5 teaspoons salt
Instructions
- Heat the oven to a scorching 425°F, preparing the stage for a delectable autumn dessert.
- Whisk together the velvety pumpkin puree, creamy sweetened condensed milk, and farm-fresh eggs until smooth and well-integrated.
- Incorporate the warm, aromatic spices of cinnamon, ginger, and nutmeg, along with a subtle hint of salt, blending thoroughly to create a harmonious filling.
- Carefully transfer the silky mixture into a prepared pie crust, ensuring an even distribution.
- Place the pie in the preheated oven and roast at 425°F for a precise 15 minutes to set the initial structure.
- Reduce the oven temperature to a gentle 350°F and continue baking for 35-40 minutes, watching for a subtle jiggle in the center that indicates perfect doneness.
- Verify the pie’s readiness by inserting a knife near the center – it should emerge clean and pristine.
- Allow the pie to cool completely, letting the filling set and flavors meld, creating a luscious, creamy texture.
- Serve at room temperature, optionally crowned with a dollop of whipped cream for an extra touch of indulgence.
Notes
- Chill the pie crust before filling to prevent soggy bottoms and maintain a crisp texture.
- Use fresh ground spices for a more vibrant and aromatic pumpkin pie flavor that elevates the entire dessert.
- Substitute coconut milk for a dairy-free version that keeps the creamy consistency and rich taste.
- Cover pie edges with aluminum foil if browning too quickly during baking to ensure even, golden-brown crust without burning.
- Prep Time: 15 minutes
- Cook Time: 55 minutes
- Category: Desserts
- Method: Baking
- Cuisine: American
Nutrition
- Serving Size: 8
- Calories: 270 kcal
- Sugar: 20 g
- Sodium: 180 mg
- Fat: 14 g
- Saturated Fat: 8 g
- Unsaturated Fat: 6 g
- Trans Fat: 0.3 g
- Carbohydrates: 30 g
- Fiber: 2 g
- Protein: 5 g
- Cholesterol: 70 mg
Michael Reyes
Founder & Lead Recipe Developer
Expertise
Education
Santa Fe Community College
Michael’s love for cooking runs deep, rooted in the bold, colorful flavors of his New Mexico upbringing.
After earning his Culinary Arts Certificate from Santa Fe Community College, he spent years sharpening his skills in kitchens that celebrated traditional Southwestern and Latin American dishes.
He believes cooking should feel approachable and fun, never complicated. When he’s not stirring up new recipe ideas, Michael’s out hiking scenic trails, chatting with farmers at local markets, or chasing the perfect sunset shot for inspiration.