Homemade Red Velvet Cheesecake Swirl Brownies Recipe: Sweet Bliss
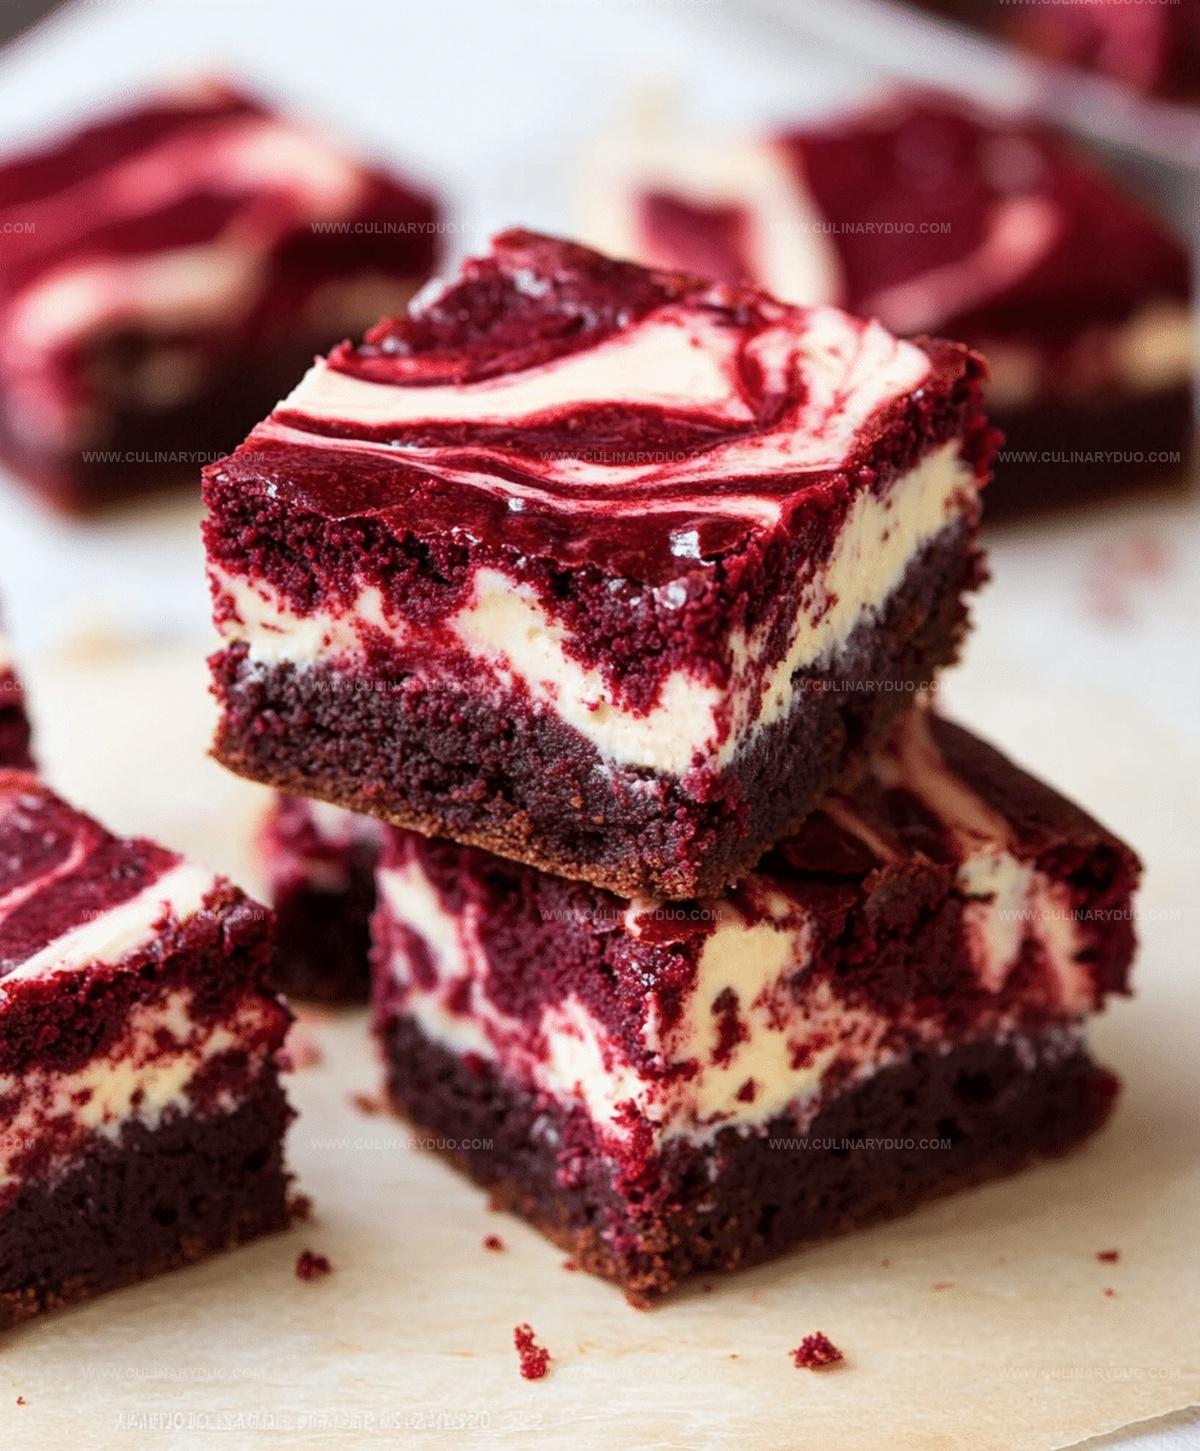
Sweet chocolate meets creamy cheesecake in these decadent red velvet cheesecake swirl brownies that dance between rich dessert textures.
These brownies blend classic Southern charm with luxurious bakery-style indulgence.
Deeply chocolatey and vibrantly colored, they create a stunning dessert centerpiece.
Each slice reveals a mesmerizing marbled pattern of red velvet and cream cheese.
The combination delivers an irresistible contrast of smooth, tangy cheesecake against dense, fudgy brownie base.
Elegant yet simple, these brownies promise to impress even the most discerning dessert lovers.
Red Velvet Swirls and Brownie Magic Collide
Ingredients for Red Velvet Cheesecake Brownies
Cake Base:Dry Ingredients:Cheesecake Swirl:Baking Red Velvet Cheesecake Brownies at Home
Step 1: Prepare Baking Environment
Warm up the oven to 350°F.
Grab an 8×8-inch baking pan and give it a light coating of grease.
Line the pan with parchment paper to ensure easy removal later.
Step 2: Create Red Velvet Brownie Base
In a spacious mixing bowl, combine:Whisk everything together until the mixture looks smooth and gorgeous.
Gently fold in flour and salt, mixing just until everything is incorporated.
Step 3: Spread Brownie Batter
Pour the vibrant red velvet batter into the prepared pan.
Use a spatula to spread it evenly, creating a perfect canvas for the cheesecake swirl.
Step 4: Whip Up Cheesecake Layer
In a separate bowl, blend:Beat the ingredients until the mixture becomes silky and luxurious.
Step 5: Create Delicious Swirl Pattern
Dollop spoonfuls of the creamy cheesecake mixture on top of the red velvet base.
Take a knife or toothpick and create beautiful swirling patterns, mixing the two layers together.
Step 6: Bake to Perfection
Slide the pan into the preheated oven.
Bake for 25-30 minutes.
The brownies are ready when a toothpick inserted in the center comes out with a few moist crumbs.
Step 7: Cool and Slice
Allow the brownies to cool completely in the pan.
Once cooled, cut into delectable squares and enjoy your stunning red velvet cheesecake swirl brownies.
Tricks for Swirled Brownies with a Cheesecake Kick
Brownie Variations for Every Occasion
Serving Suggestions for Red Velvet Cheesecake Brownies
Storage Advice for Brownies and Swirls
FAQs
The vibrant red color comes from adding red food coloring to the brownie batter, which creates the signature red velvet look.
Yes, you can omit the food coloring, but the brownies will lose their classic red velvet appearance and look more like chocolate brownies.
Vinegar helps activate the cocoa powder and creates a subtle tanginess that’s characteristic of traditional red velvet desserts.
Drop spoonfuls of cheesecake mixture on top of the brownie batter, then use a knife or toothpick to gently create swirling patterns without over-mixing.
Print
Red Velvet Cheesecake Swirl Brownies Recipe
- Total Time: 50 minutes
- Yield: 9 1x
Description
Indulgent red velvet cheesecake swirl brownies blend rich chocolate with tangy cream cheese in a mesmerizing dessert. Rich layers of crimson batter and silky cheesecake create a luxurious treat perfect for satisfying chocolate cravings and impressing guests.
Ingredients
Dry Ingredients:
- 1 cup all-purpose flour
- 1/4 cup unsweetened cocoa powder
- 1/2 teaspoon salt
- 1 cup granulated sugar
Wet Ingredients:
- 1/2 cup unsalted butter, melted
- 2 large eggs
- 2 teaspoons vanilla extract
- 1 tablespoon red food coloring
- 1 teaspoon white vinegar
Cheesecake Layer:
- 8 ounces (226 grams) cream cheese, softened
- 1/4 cup granulated sugar
- 1 large egg yolk
- 1 teaspoon vanilla extract
Instructions
- Warm the oven to 350°F and prepare an 8×8-inch baking pan by greasing and lining with parchment paper.
- Create the red velvet brownie base by whisking melted butter with sugar, eggs, cocoa powder, vibrant red food coloring, vanilla extract, and vinegar until the mixture becomes uniformly smooth and glossy.
- Gently fold flour and salt into the liquid mixture, stirring minimally to avoid overworking the batter, which ensures tender brownies.
- Transfer the crimson batter into the prepared pan, carefully spreading it into an even layer using a spatula.
- Craft the creamy cheesecake topping by blending softened cream cheese with sugar, egg, and vanilla extract until achieving a silky, lump-free consistency.
- Dollop generous spoonfuls of the cheesecake mixture across the red velvet base, creating a playful pattern.
- Using a knife or toothpick, weave delicate swirls through the two layers, creating an artistic marbled effect.
- Slide the pan into the preheated oven and bake for 25-30 minutes, watching for a set center and moist crumbs when tested.
- Remove from oven and allow the brownies to cool completely within the pan to ensure clean, precise cutting lines.
- Once cooled, slice into square portions and serve.
Notes
- Prevent color bleeding by using gel food coloring, which provides intense color without excess liquid.
- Achieve perfect swirls by using a clean toothpick and making gentle figure-eight movements across the batter surface.
- Chill brownies for at least an hour before cutting to get clean, precise squares and allow flavors to meld together.
- For gluten-free version, substitute all-purpose flour with almond or gluten-free flour blend, ensuring same measurement proportions.
- Prep Time: 20 minutes
- Cook Time: 30 minutes
- Category: Desserts, Snacks
- Method: Baking
- Cuisine: American
Nutrition
- Serving Size: 9
- Calories: 285 kcal
- Sugar: 23 g
- Sodium: 150 mg
- Fat: 18 g
- Saturated Fat: 10 g
- Unsaturated Fat: 7 g
- Trans Fat: 0.3 g
- Carbohydrates: 27 g
- Fiber: 2 g
- Protein: 5 g
- Cholesterol: 75 mg
Michael Reyes
Founder & Lead Recipe Developer
Expertise
Education
Santa Fe Community College
Michael’s love for cooking runs deep, rooted in the bold, colorful flavors of his New Mexico upbringing.
After earning his Culinary Arts Certificate from Santa Fe Community College, he spent years sharpening his skills in kitchens that celebrated traditional Southwestern and Latin American dishes.
He believes cooking should feel approachable and fun, never complicated. When he’s not stirring up new recipe ideas, Michael’s out hiking scenic trails, chatting with farmers at local markets, or chasing the perfect sunset shot for inspiration.