The Ultimate Garlic Parmesan Cheeseburger Bombs Recipe You’ll Love
Crafting a mouthwatering garlic parmesan cheeseburger bombs recipe brings pure culinary excitement to your kitchen adventure.
Cheese and ground beef create magic when combined with unexpected ingredients.
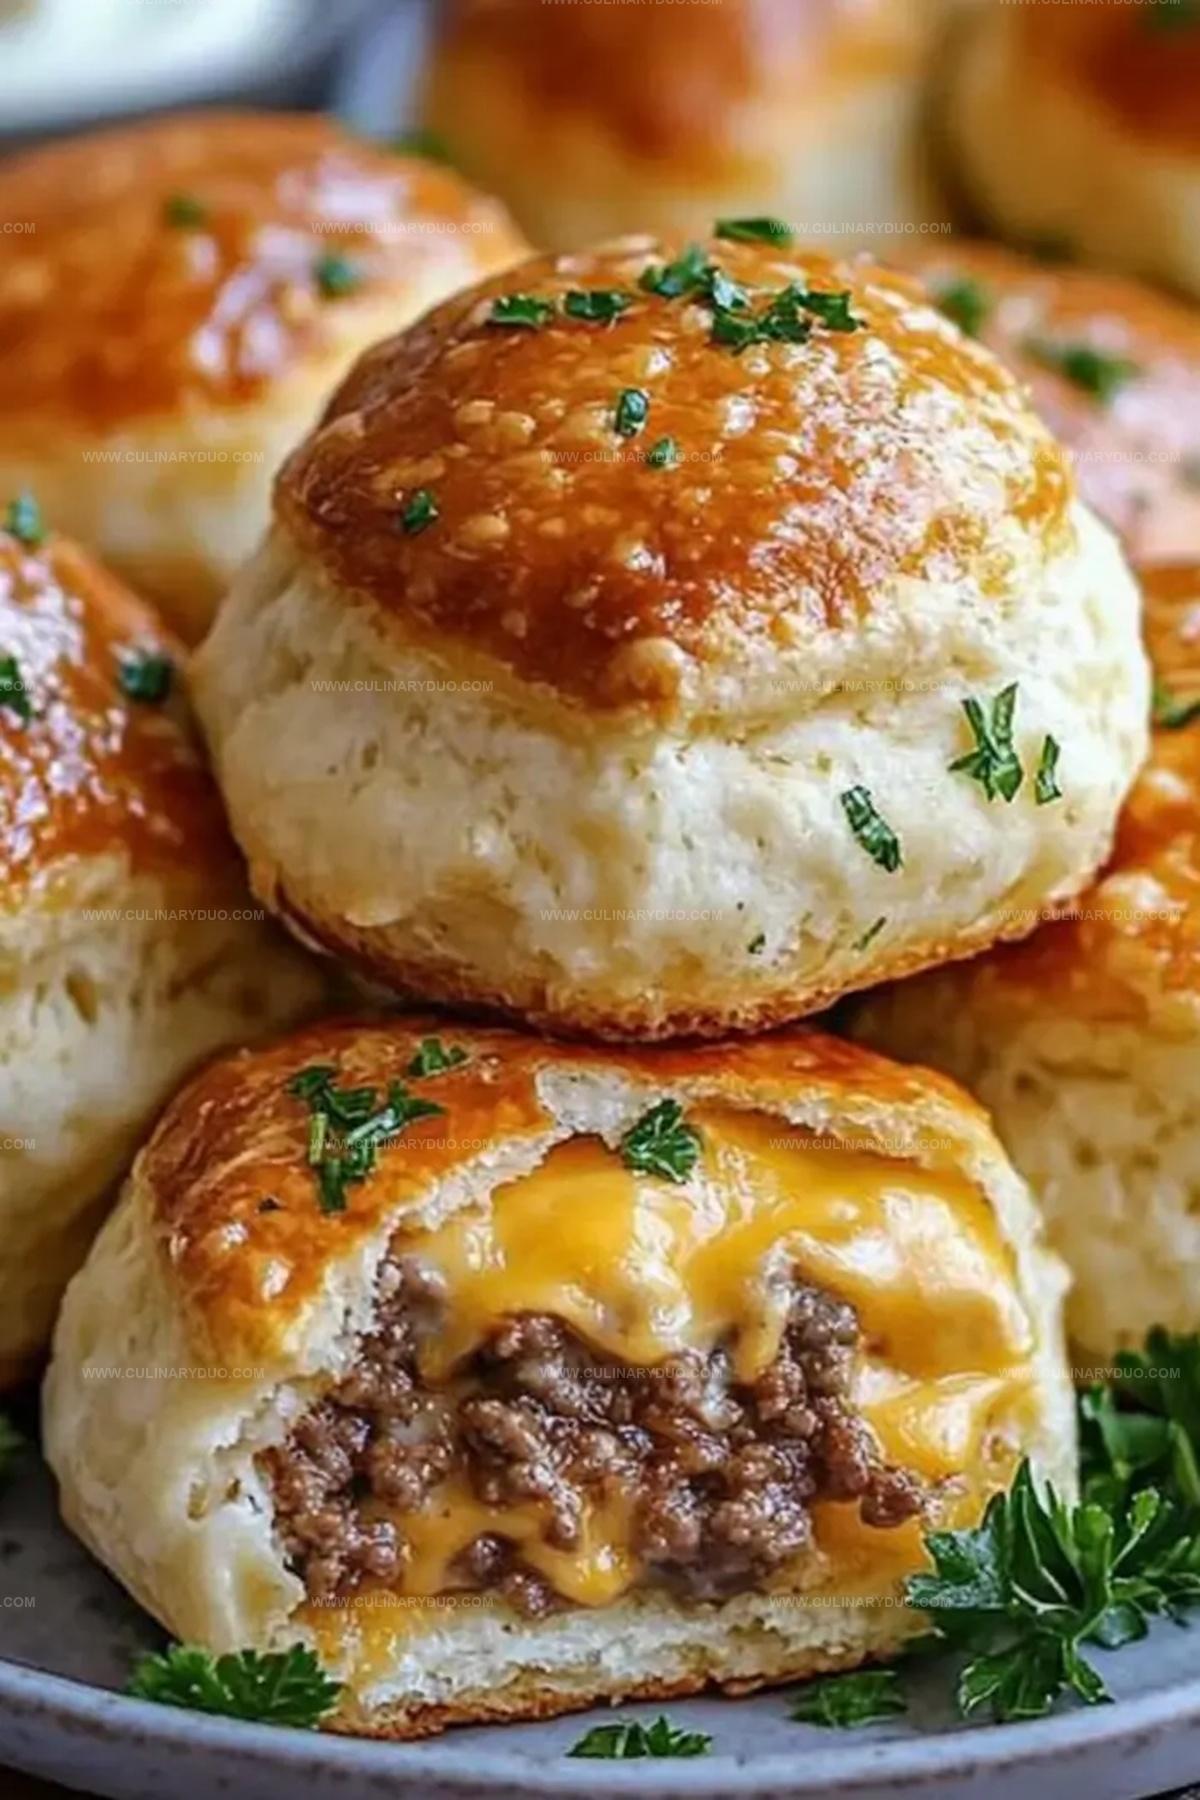
Soft dough wraps around melted centers, promising incredible flavor explosions with each bite.
Savory aromas will drift through your home, tempting everyone nearby.
Kitchen experiments rarely turn out this deliciously satisfying.
Homemade comfort food reaches new heights with these delectable parcels.
Prepare to impress and indulge in a simple yet spectacular meal that guarantees smiles around the table.
Cheeseburger Bombs That Ooze Garlic, Parmesan, and Beefy Goodness
Pineapple Upside Sugar Cookies Must-Haves
Main Ingredients:
Ground Beef: A classic protein base for the filling.
Biscuit Dough: Soft, fluffy wrapper for the savory stuffing.
Cream Cheese: Creamy element that adds richness to the filling.
Cheddar Cheese: Sharp cheese that melts beautifully in the mixture.
Seasoning Blend:Topping Ingredients:Steps to Prepare Garlic Parmesan Cheeseburger Bombs
Step 1: Fire Up The Oven
Crank the oven to 375°F and line a baking sheet with parchment paper for perfect cooking preparation.
Step 2: Brown The Beef
Sizzle ground beef in a skillet over medium heat until completely cooked. Drain away any extra grease to keep the mixture clean and tasty.
Step 3: Flavor The Meat Mixture
Sprinkle in seasonings to elevate the beef:Fold in creamy ingredients:Stir everything until wonderfully combined, then remove from heat.
Step 4: Prepare Dough Wrappers
Pop open the biscuit dough can and separate each biscuit. Gently flatten each round into a soft circle using your fingers or a rolling pin.
Step 5: Create Delicious Bombs
Place a generous spoonful of cheesy beef mixture right in the center of each biscuit circle. Carefully fold the dough over the filling, pinching edges tightly to create a perfect sealed pocket.
Step 6: Add Cheesy Butter Coating
Whisk together:Brush the tops of each bomb generously with this mouthwatering mixture.
Step 7: Bake To Golden Perfection
Arrange bombs on the prepared baking sheet. Slide into the oven and bake for 12-15 minutes until they turn a beautiful golden brown color.
Step 8: Serve And Enjoy
Allow bombs to cool slightly. Sprinkle with fresh chopped parsley for a burst of color and fresh flavor. Serve hot and watch everyone dive in!
Cheeseburger Bomb Tips That Max Out Garlic Parmesan Flavor
Wrap Cheeseburger Bombs to Keep Them Gooey
Peppermint Shortbread Cookies Serving Ideas
Pineapple Upside Cookie Tropical Combos
FAQs
Yes, these bombs are perfect for kids! They’re handheld, cheesy, and packed with familiar flavors that children love. The soft biscuit dough and savory beef filling make them an easy meal that kids will enjoy.
Absolutely! You can prepare the bombs up to the point of brushing with Parmesan butter and then refrigerate them for a few hours before baking. This makes them great for meal prep or entertaining.
Canned refrigerated biscuit dough works perfectly. Use a standard tube of ready-to-bake biscuits that are typically 8-10 count. These provide the right texture and are easy to work with for creating the bombs.
Ensure you pinch the edges of the biscuit dough tightly and completely seal the filling inside. Press and crimp the edges firmly to create a complete seal before brushing with Parmesan butter and baking.
Print
Garlic Parmesan Cheeseburger Bombs Recipe
- Total Time: 40 minutes
- Yield: 4 1x
Description
Garlic parmesan cheeseburger bombs explode with flavor in this mouthwatering culinary creation. Melted cheese, juicy beef, and crispy golden breading combine for an irresistible appetizer that delights your taste buds and satisfies hearty cravings.
Ingredients
Main Ingredients:
- 1 pound (454 grams) ground beef
- 1 cup (240 milliliters) shredded cheddar cheese
- 1/2 cup (120 grams) cream cheese, softened
- 1 can (16 ounces/454 grams) refrigerated biscuit dough
Seasonings:
- 1 teaspoon garlic powder
- 1 teaspoon onion powder
- Salt and pepper, to taste
Topping and Garnish:
- 1/4 cup (25 grams) grated Parmesan cheese
- 2 tablespoons butter, melted
- Fresh parsley, chopped (for garnish)
Instructions
- Warm the oven to 375°F and prepare a baking sheet with parchment paper for optimal cooking surface.
- Sizzle ground beef in a skillet over medium heat, ensuring complete browning and thoroughly draining excess fat.
- Enhance the meat with aromatic seasonings – garlic powder, onion powder, salt, and pepper. Incorporate cream cheese and cheddar until everything melds seamlessly, then remove from heat.
- Carefully separate individual biscuit rounds from the container and gently flatten each into uniform circular shapes.
- Position a generous spoonful of the savory beef and cheese mixture directly in the center of each biscuit round.
- Delicately fold the dough edges over the filling, meticulously sealing the perimeter to prevent any leakage during baking.
- Craft a luxurious topping by whisking melted butter with finely grated Parmesan cheese for a rich, golden glaze.
- Generously brush the Parmesan butter mixture across the surface of each prepared bomb.
- Arrange the assembled bombs on the parchment-lined sheet, maintaining slight separation between each.
- Bake for 12-15 minutes, watching for a stunning golden-brown transformation.
- Allow the bombs to rest momentarily after removing from the oven, then sprinkle with fresh parsley for a vibrant finishing touch.
- Serve warm and enjoy the eruption of flavors with each delectable bite.
Notes
- Customize meat selection by using ground turkey or plant-based crumbles for healthier alternatives.
- Ensure beef mixture is cooled slightly before stuffing to prevent dough from becoming soggy.
- Seal edges meticulously to prevent cheese from leaking during baking, using gentle pinching technique.
- Experiment with additional seasonings like smoked paprika or Italian herbs to elevate flavor profile.
- Prep Time: 25 minutes
- Cook Time: 15 minutes
- Category: Lunch, Dinner, Appetizer, Snacks
- Method: Baking
- Cuisine: American
Nutrition
- Serving Size: 4
- Calories: 450
- Sugar: 2 g
- Sodium: 800 mg
- Fat: 30 g
- Saturated Fat: 15 g
- Unsaturated Fat: 12 g
- Trans Fat: 0 g
- Carbohydrates: 30 g
- Fiber: 1 g
- Protein: 22 g
- Cholesterol: 80 mg
Michael Reyes
Founder & Lead Recipe Developer
Expertise
Education
Santa Fe Community College
Michael’s love for cooking runs deep, rooted in the bold, colorful flavors of his New Mexico upbringing.
After earning his Culinary Arts Certificate from Santa Fe Community College, he spent years sharpening his skills in kitchens that celebrated traditional Southwestern and Latin American dishes.
He believes cooking should feel approachable and fun, never complicated. When he’s not stirring up new recipe ideas, Michael’s out hiking scenic trails, chatting with farmers at local markets, or chasing the perfect sunset shot for inspiration.